
Best Tools and Apps for Shopify to Buy in June 2026
![Position Your Brand: Shopify Made Easy [2022] (Ecommerce Online Store Tool Kit)](https://cdn.blogweb.me/1/41tn_SP_8_Md2_L_SL_160_6941d1d725.jpg)
Position Your Brand: Shopify Made Easy [2022] (Ecommerce Online Store Tool Kit)
![Position Your Brand: Shopify Made Easy [2022] (Ecommerce Online Store Tool Kit)](https://cdn.flashpost.app/flashpost-banner/brands/amazon.png)
![Position Your Brand: Shopify Made Easy [2022] (Ecommerce Online Store Tool Kit)](https://cdn.flashpost.app/flashpost-banner/brands/amazon_dark.png)
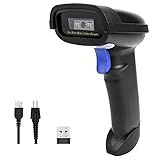
NETUM Bluetooth Barcode Scanner, Compatible with 2.4G Wireless & Bluetooth Function & Wired Connection, Connect Smart Phone, Tablet, PC, CCD Bar Code Reader Work with Windows, Mac,Android (NT-1228BC)
-
UNIVERSAL COMPATIBILITY: WORKS SEAMLESSLY WITH MANY DEVICES AND OS TYPES.
-
ROBUST SCANNING: DECODES DAMAGED 1D BARCODES RAPIDLY AND ACCURATELY.
-
LONG BATTERY LIFE: UP TO 200,000 SCANS ON A SINGLE CHARGE-LASTS A MONTH!
Reseller Inventory Log Book: Fast And Easy System To Keep Track Of Your Inventory Items. Made for Online Sellers on eBay, Poshmark, Mercari, Marketplace and More!
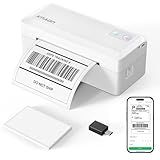
KNAON Shipping Thermal Label Printer, 4x6 Portable Label Printer, Bluetooth Label Maker for Small Business, Support iPhone,Android,Windows,Mac,Chromebook,Works with USPS, Ebay,Shopify&More, White
- WIRELESS PRINTING VIA BLUETOOTH WITH 'FLASHLABEL PRO' APP SUPPORT.
- OVER 3,000 TEMPLATES AND 5,000 ICONS FOR VERSATILE LABELING NEEDS.
- COMPACT DESIGN WITH FAST PRINTING SPEED-PERFECT FOR ANY WORKSPACE!
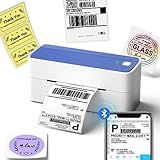
Phomemo Thermal Label Printer, 4X6 Shipping Labels Printer for Small Business, Wireless Label Printers for Package for Phone & Pad & PC, Used for Ebay, UPS, Shopify, TikTok, USPS, FedEx, DHL, Temu
- HIGH-SPEED THERMAL PRINTING-150 MM/S, NO INK OR TONER NEEDED!
- SUPPORTS LABELS FROM EBAY, SHOPIFY, AMAZON, AND MORE PLATFORMS.
- EASY USB & WIRELESS PRINTING FOR ALL DEVICES; HASSLE-FREE SETUP!

MASTERING HUBSPOT AS A BUSINESS TOOL: Learn CRM, Marketing Automation, and Sales - Manage Leads, Campaigns, and Customer Relationship
Shopify: The Definitive Guide to Setting Up Your Store (Step-by-step Guide for Beginners to Build Your Online Business)
To add a new product in Shopify, follow these steps:
- Log in to your Shopify admin panel.
- From the admin panel, go to the "Products" tab.
- Click on the "Add product" button.
- Enter the product title in the provided field.
- Add a detailed product description in the respective section.
- Upload product images by clicking on the "Add media" button and selecting the files from your device.
- Set the product's price in the "Pricing" section.
- Choose the product's inventory policy (whether you want to track it or not) from the drop-down menu.
- If you want to track inventory, enter the quantity available.
- Set the product's shipping details (weight, dimensions, etc.).
- Set product variants, if applicable (such as different sizes or colors).
- Configure the product's visibility by selecting the appropriate collection and tags or creating a new one.
- Add any product-specific metafields or SEO information as needed.
- Set product availability and schedule if necessary.
- Preview the product's information to ensure accuracy and completeness.
- Once satisfied, click on the "Save" button to add the product to your Shopify store.
How to set product prices in Shopify?
To set product prices in Shopify, follow these steps:
- Log in to your Shopify admin panel.
- Click on the "Products" tab in the left-hand menu.
- Select the product you want to set the price for or create a new product.
- In the "Pricing" section, enter the price you want to set for the product in the "Price" field.
- If you have variants (e.g., different sizes or colors), you can set individual prices for each variant by clicking on the "Edit" button next to the variant and entering the price in the "Price" field.
- You can also set a compare-at price to show a discounted price. Enter the original price in the "Compare at price" field.
- If you want to offer a discounted price for a limited time, you can set a sale price by clicking on the "Edit" button next to the variant and entering the sale price in the "Compare at price" field.
- If you want to offer quantity-based discounts (e.g., buy one get one free), you can set up a discount in the "Quantity discount" section by clicking on "Add discount" and specifying the quantity and the discounted price.
- Once you have entered the desired prices and discounts, click on the "Save" button to save the changes.
Note: Prices can be set in multiple currencies if you have enabled the multi-currency feature in your Shopify store. You can also use the bulk editor or import/export functionality to set prices for multiple products at once.
How to create a product category in Shopify?
To create a product category in Shopify, you can follow these steps:
- Log in to your Shopify admin panel.
- From the dashboard, go to the "Products" section.
- Click on "Collections" or "Product Categories" depending on your Shopify theme.
- Click on the "Create Collection" button.
- Enter a title for your product category.
- You can add a description for the category if desired.
- Under "Collection type," choose the type of collection you want: automated or manual.
- Automated collections: Products are added to the collection based on specific rules or conditions you set. For example, you can create an automated collection for "Sale items" by selecting products with a certain tag or specific pricing criteria.
- Manual collections: Products are manually chosen and added to the collection. This gives you more control over the products displayed in the category.
- Set the conditions or select the products you want to include in the collection, depending on the collection type you choose.
- Configure other options such as sorting order, visibility, and image.
- Save the collection.
Now, the product category or collection is created and can be used to organize your products on your Shopify website.
What is Shopify and how does it work?
Shopify is an e-commerce platform that allows businesses to create and operate online stores to sell products. It is a complete solution that handles website hosting, payment processing, inventory management, and other essential functions for online retail.
Here's how Shopify works:
- Sign up: Merchants sign up for a Shopify account and choose a pricing plan suitable for their business needs.
- Setup: Once registered, merchants can customize their online store using pre-designed templates or create a unique design using the Shopify theme editor. They can add products, descriptions, images, prices, and other relevant details to create an attractive storefront.
- Domain and Hosting: Shopify provides a domain name or allows users to connect their existing domain. The platform hosts the website, ensuring it is secure, reliable, and accessible to customers.
- Payment Gateway: Shopify comes integrated with various payment gateways, such as Shopify Payments, PayPal, Stripe, and more. Merchants can choose the preferred gateway to accept payments from customers.
- Inventory Management: Shopify offers inventory management tools to help businesses track stock levels, fulfill orders, and manage product variations. It allows merchants to set up SKU codes, track inventory movement, and receive notifications when inventory is low.
- Order Management: When customers make purchases, Shopify records the orders and provides essential details such as customer information, product details, and shipping address. Merchants can manage and fulfill orders, print shipping labels, and track shipments from within the platform.
- Marketing and SEO: Shopify offers built-in marketing features like SEO optimization, discount codes, gift cards, and integration with social media platforms. This helps businesses promote their products and attract more customers.
- Analytics and Reporting: Shopify provides detailed analytics and reports on sales, customer behavior, and other important metrics. Merchants can utilize this data to make informed business decisions.
- Mobile app: Shopify has a mobile app that allows merchants to manage their online store on the go, view analytics, track orders, and communicate with customers.
- Additional Features: Shopify also offers additional features through its extensive app store, enabling merchants to expand functionalities like email marketing, customer support, loyalty programs, and more.
Overall, Shopify simplifies the process of setting up and running an online store by providing a comprehensive, user-friendly, and customizable platform.
What is the difference between a product and a variant in Shopify?
In Shopify, a product refers to a specific item that you want to sell. It can be a physical product like a t-shirt or an electronic device, or a digital product like an ebook or software. Each product in Shopify has its own unique set of information such as title, description, price, images, and inventory.
On the other hand, a variant is a specific version or option of a product. For example, if you are selling t-shirts, the product would be "t-shirt" and the variants would be the different sizes (small, medium, large) or colors (black, white, blue) available for that t-shirt. Variants can have their own unique price, SKU, barcode, and inventory quantity.
In summary, a product is the overall item you want to sell, while a variant is a specific version or option of that product. Variants allow you to offer different choices to your customers without creating separate products for each option.