Best Tooltip-Enhancing Tools to Buy in June 2026
EZARC Electric Screwdriver Set, 181 in 1 Cordless Screwdriver, 3 Torque Settings with 160 Magnetic Precision Bits, Power Screwdriver Repair Tool Kit for Phone Laptop Camera Watch Computer
-
VERSATILE KIT: 160 BITS & 8 TOOLS FOR ALL YOUR REPAIR NEEDS!
-
ADJUSTABLE TORQUE: 3 SETTINGS FOR PRECISE CONTROL & ACCURATE REPAIRS.
-
LONG-LASTING BATTERY: CHARGE ONCE, TACKLE 260 SCREWS EFFORTLESSLY!


ATD Tools 8424 9-Piece Scraper, Hook and Pick Set
- DURABLE CHROME VANADIUM STEEL FOR LONG-LASTING PERFORMANCE.
- CUSHIONED GRIP HANDLES ENHANCE COMFORT AND REDUCE HAND FATIGUE.
- VERSATILE SET INCLUDES MINI AND FULL-SIZE TOOLS FOR ANY TASK.
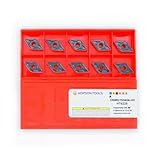
Hopson Tools Carbide Turning Inserts CNMG 431 Cnmg120404 for Finishing Cutting Steel, Cnmg Insert for Lathe Turning Tools, 10 PCS.
- VERSATILE INSERTS FOR STEEL, CAST IRON, AND EXOTIC ALLOYS.
- ENHANCED TOOL LIFE AND SURFACE FINISH FOR HIGH-SPEED MACHINING.
- OPTIMIZED H1-CHIP BREAKER ENSURES SMOOTH CHIP EVACUATION.
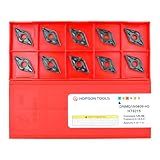
Hopson Tools Carbide Turning Inserts DNMG 432 Dnmg150408 for Semi-Finishing Cutting Steel, Dnmg Insert for Lathe Turning Tools, 10 PCS
- EXCEPTIONAL WEAR RESISTANCE AND TOUGHNESS FOR LONGER TOOL LIFE.
- ENHANCED CHIP EVACUATION DESIGN FOR SMOOTHER MACHINING OPERATIONS.
- VERSATILE USE IN MEDIUM TO SEMI-ROUGHING APPLICATIONS.
Hopson Tools Carbide Turning Inserts DNMG 431 Dnmg150404 for Semi-Finishing Cutting Steel, Dnmg Insert for Lathe Turning Tools, 10 PCS
- EXCEPTIONAL WEAR RESISTANCE WITH DUAL-COLOR COATED CVD GRADE.
- H3-CHIP BREAKER DESIGN ENSURES SMOOTH CHIP EVACUATION.
- VERSATILE FOR MEDIUM TO SEMI-ROUGHING APPLICATIONS.
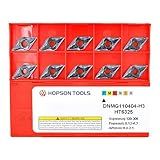
Hopson Tools Carbide Turning Inserts DNMG 331 Dnmg110404 for Semi-Finishing Cutting Steel, Dnmg Insert for Lathe Turning Tools, 10 PCS.
- VERSATILE INSERTS FOR STEEL, CAST IRON, AND EXOTIC ALLOYS-PERFECT FIT!
- CVD COATING ENHANCES TOOL LIFE AND SURFACE FINISH AT HIGH SPEEDS.
- H3-CHIP BREAKER ENSURES SMOOTH CHIP EVACUATION FOR EFFICIENT MACHINING.
To add tooltips to D3.js visualizations, you can follow these steps:
First, you need to create or select a container for your visualization. This can be an SVG element or a div element.
Next, you should bind your data to DOM elements using the D3 data() method. This will create placeholder elements for each data point.
To display a tooltip when you hover over these elements, you can utilize D3's event handling functions. In the mouseover event handler, you can create a tooltip element and position it based on the mouse's position. You can use D3's event.pageX and event.pageY properties to get the mouse coordinates.
Inside the mouseover handler, you can also modify the tooltip element's inner HTML or content to display relevant information about the data point being hovered over.
To style the tooltip, you can add CSS styles to the tooltip element directly or define a separate CSS class and apply it to the tooltip element.
To hide the tooltip when the mouse moves away from the data element, you can use the mouseout event handler. In this handler, you can remove the tooltip element from the DOM.
Additionally, you can enhance the tooltip's interactivity by adjusting its visibility and position in real-time as the user moves the mouse.
Remember to handle overlapping tooltips if multiple data points are close to each other. You may need to implement logic to prevent tooltips from overlapping or consider using a D3 plugin that provides such functionality.
By following these steps, you can successfully add tooltips to your D3.js visualizations, enhancing the user experience and providing valuable context for the displayed data.
How to format tooltip values in D3.js visualizations?
To format tooltip values in D3.js visualizations, you can use the d3-format library. This library provides formatting capabilities similar to those in other programming languages, such as JavaScript or Python.
Here are the steps to format tooltip values using d3-format:
- Include the d3-format library in your HTML file by adding the following script tag:
- Create a formatter function using the d3 format method. You can specify the desired formatting string as an argument. For example, to format a number with two decimal places, use ".2f" as the formatting string:
var formatter = d3.format(".2f");
- Use this formatter function to format the tooltip values in your visualization. For example, if you have a tooltip element with a value, you can format it as follows:
tooltip.text(formatter(value));
This will format the value according to the specified formatting string and set it as the text of the tooltip.
By customizing the formatting string, you can achieve various formatting options, such as adding commas as thousands separators, specifying whether to show positive/negative signs, or displaying scientific notation.
Make sure to consult the d3-format documentation for more information on formatting options and syntax: https://github.com/d3/d3-format
What is D3.js?
D3.js (Data-Driven Documents) is a JavaScript library used for creating dynamic and interactive data visualizations in web browsers. It allows the creation of reusable components and provides a powerful set of tools for manipulating and transforming data, binding data to visual elements, and animating transitions. D3.js is known for its flexibility and versatility, enabling developers to build custom visualizations and create highly customized and interactive data-driven applications.
How to implement tooltips with multi-line text in D3.js?
To implement tooltips with multi-line text in D3.js, you can follow these steps:
-
Create a
element to serve as the tooltip container:
var tooltip = d3.select("body").append("div") .attr("class", "tooltip") .style("opacity", 0);
- Define the CSS styles for the tooltip to control its appearance:
.tooltip { position: absolute; background-color: white; border: 1px solid gray; border-radius: 5px; padding: 10px; }
.tooltip p { margin: 0; }
- Add event handlers to show and hide the tooltip:
// Add mouseover event handler function handleMouseOver(d) { // Set tooltip content tooltip.html("" + d.tooltipText1 + "" + d.tooltipText2 + "") .style("left", (d3.event.pageX + 10) + "px") .style("top", (d3.event.pageY + 10) + "px") .style("opacity", 0.9); }
// Add mouseout event handler function handleMouseOut(d) { tooltip.style("opacity", 0); }
- In your visualization code, bind the event handlers to the appropriate elements:
// Create circles as example elements var circles = svg.selectAll("circle") .data(data) .enter() .append("circle") // Set circle attributes
// Bind event handlers to circles circles.on("mouseover", handleMouseOver) .on("mouseout", handleMouseOut);
Make sure to replace data with your actual data object, and adjust the tooltip content according to your data structure.
These steps define a div element to show the tooltip, set its style, and bind event handlers to the visualization elements. When the mouse hovers over an element, the tooltip is shown containing multi-line text, and it disappears when the mouse moves out.