
Best Tree Visualization Tools to Buy in June 2026
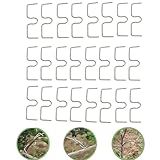
alblinsy Fruit Tree Branch Puller Tying Machine Farm Tools New Plum Tree Open Angle Pull Branch stereotyped Branch Bending Tool Used to Support The Growth and Fruiting of Branches (M-3.15" 24PCS)
- BOOST FRUIT YIELD BY ENHANCING SUNLIGHT EXPOSURE WITH BRANCH FORMS.
- DURABLE & REUSABLE IRON DESIGN ENSURES LONG-LASTING SUPPORT FOR TREES.
- EFFORTLESS INSTALLATION ALLOWS QUICK ADJUSTMENTS FOR OPTIMAL GROWTH.


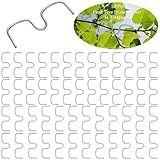
MorningRo 50 Pcs Fruit Tree Limb Spreaders Plant Tying Machine Puller Branchs Preaders Plum Tree Open Angle Pull Branch Stereotyped Tying Bending Farm Tools, M-3.94(Inch), Galvanized
-
BOOST FRUIT YIELD WITH EASY-TO-USE, ADJUSTABLE BRANCH PULLERS!
-
DURABLE GALVANIZED IRON DESIGN FOR LONG-LASTING, RUST-PROOF USE.
-
PROMOTE HEALTHY GROWTH BY SHAPING BRANCHES AND IMPROVING AIR FLOW!

Visualization Tools for Comparative Genomics applied to Convergent Evolution in Ash Trees

Forest Bathing: How Trees Can Help You Find Health and Happiness
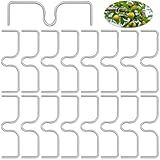
Gansita Fruit Tree Branch Puller Tying Machine Farm Tools Tree Branch Spreader Puller Tree Branch Shaping Tools New Plum Tree Open Angle Pull Branch Stereotyped Branch Bending Tool (16pcs-5.3in)
- BOOST FRUIT YIELD AND QUALITY BY OPTIMIZING SUNLIGHT EXPOSURE!
- DURABLE STEEL DESIGN ENSURES LONG-LASTING PERFORMANCE FOR GROWERS.
- QUICK AND EASY INSTALLATION-NO TOOLS NEEDED FOR INSTANT RESULTS!

LEILIN Fruit Tree Branch Puller Tying Machine Farm Tools Plum Tree Open Angle Pull Branch Bending Tool Fruit Branch branch Spreaders Fruit Trees Branch Support M-5.1(inch)
- DURABLE IRON CONSTRUCTION: REUSABLE, HIGH-QUALITY TREE LIMB SPREADERS.
- EFFORTLESS SETUP: EASILY FIX BRANCHES AT THE RIGHT ANGLE-NO TOOLS NEEDED.
- VERSATILE USE: SUPPORTS VARIOUS FRUIT TREES, ESPECIALLY FOR OPTIMAL GROWTH.
To apply preferences to a d3.tree node, you can use various attributes and methods provided by the d3.js library. Some common preferences that you may want to apply to a tree node include styling, position, and interaction.
For styling, you can use CSS to apply different colors, shapes, or sizes to the nodes based on their properties or data. You can also use d3.js methods like node.attr() or node.style() to customize the appearance of the nodes.
To position the nodes in the tree layout, you can use the node.x and node.y attributes to set the coordinates of each node. You can also adjust the spacing between nodes by setting the nodeSize or separation properties of the tree layout.
For interaction, you can add event listeners to the nodes to handle user actions like mouse clicks or hovers. You can use methods like node.on() to bind event handlers to the nodes and update the node properties accordingly.
By applying preferences to d3.tree nodes, you can customize the appearance and behavior of the tree layout to best suit your needs and enhance the user experience.
How to apply preferences to a d3.tree node?
To apply preferences to a d3.tree node, you can use the "nodes" function to manipulate the appearance and behavior of each node. Here are some common preferences that you can apply to a d3.tree node:
- Changing the size and shape of the nodes: You can set the "nodeSize" attribute to adjust the size of the nodes in the tree. Additionally, you can customize the shape of the nodes using CSS styles.
- Changing the color of the nodes: You can set the "nodeColor" attribute to change the color of the nodes in the tree. This can help differentiate between different nodes or highlight specific nodes.
- Adding text labels to the nodes: You can add text labels to the nodes using the "nodeLabel" attribute. This can provide additional context or information about each node in the tree.
- Adding interactivity to the nodes: You can add event listeners to the nodes to enable interactivity, such as highlighting or clicking on nodes to reveal more information.
Overall, by customizing these preferences for d3.tree nodes, you can create a more visually appealing and informative tree visualization.
How to set default preferences for new nodes in d3.tree?
To set default preferences for new nodes in a d3.tree, you can use the .node method to define the default values when creating new nodes. Here is an example of how you can do this:
// Define the tree layout var tree = d3.tree() .size([width, height]);
// Set default preferences for new nodes tree.node((node) => { node.x = 0; // default x position node.y = 0; // default y position node.depth = 0; // default depth // Add any other default preferences you want to set for new nodes return node; });
// Create the root node var root = d3.hierarchy(data);
// Assign the parent, children, height and depth root = tree(root);
// Now when you add new nodes to the tree, they will inherit the default preferences you have defined
By setting the default preferences using the .node method, any new nodes added to the tree will automatically inherit these default values. This can help maintain consistency in the layout and appearance of the tree.
What is the difference between static and dynamic preferences in d3.tree nodes?
In D3.js, static preferences are pre-defined styles and positioning properties that are set for each node in a tree layout. These preferences do not change or update based on user interactions or data changes.
On the other hand, dynamic preferences refer to styles and positioning properties that are calculated or updated based on user interactions, data changes, or other events. These preferences can vary and adapt to different conditions or contexts.
In summary, static preferences are fixed and do not change, while dynamic preferences are calculated or updated based on changing conditions.
How to set conditional preferences for tree nodes in d3?
Conditional preferences for tree nodes in d3 can be set using the "style" or "class" attribute based on the data and requirements. Here is an example of how to set conditional preferences for tree nodes in d3:
- Define the tree layout and data:
var treeData = { "name": "Parent", "children": [ { "name": "Child 1", "value": 100 }, { "name": "Child 2", "value": 200 } ] };
var treeLayout = d3.tree() .size([width, height]);
var root = d3.hierarchy(treeData); root.x0 = height / 2; root.y0 = 0;
var treeData = treeLayout(root);
- Create the tree node elements:
var nodes = svg.selectAll(".node") .data(treeData.descendants()) .enter() .append("g") .attr("class", "node") .attr("transform", function(d) { return "translate(" + d.y + "," + d.x + ")"; });
nodes.append("circle") .attr("r", 10) .style("fill", function(d) { // Set conditional fill color based on node value return d.data.value > 150 ? "red" : "blue"; });
nodes.append("text") .attr("dx", 10) .attr("dy", 4) .text(function(d) { return d.data.name; });
In the above example, we set the fill color of the circle based on the value of the node. If the value is greater than 150, the node will be filled with red color, otherwise it will be filled with blue color.
You can set other conditional preferences for tree nodes by using similar logic and updating the attributes/styles of the elements accordingly.
How to dynamically update node preferences in d3.tree?
To dynamically update node preferences in a d3.tree visualization, you can follow these steps:
- Store the node data in a hierarchical structure, such as a nested array or tree object.
- Create a d3.tree layout and bind the node data to it.
- Update the preferences or properties of the nodes, such as color, size, or position, based on user interactions or data changes.
- Call the update() function on the d3.tree layout to redraw the tree with the updated node preferences.
Here's an example code snippet to demonstrate how to dynamically update node preferences in a d3.tree visualization:
// Define the tree layout const treeLayout = d3.tree();
// Create a svg element const svg = d3.select("body").append("svg") .attr("width", 600) .attr("height", 600) .append("g") .attr("transform", "translate(50,50)");
// Define the tree data const treeData = { name: "Root", children: [ { name: "Child1" }, { name: "Child2" } ] };
// Bind the tree data to the tree layout const rootNode = d3.hierarchy(treeData); const treeNodes = treeLayout(rootNode);
// Draw the tree nodes const nodes = svg.selectAll(".node") .data(treeNodes.descendants()) .enter() .append("circle") .attr("class", "node") .attr("r", 10) .attr("cx", d => d.x) .attr("cy", d => d.y);
// Update the node preferences nodes.attr("fill", "blue");
// Function to update node preferences function updateNodePreferences() { // Update the node preferences here nodes.attr("fill", "green"); }
// Call the updateNodePreferences function to dynamically update node preferences updateNodePreferences();
This code sets up a d3.tree layout, binds tree data to it, draws circle nodes with blue fill color, and then dynamically updates the node preferences by changing the fill color to green. You can modify this example to update other node preferences based on your visualization requirements.