
Best Ember.js Development Tools to Buy in June 2026
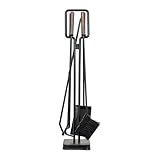
Modern Ember Levi 5 Piece Fireplace Tool Set in Black with Walnut Wood Handles | Includes Brush, Shovel, Fire Poker, Tongs, and Stand | Heavy-Duty Steel | Heat-Resistant Powder Coating
-
COMPLETE 5-PIECE SET: BRUSH, SHOVEL, POKER, TONGS & STAND INCLUDED!
-
BUILT TO LAST: HEAVY-DUTY STEEL WITH HEAT AND CORROSION RESISTANCE.
-
STYLISH DESIGN: WALNUT HANDLES ENHANCE BOTH MODERN AND TRADITIONAL DÉCOR.


Modern Ember Cascade 5 Piece Fireplace Tool Set in Black | Includes Brush, Shovel, Fire Poker, Tongs, and Stand | Heavy Guage, Coated Steel | Heat-Resistant Plating | Sleek Rounded Handles
- COMPLETE 5-PIECE SET FOR ALL YOUR FIREPLACE NEEDS, STYLISHLY ORGANIZED.
- DURABLE STEEL CONSTRUCTION ENSURES LONG-LASTING PERFORMANCE AND BEAUTY.
- NATURAL WOOD HANDLES ADD WARMTH, FITTING ANY DECOR STYLE SEAMLESSLY.

Modern Ember Knoll Fireplace Tool Set in Black - Includes Brush, Shovel, Fire Poker, Tongs, and Stand - Steel Construction
- SLEEK, MODERN DESIGN ENHANCES ANY CONTEMPORARY DÉCOR.
- DURABLE, HEAT-RESISTANT STEEL ENSURES LONG-LASTING QUALITY.
- EFFORTLESS SETUP LETS YOU ENJOY YOUR FIREPLACE IN MINUTES!

Ember's Hollow
To create a login form using Ember.js, follow these steps:
- Start by setting up a new Ember.js project or navigating to an existing one.
- Create a new route for the login page. In your project's app/router.js file, add a new route for the login page using the this.route() function. For example:
this.route('login');
- Generate a new template for the login page. In your project's terminal, run the following command to generate a new template file:
ember generate template login
- Open the generated login.hbs file and add the necessary HTML for the login form. This can include input fields for username and password, buttons for submitting the form, and any other elements you want to include.
- Create a new component for the login form. In your project's terminal, run the following command to generate a new component file:
ember generate component login-form
- Open the generated login-form.js file and define the behavior for the login form component. This can include actions for handling form submission, making API requests, and handling any error messages. For example:
import Component from '@glimmer/component';
export default class LoginFormComponent extends Component { handleLogin(event) { event.preventDefault();
// Retrieve username and password values from form inputs
const username = event.target.elements.namedItem('username').value;
const password = event.target.elements.namedItem('password').value;

// Perform login logic, e.g., make an API request or authenticate locally
// ...

// Redirect to a different route upon successful login
this.router.transitionTo('dashboard');
} }
- Open the login.hbs file and include the newly created login form component. Use the {{component}} helper and pass any necessary attributes or actions. For example:
{{#component "login-form" submit=(action "handleLogin")}}
<label for="password">Password:</label>
<input id="password" type="password">

<button type="submit">Login</button>
That's it! You now have a login form in your Ember.js application. Customize it further based on your project's specific requirements or desired styling. Remember to handle authentication logic and error handling appropriately for a complete login functionality.
How to create a basic HTML login form?
To create a basic HTML login form, you can follow these steps:
Step 1: Set up the basic HTML structure
Step 2: Add CSS styles (optional, but recommended for better appearance)
Step 3: Add the login form elements inside the <body> section
In this example, the form element has the method attribute set to "post", and the action attribute set to "login.php". You can replace "login.php" with the appropriate server-side script that handles the authentication.
Step 4: Optionally add any additional form elements or styling as needed.
That's it! You now have a basic HTML login form. Remember to handle the form submission and login logic on the server side.
What is the Ember.js route responsible for handling a login form?
In Ember.js, the route responsible for handling a login form is typically the login route. This route is responsible for rendering the login form template, handling form submissions, and processing login logic. It is responsible for communicating with the server-side authentication endpoint and handling any success or error responses.
How to handle login form errors in Ember.js?
To handle login form errors in Ember.js, you can follow these steps.
- Create an error message property in the component or controller that is responsible for handling the login form. For example, you can add an errorMessage property to the controller or component's JavaScript code.
- In your template, display the error message using the {{if ...}} helper. For example, you can add the following code to your template:
{{#if errorMessage}}
- In your login action handler, catch any errors that occur during the login process. You can use the catch method on the promise returned by the login request.
actions: { login() { let username = this.get('username'); let password = this.get('password');
// Make login request
loginRequest(username, password)
  .then(() => {
    // Handle successful login
  })
  .catch((error) => {
    // Set error message
    this.set('errorMessage', error.message);
  });
} }
In the code above, loginRequest is a function that sends the login request to the server. If there is an error during the login process, the error message is set in the errorMessage property.
- You can also clear the error message when the form is submitted again by resetting the errorMessage property to null.
actions: { login() { // Clear error message this.set('errorMessage', null);
// Rest of the login code
} }
By following these steps, you can handle login form errors in Ember.js and display appropriate error messages to the user.
What is the Ember.js controller responsible for in a login form?
The Ember.js controller for a login form is responsible for handling user input and application logic related to the login process. Its responsibilities typically include:
- Capturing and tracking user input: The controller will contain properties that bind to the input fields in the login form (e.g., username and password). It is responsible for capturing user input and updating these properties accordingly.
- Validating user input: The controller can perform validation checks on the user's input to ensure it meets certain requirements (e.g., minimum password length, valid email format). It can display validation errors to the user and handle any input errors appropriately.
- Handling login actions: When the user clicks the login button or submits the form, the controller will handle the login action. It will typically send the user's credentials (e.g., username and password) to the server for authentication, handle any success or error responses from the server, and update the application state accordingly.
- Displaying success or error messages: After attempting the login, the controller may display success or error messages to the user based on the response from the server. It controls the visibility and content of these messages.
- Redirecting after login: If the login is successful, the controller may handle the redirection to the appropriate page within the application. It can determine the destination based on the user's role or other application logic.
Overall, the Ember.js controller for a login form plays a crucial role in managing user input, validating it, performing login actions, and updating the application state based on the login process's outcome.