
Best Magento Installation Tools to Buy in June 2026
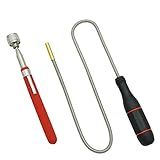
GUTIMORE Magnetic Pickup Tool Pack of 2, Flexible Magnetic Pickup 2LB,Telescoping Magnet Pickup 10LB,Strong Magnet for Hard to Reach Keys,Bolts,Nuts and Screws for Car and Home
- FLEXIBILITY & REACH: 25 FLEXIBLE TOOL FOR HARD-TO-REACH SPACES.
- STRONG MAGNET: 10LB CAPACITY FOR PICKING UP METAL OBJECTS EASILY.
- VERSATILE USE: IDEAL FOR DIY, CONSTRUCTION, AND AUTO REPAIR TASKS.


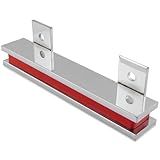
Master Magnetics 6" Magnetic Bar Tool Organizer - Easy to Install Magnet Storage Holder for House, Garage, Shed, or Job Site - Nickel Plate Finish
- DECLUTTER YOUR SPACE: STORE TOOLS SECURELY IN ANY ENVIRONMENT.
- HEAVY-DUTY MAGNET: HOLDS UP TO 20 LBS FOR MAXIMUM VERSATILITY.
- EASY INSTALLATION: QUICK SETUP WITH INCLUDED MOUNTING SCREWS.
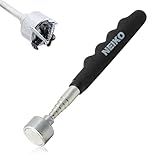
NEIKO 53425A Magnetic Pickup Tool, 25 Lb Telescoping Magnet Tool, 30" Long Extendable Magnet Pick Up Tool, Non-Slip Grip Magnetic Wand, Telescopic Magnet, 7" Short Magnetic Stick, Extra Strong Magnet
-
POWERFUL 25LB PULLING FORCE: EFFORTLESSLY RETRIEVE METAL OBJECTS ANYWHERE.
-
ADJUSTABLE 7 TO 30 REACH: ACCESS HARD-TO-REACH SPOTS WITH EASE.
-
COMPACT & PORTABLE DESIGN: IDEAL FOR ON-THE-GO USE IN TIGHT SPACES.
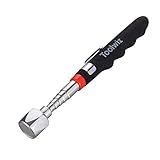
Toolwiz Telescopic Magnetic Pick up Tool (16LB), Extendable to 30 inch Extendable Magnet Pickup Tool, Gifts for Dad, Husband, Grandpa, Handyman Father's Day
-
POWERFUL 16 LB MAGNET EFFORTLESSLY RETRIEVES HEAVY METAL ITEMS!
-
TELESCOPES FROM 7.2 TO 30 FOR DEEP, HARD-TO-REACH SPACES!
-
COMPACT DESIGN SLIPS EASILY INTO YOUR TOOLBOX FOR ON-THE-GO USE!
To install Magento on Hostinger, follow these steps:
- Log in to your Hostinger account and access the control panel (hPanel).
- In the hPanel, navigate to the "Website" section and click on "Auto Installer."
- Search for Magento and click on the "Install" button.
- Choose the domain or subdomain where you want to install Magento. If needed, you can create a new subdomain here as well.
- Enter a directory name where Magento will be installed. If you want it to be accessible from the main domain (e.g., yourdomain.com), leave the directory field empty. Otherwise, enter a directory name (e.g., yourdomain.com/magento).
- Next, select the version of Magento you want to install. It is recommended to choose the latest stable version for better security and features.
- Configure settings such as the store name, admin username, and password. Make sure to choose a strong password for security purposes.
- Set up the Cron Scheduler. You can either set it up manually or use the default option.
- Optional: You can choose a theme for your Magento store at this stage. If you prefer, you can install a custom theme later.
- Review the installation details, such as the domain, directory, and other settings. Double-check and make any necessary changes.
- Finally, click on the "Install" button to begin the installation process.
- Wait for the installation to complete. Once finished, you will see a success message with details about your Magento installation.
- Access your Magento admin panel by going to yourdomain.com/admin (replace "yourdomain.com" with your actual domain).
That's it! You have successfully installed Magento on Hostinger. You can now start customizing your store, adding products, and configuring various settings to set up your online shop.
How to set up and configure payment gateways for a Magento installation on Hostinger?
To set up and configure payment gateways for your Magento installation on Hostinger, you can follow these steps:
- Log in to your Hostinger account and access the control panel.
- Navigate to the Files section and click on File Manager.
- Locate your Magento installation directory and access it.
- In the Magento root directory, find the app folder and open it.
- Inside the app folder, go to etc and open the local.xml file.
- Look for the tag and within it, find the tag.
- Under the tag, you will see various payment gateway sections such as , , etc.
- Uncomment the payment gateway(s) you want to use by removing the tags surrounding the gateway section.
- Save the local.xml file.
Now you have enabled the desired payment gateways. Next, you need to configure them:
- Log in to your Magento admin panel.
- Go to the Stores tab and select Configuration.
- In the left sidebar, under Sales, click on Payment Methods.
- You will see the list of available payment methods. Configure each payment gateway accordingly.
- Provide the necessary details such as API credentials, account details, etc. for each payment gateway you enabled.
- Save the configuration.
Your payment gateways are now set up and configured for your Magento installation on Hostinger. Your customers will be able to use the enabled payment methods during the checkout process.
How to configure the base URL for a Magento installation on Hostinger?
To configure the base URL for a Magento installation on Hostinger, you can follow these steps:
- Log in to your Hostinger account and access the control panel.
- Navigate to the "File Manager" section.
- Locate the root directory of your Magento installation. This is typically named "public_html" or "www."
- In the root directory, look for a file called "app/etc/local.xml". Right-click on the file and select the "Edit" option.
- Find the line that starts with . It should look like this: http://yourdomain.com/
- Replace "http://yourdomain.com/" with your actual domain name, including the "http://" or "https://" prefix.
- Save the changes and close the file.
After configuring the base URL, you may need to clear Magento's cache for the changes to take effect. You can do this by following these steps:
- In the control panel, navigate to the "File Manager" section.
- Open the root directory of your Magento installation.
- Locate the "var" folder and open it.
- Delete the contents of the "cache" and "session" folders.
- Close the File Manager.
Once the cache is cleared, you should be able to access your Magento installation using the new base URL.
What is the recommended PHP version for Magento installation on Hostinger?
The recommended PHP version for Magento installation on Hostinger is PHP 7.4 or later.
How to enable or disable the maintenance mode during Magento installation on Hostinger?
To enable or disable maintenance mode during Magento installation on Hostinger, you can follow these steps:
- Connect to your hosting account on Hostinger using FTP or the File Manager in the control panel.
- Navigate to the root directory of your Magento installation (usually "public_html") with the help of your FTP client or the control panel's File Manager.
- Locate the file named ".maintenance.flag" in the root directory. This file is responsible for enabling or disabling maintenance mode in Magento.
- To enable the maintenance mode, you need to create the ".maintenance.flag" file if it doesn't exist. Right-click in the root directory and select "Create new file" or use the "New File" option in the control panel's File Manager. Name the file as ".maintenance.flag" without any file extension.
- To disable the maintenance mode, you need to delete the ".maintenance.flag" file. Right-click on the file and choose the "Delete" option or use the file manager's respective option to delete the file.
Once the maintenance mode is enabled, visitors to your Magento store will see a "Maintenance Mode" message displayed on the front end. They will only have access to the maintenance page until you disable the mode by deleting the ".maintenance.flag" file.
Note: It is recommended to make a backup of your Magento installation before making any changes.
What is the importance of optimizing server settings for a Magento installation on Hostinger?
Optimizing server settings for a Magento installation on Hostinger is crucial for several reasons:
- Performance: Magento is a resource-intensive e-commerce platform, and optimizing server settings can significantly improve its performance. It ensures fast loading times and smooth user experience, reducing bounce rates and increasing customer satisfaction.
- Scalability: By optimizing server settings, you can ensure that your Magento store can handle increased traffic and customer demand. This is important for a growing e-commerce business as it allows you to scale your operations without worrying about server performance limitations.
- Security: Magento is a popular target for hackers due to its widespread usage and potential for sensitive customer data exposure. Optimizing server settings includes implementing security measures like SSL certificates, firewalls, and intrusion detection systems, making your Magento installation more secure.
- SEO: Website speed is an important factor in search engine optimization (SEO), and optimizing server settings can help improve your Magento store's loading times. Faster websites tend to rank higher in search engine result pages, increasing the visibility of your store and driving more organic traffic.
- Cost-efficiency: Optimized server settings can help reduce server resource usage by efficiently allocating resources to the Magento installation. This can result in cost savings as you won't need to upgrade to higher-priced hosting plans or invest in additional server resources.
In conclusion, optimizing server settings for a Magento installation on Hostinger is crucial for ensuring optimal performance, scalability, security, SEO, and cost-efficiency for your e-commerce store.
What is the purpose of the app/etc/config.xml file during Magento installation on Hostinger?
The app/etc/config.xml file is important during the Magento installation on Hostinger as it contains crucial configuration settings for the store. It stores information related to the database connection, encryption key, cache settings, session storage, and more. This file is created and modified automatically during the installation process and plays a significant role in determining how the Magento store functions.