
Best Hosting Solutions to Buy in June 2026

WordPress To Go: How To Build A WordPress Website On Your Own Domain, From Scratch, Even If You Are A Complete Beginner


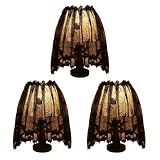
3-Pack Halloween Decorations Indoor, Black Lace Spider Web Lampshade Cover, 20" x 60" – Reusable Polyester Halloween Lamp Shade Topper & Party Decor
-
ALL-IN-ONE PACK: THREE COVERS FOR QUICK, VERSATILE HALLOWEEN DECOR.
-
ELEGANT DESIGN: INTRICATE LACE ENHANCES ANY INDOOR OR OUTDOOR SPACE.
-
DURABLE & REUSABLE: MACHINE WASHABLE FABRIC ENSURES LONG-LASTING USE.

Modern Web Development: A Beginner's Guide to HTML, CSS, Hosting, and SEO

Creating a Website: The Missing Manual
Full Stack Web Development for 2025: The Complete Guide to Modern Web Apps
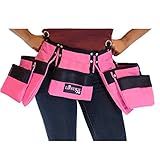
Pink Tool Belt For Women. Keep Your Gardening and Home Improvement Tools Within Hands Reach. Ladies Stylish Belt W/Pouches Carry Your Supplies W/You. Use It For Leisure Or Take It To Work (Adult)
-
ORGANIZED STORAGE: 6 POCKETS & 2 HOOKS KEEP TOOLS AT YOUR FINGERTIPS.
-
COMFORTABLE FIT: ADJUSTABLE STRAPS ENSURE A PERFECT FIT FOR EVERY USER.
-
DURABLE DESIGN: HEAVY-DUTY MATERIALS FOR LONG-LASTING, RELIABLE USE.
Building Tools with GitHub: Customize Your Workflow
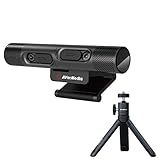
AVerMedia PW313D DualCam, 2-in-1 Webcam for Remote Learning, Conferencing and Hosting Meetings, 2 Autofocus Cameras and Mics, Works with Zoom, Teams and Skype, TAA/NDAA Compliant
- DUAL 2K & HD CAMERAS FOR VERSATILE STREAMING OPTIONS.
- AI NOISE REDUCTION ENHANCES VOICE CLARITY DURING CALLS.
- CUSTOMIZABLE SETTINGS VIA CAMENGINE FOR ENGAGING VIDEO CHATS.
To install Microweber on RackSpace, follow the steps below:
- Log in to your RackSpace account.
- Navigate to the "Cloud Control Panel" and click on "Create Server" to launch a new cloud server.
- Choose the desired configuration for your server, including the operating system. Select an OS that is compatible with Microweber, such as Ubuntu or CentOS.
- Optionally, configure additional settings such as server size, network, and disk space. Ensure that your server meets the minimum requirements for Microweber.
- Once the server is created and running, you will receive the login credentials. Make a note of the IP address of your server.
- Connect to your server using SSH or a terminal emulator. If you are using Windows, you can utilize software like PuTTY.
- Update the package repository by running the following command:
sudo apt-get update
- Install the required dependencies for Microweber. For example, if you are using Ubuntu, run the following command:
sudo apt-get install apache2 mysql-server php libapache2-mod-php php-mysql
- Download Microweber by cloning its repository from GitHub. Execute the following command:
git clone https://github.com/microweber/microweber.git
- Move the downloaded files to the webroot directory. For example, if you are using Apache, execute:
sudo mv microweber /var/www/html
- Grant required permissions on the microweber folder:
sudo chmod -R 755 /var/www/html/microweber
- Configure the Apache virtual host to serve Microweber. Create a new virtual host configuration file using a text editor:
sudo nano /etc/apache2/sites-available/microweber.conf
- Add the following configuration to the file:
<VirtualHost *:80> ServerAdmin admin@example.com DocumentRoot /var/www/html/microweber ServerName your_domain.com ServerAlias www.your_domain.com
<Directory /var/www/html/microweber/>
    Options FollowSymlinks
    AllowOverride All
    Require all granted
</Directory>

ErrorLog ${APACHE\_LOG\_DIR}/microweber\_error.log
CustomLog ${APACHE\_LOG\_DIR}/microweber\_access.log combined
- Save the file and exit the editor.
- Enable the virtual host by creating a symbolic link to the sites-enabled directory:
sudo ln -s /etc/apache2/sites-available/microweber.conf /etc/apache2/sites-enabled/
- Restart Apache to apply the changes:
sudo service apache2 restart
- Access the Microweber setup wizard by visiting your IP address or domain in a web browser. Follow the on-screen instructions to complete the installation.
Congratulations! You have successfully installed Microweber on your RackSpace server.
How to install PHP on RackSpace server?
To install PHP on a RackSpace server, you can follow these steps:
- Connect to your RackSpace server via SSH (Secure Shell) using a terminal or SSH client.
- Update the server's package repository by running the following command: sudo apt update
- Install PHP and its dependencies by running the following command: sudo apt install php
- After the installation is complete, you can verify the installation by checking the PHP version with the command: php -v This should display the installed PHP version.
- Additionally, you may want to install some commonly used PHP extensions. For example, if you want to install the MySQL extension, you can run the following command: sudo apt install php-mysql Replace php-mysql with the name of the extension you want to install. You can find a list of available extensions by running: apt search php-
- Restart the web server to apply the changes. The command may vary depending on the web server you are using. For example, if you are using Apache, you can run: sudo systemctl restart apache2 If you are using Nginx, the command might be: sudo systemctl restart nginx
Now PHP should be installed and ready to use on your RackSpace server.
What are the available themes and templates for Microweber?
Microweber offers a variety of themes and templates that you can use for your website. Some popular themes and templates available for Microweber include:
- Default Theme: This is the default theme provided by Microweber with a clean and minimal design.
- Modern: A sleek and professional theme with a modern design.
- Blog: A template specifically designed for blogging websites with a focus on readability and user-friendly navigation.
- E-commerce: A template optimized for online stores, with features like product listings, shopping carts, and payment integration.
- Portfolio: A theme designed for showcasing your work, featuring a portfolio section with customizable layouts.
- Creative: A visually stunning theme with a focus on creativity and artistic expression.
- Magazine: A template for magazine-style websites, with options for categorizing content and displaying featured articles.
- Corporate: A versatile and professional theme suitable for corporate websites, featuring sections for services, team members, and testimonials.
These are just a few examples of the available themes and templates for Microweber. You can explore more options on the Microweber website or marketplace.
What are the default media management options in Microweber?
The default media management options in Microweber include:
- Upload and insert images into content
- Create and manage image galleries
- Upload and insert videos from platforms like YouTube, Vimeo, and Dailymotion
- Create and manage audio playlists
- Upload and attach files for download, such as PDFs or Word documents
- Manage and organize media files in folders for easy access and organization.
What is Microweber?
Microweber is an open-source website builder and content management system (CMS) that allows users to create websites, online stores, and blogs. It is designed to be user-friendly and does not require coding knowledge to use. Microweber provides a drag-and-drop interface for building and customizing websites, making it accessible for beginners and experienced users alike. It also offers various templates, themes, and plugins to enhance the functionality and design of websites created with Microweber.