
Best Ember.js Project Structure Tools to Buy in June 2026
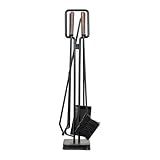
Modern Ember Levi 5 Piece Fireplace Tool Set in Black with Walnut Wood Handles | Includes Brush, Shovel, Fire Poker, Tongs, and Stand | Heavy-Duty Steel | Heat-Resistant Powder Coating
- COMPREHENSIVE 5-PIECE SET FOR ALL YOUR FIREPLACE NEEDS.
- BUILT TO LAST WITH DURABLE, HEAT-RESISTANT STEEL CONSTRUCTION.
- STYLISH WALNUT HANDLES ENHANCE ANY TRADITIONAL OR MODERN DECOR.


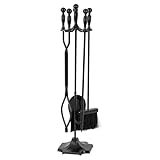
Modern Ember Cascade 5 Piece Fireplace Tool Set in Black | Includes Brush, Shovel, Fire Poker, Tongs, and Stand | Heavy Guage, Coated Steel | Heat-Resistant Plating | Sleek Rounded Handles
- COMPLETE 5-PIECE SET: BRUSH, SHOVEL, POKER, TONGS, AND STAND INCLUDED.
- BUILT TO LAST: HEAVY-GAUGE STEEL RESISTS HEAT AND CORROSION.
- STYLISH DESIGN: NATURAL WOOD HANDLES COMPLEMENT ANY DECOR.
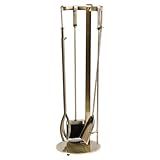
Modern Ember Knoll Fireplace Tool Set in Aged Brass - Includes Brush, Shovel, Fire Poker, Tongs, and Stand - Steel Construction
- ELEGANT AGED BRASS FINISH ENHANCES ANY FIREPLACE AND DÉCOR.
- HEAVY-DUTY STEEL ENSURES LONG-LASTING DURABILITY AND RESISTANCE.
- HASSLE-FREE INSTALLATION FOR INSTANT ENJOYMENT AND USE.

Ember's Hollow
When organizing an Ember.js project structure, it’s important to maintain a clear and organized codebase, making it easier to understand and maintain the application. Here are some general principles and guidelines to consider:
- Modules: Encourage the use of modules by breaking the application down into logical units such as controllers, components, routes, models, and services. Each module should have its own file within the defined directory structure.
- Namespacing: Avoid global namespace pollution by using Ember.js modules and namespaces. Organize files based on their functionality, placing related files within the same directory.
- Directory Structure: Establish a consistent and intuitive directory structure that matches the application's architecture. For example, maintain separate directories for routes, controllers, models, components, templates, styles, and tests. This allows developers to easily locate and navigate different parts of the application.
- Route Hierarchy: Define a clear route hierarchy by organizing routes into nested directories based on their relationship. This makes it easier to understand the application's navigation flow and structure.
- Services: Place service files within a separate directory, keeping them isolated from other application components.
- Components: Organize component files into directories to group related templates, styles, and JavaScript files together. Name the component directory with a unique and meaningful name.
- Utilize Addons: Leverage Ember.js addons to enhance the project structure and organization. For example, addons like ember-cli-files or ember-directory have helpful utilities for managing files and directories.
- Keep Files Concise: Aim to keep individual files concise and modular. Avoid having a single file that becomes too large and difficult to navigate.
- Consistency: Maintain consistency in naming conventions, file organization, and code structure throughout the project. This enables better collaboration among team members and makes the codebase more maintainable in the long run.
Remember, these guidelines are not strict rules but rather recommendations to help you organize your Ember.js project effectively.
What is the recommended way to structure Ember.js helpers in a project?
There is no strict rule for structuring Ember.js helpers in a project as it ultimately depends on the size and complexity of the project. However, there are some common patterns that can be followed:
- Folder Structure: Typically, helpers are organized in a dedicated directory under the app/ directory, such as app/helpers/. This helps keep them separate from other files and makes it easy to locate and manage them.
- File Naming: File names for helpers should follow a consistent convention to improve readability and understandability. A common approach is to use kebab-case for file names and include the word "helper" at the end. For example, app/helpers/my-helper.js.
- Namespace: It is a good practice to group related helpers under a common namespace. This can be achieved by creating subdirectories within the app/helpers/ directory. For example, a set of date-related helpers can be stored in app/helpers/date/.
- Exporting: Each helper should have a clear and descriptive name. In Ember.js, helpers are typically defined as functions and exported using the helper function. For example:
// app/helpers/my-helper.js
import { helper } from '@ember/component/helper';
export function myHelper(params, hash) { // helper logic }
export default helper(myHelper);
- Testing: It's important to write tests for helpers to ensure their correctness. Test files can be created alongside the helper files, following a similar folder structure. This helps keep tests organized and maintainable.
By following these general guidelines, you can structure and organize your Ember.js helpers in a way that makes them easy to manage, understand, and test within your project.
How to efficiently structure the stylesheets in an Ember.js project?
Structuring stylesheets in an Ember.js project efficiently can help improve maintainability and organization. Here are some best practices for structuring stylesheets in an Ember.js project:
- Use the Pod Structure: Ember.js offers the pod structure which organizes files by features rather than their type. Utilize this structure to keep related stylesheets together. Within each pod, you can have a styles directory to store all the related stylesheets.
- Component-specific Stylesheets: Styles related to a specific component should be kept within the component itself. Create a styles directory within the component's directory and place the component-specific stylesheets in it. This way, each component becomes self-contained.
- Utilize Addon CSS: If your project uses addons that provide their own CSS, make use of the addon directory within your project's app directory. Move the addon's stylesheets into the respective directories within the addon directory. This separates the addon's styles from your project's styles.
- Use shared Stylesheets: If you have styles that are reused across multiple components, consider creating shared stylesheets. Place these shared styles in a shared or common directory within the styles directory. Import these shared stylesheets only where they are needed.
- Optimize Global Styles: For global styles that affect the entire application, consider using a single global stylesheet named app.scss or similar. Import individual stylesheets for libraries or frameworks used in the project. Make sure to only import the styles that are necessary for the current page or route to avoid unnecessary overhead.
- Leverage Preprocessors: If your project uses a CSS preprocessor like Sass or Less, take advantage of their features to better organize your styles. Utilize mixins, variables, and partials to modularize and reuse code.
- Use a Naming Convention: Adopt a consistent naming convention for your classes and stylesheets to make it easier to understand and maintain the code. Consider using BEM (Block, Element, Modifier) methodology or a similar convention to give structure to your class names.
- Maintain a File Structure: Organize your stylesheets into directories based on their purpose or feature, such as base, layouts, components, etc. Having a structured file organization makes it easier to find, update, and maintain stylesheets.
- Use CSS Modules: Consider using CSS modules, a popular approach to CSS organization, which automatically scopes styles to components or modules. This helps avoid global class name clashes and promotes CSS encapsulation.
By following these best practices, you can efficiently structure the stylesheets in your Ember.js project, making it easier to manage and maintain your styling codebase.
How to organize external libraries and dependencies in an Ember.js project?
Organizing external libraries and dependencies in an Ember.js project can be done by following these steps:
- Use a package manager: Ember.js supports both npm and yarn as package managers. Choose one and initialize a package.json file in your project directory using the respective package manager's commands (npm init or yarn init).
- Install dependencies: Use the package manager to install the external libraries and dependencies you need for your project. For example, if you want to install jQuery, you can run npm install jquery or yarn add jquery. This will add the library to the "dependencies" section of your package.json file.
- Add a vendor directory: Create a vendor directory inside your project's "public" folder (public/vendor). This directory will store all the external libraries and dependencies that are not managed by Ember.js.
- Copy the library files: After installing the libraries with the package manager, locate the installed library files inside the "node_modules" directory (e.g., node_modules/jquery/dist/jquery.js). Copy the required files into the "public/vendor" directory. Repeat this step for all the external libraries and dependencies you want to include in your project.
- Import the library: In your Ember application, import the library by adding the library's path to the "ember-cli-build.js" file (ember-cli-build.js). For example, to import jQuery, you can add the following line to the file:
app.import('vendor/jquery.js');
This will include the library in your Ember application during the build process.
- Use the library: Now you can use the imported library in your Ember components, services, or any other parts of your application.
By following these steps, you can effectively organize and manage external libraries and dependencies in your Ember.js project.