Best Laravel Controller Techniques to Buy in February 2026
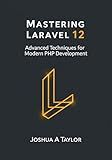
Mastering Laravel 12 : Advanced Techniques for Modern PHP Development


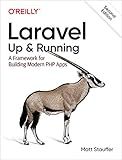
Laravel: Up & Running: A Framework for Building Modern PHP Apps


Laravel 12 for Beginners & Beyond: A Complete Guide to Building Modern PHP Web Applications with Clean Architecture, Hands-On Projects, and Best Practices


Architecture of complex web applications. Second Edition.: With examples in Laravel(PHP)


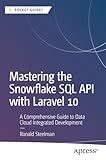
Mastering the Snowflake SQL API with Laravel 10: A Comprehensive Guide to Data Cloud Integrated Development (Apress Pocket Guides)


Laravel 7.X : LEARN BASIC LESSONS & BUILD A CRUD APP (PHP Framework)


Laravel Essentials: Tips & Tricks for Developers: Master Laravel with Practical Tips for Every Developer


Consuming APIs in Laravel: Build Robust and Powerful API Integrations For Your Laravel Projects With Ease


Overview Of Laravel PHP Framework: For Other Web Framework Users


The Laravel Survival Guide: Written & Updated for Laravel 5.3


To pass an input value into a controller in Laravel, you can use the Request object. Within your controller method, you can access the input value using the request() helper function or by type-hinting the Request object in the method signature. For example, if you have a form input with the name "name", you can access it in your controller method like this:
public function store(Request $request) { $name = $request->input('name');
// Do something with the input value
}
Alternatively, you can use the validate() method to validate the input data and retrieve it in a more concise way:
public function store(Request $request) { $data = $request->validate([ 'name' => 'required|string' ]);
$name = $data\['name'\];

// Do something with the input value
}
In either case, make sure to properly validate and sanitize the input data to ensure security and prevent potential vulnerabilities in your application.
How to retrieve input value in Laravel controller?
To retrieve input values in a Laravel controller, you can use the request() helper function or the input() method. Here's how you can do it:
Using the request() helper function:
public function store(Request $request) { $name = request('name'); $email = request('email');
// Do something with the input values
}
Using the input() method:
public function store(Request $request) { $name = $request->input('name'); $email = $request->input('email');
// Do something with the input values
}
It is recommended to use the request() helper function as it is a shorthand syntax for retrieving values from the request object in Laravel.
What is the maximum size of input value that can be passed into controller in Laravel?
In Laravel, the maximum size of input value that can be passed into a controller is determined by the PHP configuration settings related to input sizes, such as post_max_size and upload_max_filesize. By default, these values are set to a maximum of 2MB.
If you need to increase the maximum size of input values that can be passed into a controller, you can adjust these configuration settings in your php.ini file or in your Laravel application's .htaccess file.
Additionally, you can also validate and handle large inputs in your Laravel controller by using chunking or pagination techniques to process the input in smaller parts.
How to handle errors when passing input value into controller in Laravel?
In Laravel, you can handle errors when passing input values into a controller by validating the input data before processing it. Laravel provides a built-in validation feature that makes it easy to validate incoming HTTP requests.
Here's how you can handle errors when passing input values into a controller in Laravel:
- Define the validation rules for the input data in your controller method. You can define the rules using the validate method provided by Laravel's Illuminate\Http\Request class.
public function store(Request $request) { $validatedData = $request->validate([ 'name' => 'required|string|max:255', 'email' => 'required|email|unique:users', 'password' => 'required|string|min:6', ]);
// Process the validated data
}
- If the input data does not pass the validation rules, Laravel will automatically return a response with the validation errors. You can customize the error messages by modifying the messages method in the same controller method.
$validatedData = $request->validate([ 'name' => 'required|string|max:255', 'email' => 'required|email|unique:users', 'password' => 'required|string|min:6', ], [ 'name.required' => 'Name is required', 'email.required' => 'Email is required', 'password.required' => 'Password is required', 'password.min' => 'Password must be at least 6 characters long', ]);
- You can also perform custom validation logic by creating a new Form Request class with the php artisan make:request command and adding your custom validation rules in the rules method.
public function rules() { return [ 'name' => 'required|string|max:255', 'email' => 'required|email|unique:users', 'password' => 'required|string|min:6', ]; }
- Handle the validation errors in your view by displaying the error messages using the @error directive provided by Laravel's Blade templating engine.
By following these steps, you can handle errors when passing input values into a controller in Laravel and ensure that your application remains secure and functional.
