
Best Tools and Resources for Running Polymer Projects on XAMPP to Buy in June 2026
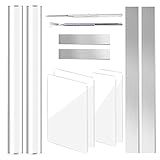
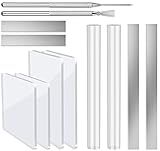
12 Pieces Polymer Clay Cutter Tools Acrylic Roller Pin for Sculpting Craft Shaping Knife Ceramic Cutters Slicer Kit Clear Rectangle Sheet Press Board Wire Texture Set Needle Detail Modelling Supplies
- COMPLETE KIT: 4 ACRYLIC SHEETS, 2 ROLLING PINS & CLAY CUTTERS INCLUDED!
- SAFE DESIGN: PROTECTIVE COVERS ON TOOLS AND BLADES PREVENT INJURIES.
- VERSATILE USE: IDEAL FOR SCULPTING, JEWELRY MAKING, AND DIY PROJECTS!


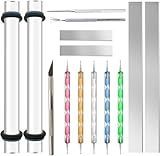
14 Polymer Clay Tools Acrylic Roller Clay Rolling Pin with Thickness Rings Tissue Blade Sculpting Earring Making Kit Supplies Slicer Knife Dotting Tool Jewelry Accessories Mini Cutters Press
- HIGH-QUALITY, REUSABLE ACRYLIC ROLLERS IDEAL FOR ALL CRAFTING NEEDS.
- VERSATILE CLAY CUTTERS AND TOOLS FOR JEWELRY AND DIY ART PROJECTS.
- CLEAR DESIGN ENHANCES VISIBILITY, ENSURING PRECISION IN EVERY PROJECT.
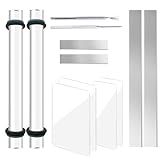
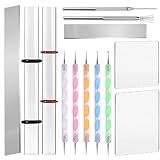
12 Polymer Clay Tools Acrylic Rolling Pin with Thickness Rings for Sculpting Craft Shaping Knife Cutters Slicer Kit Clear Rectangle Sheet Press Board Wire Texture Set Needle Detail Modelling Supplies
-
COMPLETE KIT: FULL ACRYLIC SHEETS AND TOOLS FOR DIVERSE CRAFTING PROJECTS.
-
VERSATILE USE: IDEAL FOR SCHOOLS, HOMES, AND JEWELRY-MAKING ENTHUSIASTS.
-
PRECISION CONTROL: THICKNESS RINGS ENSURE UNIFORM CLAY SHEETS EVERY TIME.
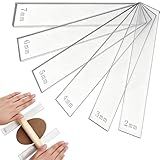
YANGYIXIN Polymer Clay Tools: Rolling Pin Guides & Roller Set 12Pcs Acrylic Adjustable Depth Guides (2-7mm) with Protective Film for Polymer Earrings, Sculpting & Modeling Clays
- ACHIEVE UNIFORM, PROFESSIONAL-GRADE SHEETS WITH PRECISE THICKNESS GUIDES.
- DURABLE ACRYLIC DESIGN ENSURES SAFETY AND LONGEVITY FOR ALL USERS.
- EFFORTLESS USE WITH CLEAR MARKINGS FOR QUICK SELECTION OF THICKNESS.
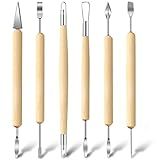
Jetmore 6 Pack Clay Tools Kit, Pottery Tools & Sculpting Tools, Polymer Modeling Clay Cutters Sculpture Set for Carving, Ceramics, Molding, DIY
- VERSATILE 6-PACK TOOLS FOR ALL CLAY, POTTERY, AND ART PROJECTS.
- DURABLE STAINLESS STEEL HEADS WITH ERGONOMIC WOODEN HANDLES.
- DOUBLE-END DESIGN OFFERS FLEXIBILITY FOR DIVERSE SCULPTING NEEDS.

Clay Tools, 18pcs DIY Plastic Pottery Tool Kit for Polymer, Modeling, Air Dry Clay, Sculpting Tools Dotting Ball Stylus Pen for Embossing, Fondant, Crafts, Styling, for Kids and Beginners
-
18-PIECE KIT: VARIETY FOR SCULPTING, MOLDING, AND CRAFTING CREATIVITY!
-
LIGHTWEIGHT DESIGN: COMFORTABLE HANDLING FOR LONG CREATIVE SESSIONS!
-
VERSATILE TOOLS: PERFECT FOR CLAY, FONDANT, AND VARIOUS CRAFT PROJECTS!
12 Pcs Polymer Clay Cutter Tools, Acrylic Roller for Polymer Clay, Acrylic Sheet Rectangle Shape, Clay Rolling Pin, Modeling Clay Carving Tools, Shaping Knife for Clay DIY, Earing Making, Jewelry
- CLEAR ROLLING PIN FOR PERFECT THICKNESS EVERY TIME!
- PRECISION CUTTERS ENSURE FLAWLESS SHAPES FOR YOUR CREATIONS!
- DURABLE TOOLS FOR UNIQUE TEXTURES & DETAIL WORK IN CLAY!
Polymer Clay Tools, Acrylic Clay Roller Pin, Polymer Clay Cutters Tools, Clear Rectangle Sheet Press Board Wire Texture Set Needle Detail Modelling Supplies
- COMPLETE 5-PIECE SET FOR VERSATILE POLYMER CLAY CREATIONS WITH EASE.
- DUAL-ENDED METAL BALL TOOLS ENSURE PRECISION AND STUNNING DETAIL.
- TEXTURED NEEDLE TOOL ENHANCES GRIP FOR INTRICATE DESIGNS AND TEXTURES.
To run a Polymer project on XAMPP, you first need to have XAMPP installed on your computer. Once XAMPP is installed, you can create a new folder in the htdocs directory of your XAMPP installation and copy the contents of your Polymer project into this folder.
Next, start the Apache server in XAMPP and open your web browser. In the address bar, type "localhost/folderName", where "folderName" is the name of the folder where you copied your Polymer project. This will display your Polymer project in the web browser, allowing you to run and test it on XAMPP.
Make sure that all the necessary dependencies for your Polymer project are properly installed and configured in your project folder. You may need to adjust some settings in the XAMPP configuration files to ensure that your Polymer project runs smoothly on XAMPP.
How to configure MySQL database in XAMPP?
To configure a MySQL database in XAMPP, you can follow these steps:
- Start XAMPP: Open XAMPP Control Panel and start the MySQL module by clicking on the "Start" button next to it.
- Access PhpMyAdmin: Open your web browser and go to http://localhost/phpmyadmin. This will open the PhpMyAdmin interface for managing MySQL databases.
- Create a new database: Click on the "Databases" tab in PhpMyAdmin and enter a name for your new database in the "Create database" field. Click on the "Create" button to create the database.
- Create a new user: Click on the "User accounts" tab in PhpMyAdmin and then click on the "Add user account" button. Enter a username and password for the new user and make sure to select "localhost" as the host.
- Grant privileges: After creating a new user, you need to grant privileges to the user for the database you created. Click on the "Database-specific privileges" link next to the user you created and select the database you want to grant privileges for. Then, select the specific privileges you want to grant to the user (e.g., select all privileges for full access).
- Save changes: Click on the "Go" button to save the changes and apply the privileges to the user.
Now, you have successfully configured a MySQL database in XAMPP. You can use this database for your web applications or projects that require a database backend.
What is the htdocs folder in XAMPP?
The htdocs folder in XAMPP is the root directory where all your website files and folders are stored. When you create a website using XAMPP, you would place all your HTML, CSS, JavaScript, and other files in the htdocs folder so that the Apache server can access and serve them to visitors. This folder is where your website's home page or index file is located, and it is the starting point for navigating the files and directories of your local web server.
What is the php.ini file in XAMPP and how to edit it?
The php.ini file in XAMPP is a configuration file that controls the behavior of PHP on your local server. It contains settings related to PHP execution, such as memory limits, file upload limits, error reporting, and more.
To edit the php.ini file in XAMPP, follow these steps:
- Open the XAMPP control panel and stop the Apache server.
- Locate the php.ini file in your XAMPP installation directory. By default, it is usually located at "C:\xampp\php\php.ini" on Windows or "/Applications/XAMPP/xamppfiles/etc/php.ini" on Mac.
- Make a backup copy of the php.ini file before making any changes. This will allow you to revert to the original settings if needed.
- Open the php.ini file in a text editor, such as Notepad or TextEdit.
- Make your desired changes to the settings in the php.ini file. You can search for specific settings using the text editor's search function.
- Save the php.ini file and close the text editor.
- Start the Apache server in the XAMPP control panel to apply the changes.
It is important to note that changes made to the php.ini file will only affect the PHP configuration on your local XAMPP server. If you are working on a live server, you will need to make similar changes to the php.ini file on that server.