Best PHP Development Resources to Buy in February 2026
PHP Development Tool Essentials


PHP 8 Objects, Patterns, and Practice: Mastering OO Enhancements, Design Patterns, and Essential Development Tools


PHP Cookbook: Modern Code Solutions for Professional Developers


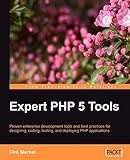
Expert PHP 5 Tools


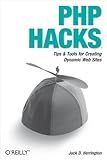
PHP Hacks: Tips & Tools For Creating Dynamic Websites
- AFFORDABLE PRICES ON QUALITY READS-SAVE WHILE YOU INDULGE!
- ECO-FRIENDLY CHOICE: REDUCE WASTE BY BUYING PRE-LOVED BOOKS.
- THOROUGHLY CHECKED FOR QUALITY-ENJOY GREAT STORIES, WORRY-FREE!


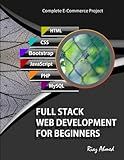
Full Stack Web Development For Beginners: Learn Ecommerce Web Development Using HTML5, CSS3, Bootstrap, JavaScript, MySQL, and PHP


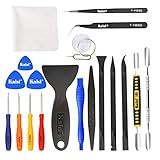
Kaisi Professional Electronics Opening Pry Tool Repair Kit with Metal Spudger Non-Abrasive Nylon Spudgers and Anti-Static Tweezers for Cellphone iPhone Laptops Tablets and More, 20 Piece
-
COMPREHENSIVE KIT: 20 TOOLS FOR ALL YOUR DEVICE REPAIR NEEDS!
-
DURABLE & RELIABLE: PROFESSIONAL-GRADE STAINLESS STEEL FOR LONGEVITY.
-
SCREEN CLEANING INCLUDED: MAGIC CLOTH ENSURES A SPOTLESS FINISH POST-REPAIR.


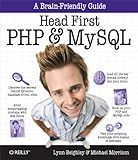
Head First PHP & MySQL: A Brain-Friendly Guide


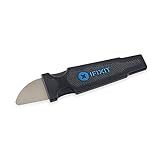
iFixit Jimmy - Ultimate Electronics Prying & Opening Tool
- HIGH QUALITY BLADE: EASILY SLIPS INTO TIGHT GAPS FOR PRECISION WORK.
- ERGONOMIC HANDLE: ALLOWS FOR PRECISE CONTROL DURING REPAIRS AND TASKS.
- UNIVERSAL UTILITY: PERFECT FOR TECH, HOME IMPROVEMENT, AND DIY PROJECTS.


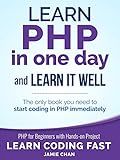
PHP: Learn PHP in One Day and Learn It Well. PHP for Beginners with Hands-on Project. (Learn Coding Fast with Hands-On Project Book 6)


To validate checkboxes with Laravel, you can follow these steps:
- Open the validation file: In Laravel, the validation rules are defined in a file located at app\Http\Requests. Open this file, which corresponds to the form you want to validate.
- Add validation rule: Inside the validation file, add a rule for the checkbox field you want to validate. The most common validation rule for checkboxes is 'accepted', which ensures the checkbox is checked. You can also use other validation rules like 'required' or custom rules based on your requirements. Example: public function rules() { return [ 'checkbox_field' => 'accepted', ]; }
- Display validation errors: In your form view file, you can display any validation errors related to the checkbox field. Use the @error blade directive to check for errors and display an error message if validation fails. Example: @error('checkbox_field') {{ $message }}@enderror
That's it! The checkbox field will now be validated based on the rules defined in your validation file. If the checkbox is not checked or fails any other validation rule, an error message will be displayed.
What is the Laravel helper function used for checkbox validation?
The Laravel helper function used for checkbox validation is either required or in:0,1.
To validate if a checkbox is checked or not, you can use the required rule. For example:
$request->validate([ 'checkbox_field' => 'required', ]);
This will ensure that the checkbox field is present in the request and is checked.
Alternatively, if you want to validate the checkbox value (i.e., if it is checked or not), you can use the in:0,1 rule. For example:
$request->validate([ 'checkbox_field' => 'in:0,1', ]);
This will ensure that the checkbox field value is either 0 (unchecked) or 1 (checked).
How to ensure at least one checkbox is checked during validation in Laravel?
To ensure at least one checkbox is checked during validation in Laravel, you can create a custom rule. Here is an example of how to do it:
- Create a new rule by running the following command in your terminal:
php artisan make:rule AtLeastOneCheckboxChecked
- Open the app/Rules/AtLeastOneCheckboxChecked.php file that was generated and replace its contents with the following code:
namespace App\Rules;
use Illuminate\Contracts\Validation\Rule;
class AtLeastOneCheckboxChecked implements Rule { /** * Determine if the validation rule passes. * * @param string $attribute * @param mixed $value * @return bool */ public function passes($attribute, $value) { if (!is_array($value)) { return false; }
    return count($value) > 0;
}

/\*\*
 \* Get the validation error message.
 \*
 \* @return string
 \*/
public function message()
{
    return 'At least one checkbox must be checked.';
}
}
- In your controller or form request where you handle the validation, you can now use this custom rule. For example, if you are using a form request, you can add the rule to the respective rules array.
use App\Rules\AtLeastOneCheckboxChecked;
public function rules() { return [ 'checkboxes' => ['required', new AtLeastOneCheckboxChecked] ]; }
- Run your validation request, and if none of the checkboxes are checked, it will throw an error with the message:
At least one checkbox must be checked.
By using this custom rule, you can ensure at least one checkbox is checked during validation in Laravel.
How to validate checkboxes in Laravel using form request validation?
To validate checkboxes in Laravel using a form request, you can follow these steps:
Step 1: Create a Form Request Create a new form request by running the following command:
php artisan make:request CheckboxValidationRequest
This will create a new file CheckboxValidationRequest.php in the app\Http\Requests directory.
Step 2: Define Validation Rules Open the CheckboxValidationRequest.php file and define your validation rules in the rules method. For checkbox validation, you can use the array and in validation rules.
public function rules() { return [ 'checkboxes' => 'required|array', 'checkboxes.*' => 'required|in:on', ]; }
In the example above, checkboxes represents the attribute name of the checkbox field in your form. The required|array rule ensures that the checkbox field is required and an array of values is passed. The required|in:on rule ensures that each checkbox value is "on", which indicates that the checkbox is checked.
Step 3: Use the Form Request in Your Controller In your controller, replace the Request parameter with your custom form request. For example:
use App\Http\Requests\CheckboxValidationRequest;
public function store(CheckboxValidationRequest $request) { // Validation passed, continue with the form submission logic }
By type-hinting the CheckboxValidationRequest class, Laravel will automatically validate the incoming request before executing the logic in your controller's store method.
That's it! Now your checkboxes will be properly validated using the form request validation in Laravel. If validation fails, the user will be redirected back to the form with the validation errors automatically displayed.
