Best WordPress Button Plugins to Buy in February 2026
Professional WordPress Plugin Development, 2nd Edition


Building Web Apps with WordPress: WordPress as an Application Framework


WordPress Power Toolkit: Harness AI to build next-level websites


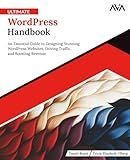
Ultimate WordPress Handbook: An Essential Guide to Designing Stunning WordPress Websites, Driving Traffic, and Boosting Revenue (English Edition)


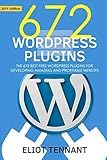
WordPress Plugins: The 672 Best Free WordPress Plugins for Developing Amazing and Profitable Websites


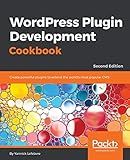
WordPress Plugin Development Cookbook: Create powerful plugins to extend the world's most popular CMS, 2nd Edition


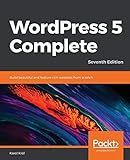
WordPress 5 Complete: Build beautiful and feature-rich websites from scratch, 7th Edition


Professional WordPress: Design and Development


101 WordPress Plugins… and Then Some : Build your dream website 2023


To add a button to all posts in WordPress, you can follow these steps:
- Log in to your WordPress admin dashboard.
- Navigate to the Appearance section and click on "Editor" or "Theme Editor." This will open the theme editor.
- On the right-hand side, you will see a list of theme files. Look for the file named "single.php" or "content.php." This file is responsible for displaying individual posts.
- Click on the file you found in the previous step to open it in the code editor.
- Find the section within the file where the content of a single post is displayed. This section usually includes HTML markup and PHP code.
- Inside that section, find the spot where you want to place the button. It could be below the content or in any desired location.
- Insert the following code at the desired location to create a button:
Button Text
Replace "your-link" with the URL you want the button to link to. Also, replace "your-button-class" with any custom CSS class you want to apply to the button for styling purposes. Adjust the "Button Text" with the desired text displayed on the button.
- Once you have added the button code, click on the "Update File" or "Save" button to save your changes.
- Visit one of your posts to see the button added to all posts. If it doesn't appear, make sure you added the button code in the correct location of the file.
That's it! The button should now be added to all your WordPress posts. Remember, if you switch to a different theme or update your current theme, these changes might be overwritten. To avoid losing your modifications, it is recommended to create a child theme or use a custom plugin specifically designed for this purpose.
What are the steps to include a button in all WordPress posts?
To include a button in all WordPress posts, you can follow the steps below:
- Log in to your WordPress admin dashboard.
- Go to the "Appearance" menu and click on "Theme Editor".
- In the Theme Editor, locate and click on "Theme Functions" or "functions.php" file from the right-hand sidebar.
- Add the following code snippet to the functions.php file:
function add_button_to_posts($content) { if(is_single()) { $button_html = 'Button Text'; $content .= $button_html; } return $content; } add_filter('the_content', 'add_button_to_posts');
Replace "YOUR_BUTTON_URL" with the URL you want the button to link to and "Button Text" with the desired text for your button.
- Save the changes.
Now, the button will be automatically added at the end of every post in your WordPress site. You can customize the button's appearance by applying CSS styles to the "button" class in your theme's stylesheet.
How can I add a button to open a pop-up window in WordPress?
To add a button that opens a pop-up window in WordPress, you can follow these steps:
- Choose a plugin: Install and activate a plugin that allows you to create pop-up windows in WordPress. Some popular options include Popup Maker, Popup Builder, and Elementor Pro.
- Create a pop-up: Use the plugin's interface to create your desired pop-up window. You can typically customize the content, appearance, and behavior of the pop-up window.
- Get the pop-up's shortcode or embed code: Once you've created your pop-up window, the plugin will provide you with a shortcode or embed code. Make sure to copy it.
- Create a button: In the WordPress editor, navigate to the page or post where you want to place the button. Choose the block that allows you to add a button or use the shortcode block if necessary.
- Insert the pop-up trigger code: Within the button block or shortcode block, add the code that triggers the pop-up window. This code is typically provided by the pop-up plugin and is responsible for opening the pop-up when the button is clicked.
- Customize the button: Adjust the button's text, color, and other visual settings to fit your website's design.
- Publish or update the page/post: Save your changes, and your button that opens a pop-up window should now be added to your WordPress site.
Remember to review the documentation or support resources provided by the specific plugin you're using for more detailed instructions or troubleshooting.
How to add a call-to-action button in WordPress posts?
To add a call-to-action button in WordPress posts, follow these steps:
- Log in to your WordPress dashboard.
- Navigate to the post editor where you want to add the button.
- Locate and click the "Add Media" button above the editor.
- In the media library, upload an image for your button, or select an existing image if you already have one.
- After the image is uploaded, click on it to select it and click the "Insert into post" button.
- You will see the image added to your post. Click on the image to highlight it, and then click the "Add link" button in the editor toolbar.
- Enter the URL or destination page where you want the button to lead.
- Choose the option to open the link in a new tab or the same tab, depending on your preference.
- Lastly, save or update the post to apply and display the call-to-action button.
Note: You can further customize the button by adjusting its size, alignment, and additional styles through the block editor options or by applying custom CSS if needed.
How to add a button to all posts in WordPress?
To add a button to all posts in WordPress, you can follow these steps:
- Login to your WordPress dashboard.
- Navigate to the Appearance section and click on "Theme Editor."
- On the right-hand side, you will see a list of theme files. Look for the "single.php" file and click on it to open.
- In the "single.php" file, locate the section where you want the button to appear. This may vary based on your theme, but typically, it can be found within the loop or the content section.
- Once you've found the appropriate location, add the following HTML code to create the button:
Button Text
- Customize the button by modifying the "Button Text" with the desired text for your button.
- Save the changes by clicking on the "Update File" button at the bottom of the editor page.
Now, the button with the specified text will appear in the designated location on all of your WordPress posts. You can further style the button by adding CSS using your theme's stylesheet or by using a custom CSS plugin.
How to include an email subscription button in WordPress posts?
To include an email subscription button in WordPress posts, you can follow these steps:
- Install and activate an email subscription plugin: There are several plugins available for email subscriptions, including MailChimp, Constant Contact, and WP Subscribe. Install and activate the plugin of your choice from the WordPress Plugin Directory.
- Configure the plugin: After activating the plugin, go to the plugin settings page in your WordPress dashboard. Configure the settings according to your email service provider's instructions. You may need to connect your email service provider account to the plugin and obtain an API key.
- Customize the subscription button: Most plugins allow you to customize the appearance of the subscription button. Go to the plugin settings and customize the button text, color, size, and placement.
- Add the subscription button to a post: Open the post editor for the post where you want to include the subscription button. Depending on the plugin you are using, there might be a subscription button block available, or you can use a shortcode provided by the plugin. Place the button block or shortcode at the desired location in your post.
- Preview and publish: Preview the post to see how the subscription button looks. If you are satisfied with the button's appearance, publish the post.
- Test the subscription button: Open the published post and click on the subscription button to make sure it is functioning correctly. Check whether you receive the confirmation email and the subscriber gets added to your email list.
By following these steps, you will be able to include an email subscription button in your WordPress posts and start growing your email subscriber list.
What is the method to customize a page scrolling button in WordPress?
To customize a page scrolling button in WordPress, you can follow these steps:
- Install and activate a plugin: Start by installing and activating a plugin that allows you to create and customize a scrolling button. Some popular plugins for this purpose are "Easy Smooth Scroll Links", "Page scroll to id", and "Scroll Back to Top".
- Configure the plugin settings: Once the plugin is activated, go to the plugin settings page (usually found in the WordPress dashboard under "Settings" or "Appearance"). Here, you can configure various options such as button appearance, position, animation, and scrolling behavior.
- Customize button appearance: Most plugins allow you to customize the appearance of the scrolling button. You can specify the button's shape, color, size, and icon. Some plugins also provide options to customize the button text or add custom CSS styles.
- Choose the button position: You can select where the scrolling button will appear on your website. Common options include the bottom-right or bottom-left corner, fixed position, or floating button. Some plugins also offer the flexibility to define a custom position using CSS selectors.
- Configure scrolling behavior: Depending on the plugin, you may be able to adjust the button's scrolling behavior. This includes settings such as the scroll speed, easing effect, and whether the scrolling should be smooth or instant.
- Save your changes and test: Once you have customized the scrolling button to your liking, don't forget to save the settings. Then, visit your website to test the scrolling button to ensure it works as expected and matches your desired appearance.
Remember to choose a plugin that is compatible with your WordPress version and regularly updated for security and functionality.
How to create a custom button in WordPress?
To create a custom button in WordPress, you can follow these steps:
- Login to your WordPress admin panel.
- Go to Appearance > Customize.
- This will open the WordPress Customizer.
- Look for the "Additional CSS" option or navigate to the button's specific location if you are using a specific theme or builder.
- In the Additional CSS section, add the following code:
.custom-button { background-color: #yourColorHere; color: #yourColorHere; padding: 10px 20px; border-radius: 5px; }
Replace "yourColorHere" with the desired color code or name.
- Save the changes.
- Now, go to the page or post where you want to add the button.
- Insert the following code in the text editor where you want the button to appear:
Button Text
Replace "Button Text" with your desired button text.
- Update or publish the page/post.
You should now have a custom button on your WordPress website with the specified design and text.
How to add a download button in WordPress posts?
To add a download button in WordPress posts, you can follow these steps:
- Install a file download plugin: There are several plugins available for WordPress that allow you to add a download button. Some popular options include Download Monitor, Easy Digital Downloads, and File Manager.
- Activate the plugin: Once you have installed the desired file download plugin, activate it from the WordPress dashboard by navigating to "Plugins" > "Installed Plugins" and clicking on the "Activate" button next to the plugin name.
- Upload your file: Depending on the plugin you choose, you will typically find an option to upload files in the WordPress dashboard. Use this feature to upload the file you want users to download. Make sure to follow any instructions provided by the plugin.
- Create a new post or edit an existing one: Open the post in the WordPress editor where you want to add the download button. Alternatively, you can also create a new post.
- Add the download button shortcode: Most file download plugins provide a shortcode that you can use to insert a download button in your post. You can usually find the shortcode in the plugin's documentation or settings. Copy the shortcode.
- Insert the shortcode in your post: In the WordPress editor, add a new block and select the "Shortcode" block. Paste the shortcode into the block. Alternatively, if your plugin supports it, you can also directly insert the shortcode into the post's text editor.
- Publish or update the post: Once you have inserted the shortcode, save your changes and publish the post or update the existing one. The download button should now be visible in your post.
Keep in mind that the specific steps may vary depending on the file download plugin you choose, so make sure to consult the plugin's documentation for detailed instructions.
How to change the color of a button in WordPress posts?
To change the color of a button in WordPress posts, follow these steps:
- Log in to your WordPress admin dashboard.
- Navigate to the post editor where you want to change the button color.
- Switch to the text editor mode if you are currently in the visual editor mode.
- Locate the button HTML code in your post. It might look something like this:
Click Me
- Add the style attribute to the tag and set the background-color property to the desired color. For example, to change the button background color to blue:
Click Me
- Save or update the post.
- Preview the post to see the updated button color.
Note: The above method will only change the button color for that specific button in the post where you made the change. If you want to change the button color globally for all buttons on your WordPress site, you might need to modify the CSS code in your WordPress theme's stylesheet or use a custom CSS plugin.
