Best TensorFlow Learning Resources to Buy in February 2026
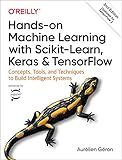
Hands-On Machine Learning with Scikit-Learn, Keras, and TensorFlow: Concepts, Tools, and Techniques to Build Intelligent Systems


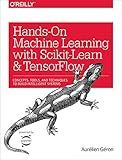
Hands-On Machine Learning with Scikit-Learn and TensorFlow: Concepts, Tools, and Techniques to Build Intelligent Systems


Understanding Deep Learning: Building Machine Learning Systems with PyTorch and TensorFlow: From Neural Networks (CNN, DNN, GNN, RNN, ANN, LSTM, GAN) to Natural Language Processing (NLP)


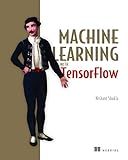
Machine Learning with TensorFlow


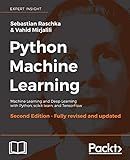
Python Machine Learning - Second Edition: Machine Learning and Deep Learning with Python, scikit-learn, and TensorFlow


Mastering Machine Learning on AWS: Advanced machine learning in Python using SageMaker, Apache Spark, and TensorFlow


Python Machine Learning for Beginners: Learning from Scratch Numpy, Pandas, Matplotlib, Seaborn, SKlearn and TensorFlow 2.0 for Machine Learning & Deep ... Learning & Data Science for Beginners)


Transformers for Natural Language Processing: Build innovative deep neural network architectures for NLP with Python, PyTorch, TensorFlow, BERT, RoBERTa, and more


In TensorFlow, you can assign values to a subset of a tensor using the tf.Variable and indexing operations supported by TensorFlow. Here is an explanation of the process:
- Create a TensorFlow variable: Start by creating a TensorFlow variable using the tf.Variable function. This variable will serve as the tensor that you want to modify. For example:
my_tensor = tf.Variable([1, 2, 3, 4, 5])
- Use indexing to select the subset: TensorFlow supports various indexing operations to select a subset of a tensor. You can use the basic indexing operations, such as tensor[start:end], or advanced indexing techniques like tf.gather for more complex selections. For example:
subset = my_tensor[1:4] # Select elements at indices 1, 2, and 3
- Assign new values to the subset: Once you have selected the desired subset, you can assign new values to it. Use the assignment operations provided by TensorFlow, such as the tf.Variable.assign function or the tf.scatter_update method. These operations will update the selected subset with the assigned values. For example:
assign_op = my_tensor[1:4].assign([8, 9, 10]) # Assign new values [8, 9, 10] to the subset
Note: The original tensor will be modified by these operations.
- Run the TensorFlow session: Finally, you need to run the TensorFlow session to execute the assignment operation and observe the updated tensor. Make sure to initialize all variables in the session using tf.global_variables_initializer() and run the session with the assignment operation. For example:
init = tf.global_variables_initializer()
with tf.Session() as sess: sess.run(init) sess.run(assign_op) updated_values = sess.run(my_tensor) print(updated_values)
Executing the code above will print the tensor my_tensor after assigning new values to the subset. In this case, it would print [1, 8, 9, 10, 5], reflecting the updated elements at indices 1, 2, and 3.
What is the dtype parameter in TensorFlow tensors?
The dtype parameter in TensorFlow tensors is used to specify the data type of the elements in the tensor. It is a required parameter when creating a new tensor in TensorFlow.
TensorFlow supports various data types including:
- tf.float16: 16-bit floating-point.
- tf.float32: 32-bit floating-point.
- tf.float64: 64-bit floating-point.
- tf.int8: 8-bit signed integer.
- tf.int16: 16-bit signed integer.
- tf.int32: 32-bit signed integer.
- tf.int64: 64-bit signed integer.
- tf.uint8: 8-bit unsigned integer.
- tf.uint16: 16-bit unsigned integer.
- tf.uint32: 32-bit unsigned integer.
- tf.uint64: 64-bit unsigned integer.
- tf.bool: Boolean.
By specifying the dtype parameter, you can ensure that the tensor has the desired data type, which is important for performing operations and ensuring compatibility with other tensors or models in your TensorFlow graph.
What is the difference between eager execution and graph mode in TensorFlow?
Eager execution and graph mode are two different ways of executing TensorFlow code. Here are the differences between them:
- Eager execution: In eager execution, TensorFlow operations execute immediately like regular Python code. This means that computations are evaluated and results are returned immediately. Eager execution provides a more intuitive and interactive development experience, making it easier to debug and understand the code. It also supports direct access to Python control flow features like loops and conditionals.
- Graph mode: In graph mode, TensorFlow builds a computational graph that represents the operations in the code. This graph defines the computation and the dependencies between operations. The graph is then executed as a whole, typically within a TensorFlow session. This allows for optimizations like automatic differentiation, distributed training, and deployment to different devices.
The key differences can be summarized as follows:
- Eager execution offers immediate execution of TensorFlow operations and supports dynamic computation, while graph mode requires first defining and building a computational graph before executing it.
- Eager execution is well-suited for development, exploration, and debugging, while graph mode is often preferred for production use due to its ability to optimize and distribute computations.
- In eager execution, TensorFlow operations are called directly, while in graph mode, operations are added to a computational graph and executed within a session.
- Eager execution supports Python control flow features, while graph mode requires using TensorFlow control flow operations like tf.cond() and tf.while_loop().
TensorFlow 2.0 and later versions have eager execution enabled by default, while earlier versions relied primarily on graph mode. However, TensorFlow still supports graph mode for cases that require it, and users can choose to enable or disable eager execution based on their needs.
What is the difference between tf.placeholder and tf.Variable in TensorFlow?
In TensorFlow, tf.placeholder and tf.Variable are two different ways to create and use tensors.
- tf.placeholder: tf.placeholder is used to create a placeholder tensor that will be provided at runtime. It is typically used to feed input data into the TensorFlow computational graph. It does not require any initial value. The shape and data type of the placeholder are specified when it is created but can be dynamic or unknown. During execution, actual values are passed to the placeholder using the feed_dict argument in the session run call.
- tf.Variable: tf.Variable is used to create a mutable tensor that can be trained and updated during the session. It is typically used to store and update the model parameters (weights and biases) during training. It requires an initial value and can have different shapes and data types. The initial value can be specified explicitly or using initializer functions provided by TensorFlow. Variables persist their values across multiple invocations of the session and can be saved and restored.
In summary, tf.placeholder is used for input data and tf.Variable is used for trainable parameters, such as weights and biases, and both serve different purposes in TensorFlow.
How to access elements of a tensor in TensorFlow?
In TensorFlow, you can access elements of a tensor using indexing and slicing. Here are a few examples:
- Accessing a single element:
import tensorflow as tf
Create a tensor
tensor = tf.constant([[1, 2, 3], [4, 5, 6]])
Access an element at a specific index
element = tensor[0, 1] print(element.numpy()) # Output: 2
- Accessing multiple elements using slicing:
# Access a slice of the tensor slice = tensor[1, :] # Access the second row of the tensor print(slice.numpy()) # Output: [4, 5, 6]
- Accessing elements with boolean indexing:
# Create a tensor tensor = tf.constant([1, 2, 3, 4, 5, 6])
Create a boolean mask
mask = tensor > 3
Access elements based on the mask
filtered_elements = tf.boolean_mask(tensor, mask) print(filtered_elements.numpy()) # Output: [4, 5, 6]
Note that TensorFlow tensors are immutable, so you cannot directly modify the elements. However, you can assign new values to the elements using tf.Variable tensors, which can be modified inplace.
How to calculate the element-wise maximum of two tensors in TensorFlow?
In TensorFlow, you can calculate the element-wise maximum of two tensors using the tf.maximum() function. This function takes two tensors as input and returns a new tensor containing the element-wise maximum values.
Here's an example on how to use tf.maximum():
import tensorflow as tf
Define the input tensors
tensor1 = tf.constant([[1, 2, 3], [4, 5, 6]]) tensor2 = tf.constant([[3, 2, 1], [6, 5, 4]])
Calculate the element-wise maximum
result = tf.maximum(tensor1, tensor2)
Run the TensorFlow session
with tf.Session() as sess: output = sess.run(result) print(output)
Output:
[[3 2 3] [6 5 6]]
In this example, tf.constant() is used to create two input tensors tensor1 and tensor2. The tf.maximum() function then calculates the element-wise maximum of tensor1 and tensor2 and stores it in result. Finally, the output is obtained by running the TensorFlow session and printing the result.
