Best Filter Plugins to Buy in June 2026
Plug In Air Ionizers - Negative Ion Technology Air Purifier - Quiet Operation Air Freshener for Home, Bedroom, Office, Garage Room - Portable Air Purifiers Odor,Pets Smell - Air Cleaner White (4 Pack)
- COMPACT, STYLISH DESIGN: SPACE-SAVING AND TRAVEL-FRIENDLY AIR PURIFIER.
- BREATHE EASY: FILTERLESS TECHNOLOGY ELIMINATES ODORS NATURALLY.
- WHISPER-QUIET OPERATION: ENJOY FRESH AIR WITHOUT DISTURBANCE ANYTIME.


Air Ionizers (4 Pack)- Plug In Negative Ion Air Purifiers - Quiet Air Freshener for Home, Bedroom, Office, Basement - Portable Air Purifier Odor, Smoke, Dust, Pet Smell - Mini Air Cleaner White
-
COMPACT DESIGN: SPACE-SAVING PURIFIER PLUGS ANYWHERE EFFORTLESSLY.
-
CHEMICAL-FREE FRESHNESS: ENJOY CLEAN AIR WITHOUT FILTERS OR TOXINS!
-
WHISPER-QUIET: OPERATES SILENTLY, PERFECT FOR RESTFUL SLEEP OR FOCUS.
PVACG Cat Litter Box Deodorizer Plug In Air Purifier for Whole House Pet Odor Portable Air Cleaner for Bathroom Toilet Living Room Kitchen Pets House (1)
-
DEODORIZE UP TO 99.99%: BANISH ODORS IN EVERY CORNER OF YOUR HOME.
-
FOUR MODES FOR EVERY ROOM: ADJUST SETTINGS FOR SPACES FROM 100-500 SQ FT.
-
WHISPER-QUIET & PORTABLE: USE ANYWHERE WITHOUT DISTURBING YOUR PEACE.
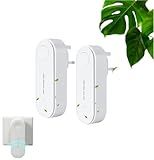
2PCS Magair Air Purifie, Magair Air Purifier Plug In With Replacement Filter, Suitable For Bedrooms, Toilets, Closets, Pet Room (White)
- PLUG-AND-PLAY: EASY ONE-TOUCH OPERATION, NO FILTERS OR SETUP NEEDED!
- FAST AIR PURIFICATION: INSTANTLY RELEASES IONS FOR CLEANER, FRESHER AIR.
- WHISPER-QUIET OPERATION: AUTOMATICALLY PAUSES EVERY 2 HOURS FOR SILENT USE.
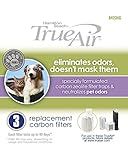
Hamilton Beach TrueAir Replacement Carbon Filter for Odor Eliminators, Neutralizes Pet Smells, 3-Pack (04234G), 5.8 x 1.8 x 6.8 inches , White
- NEUTRALIZES PET ODORS FOR A FRESHER, CLEANER HOME ENVIRONMENT.
- COMPATIBLE WITH MULTIPLE TRUEAIR MODELS FOR VERSATILE USE.
- LONG-LASTING 3-PACK: EACH FILTER LASTS UP TO 90 DAYS!
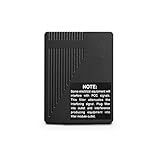
X10 XPPF Plug In Noise Filter - Use to Control Line Noise for X10 Home Automation Items Only
- EFFICIENT 120 VAC POWER FOR RELIABLE PERFORMANCE.
- 5 AMP CAPACITY ENSURES STRONG, STEADY OPERATION.
- DESIGNED SPECIFICALLY FOR USA COMPATIBILITY.

8 Pack For DSTx HEPA + Carbon Filters Replacement Compatible with Clarifion DSTx Mini Personal Portable Air Purifiers for Home, Bedroom and Pets, Works for Dust, Smoke,Odors and Airborne Particles
- DESIGNED FOR CLARIFION DSTX MODELS ONLY - ENSURE PERFECT FIT!
- THREE-STAGE FILTRATION: CLEANER AIR WITH HEPA & ACTIVATED CARBON!
- EASY 3-6 MONTH REPLACEMENT - NO TOOLS NEEDED FOR QUICK INSTALL!
To change filter WooCommerce products, you can go to the WooCommerce plugin settings on your WordPress dashboard. From there, you can access the product filters section and customize the filters according to your preferences. You can add new filters, remove existing ones, or modify the filter categories to help users easily navigate and find products on your online store. Additionally, you can also adjust the filter options such as price range, product attributes, and sorting criteria to enhance the user experience and improve the product search functionality on your eCommerce platform.
How to change filter woocommerce products by size?
To change the filter for WooCommerce products by size, you can follow these steps:
- Go to your WordPress dashboard and navigate to "Products" -> "Attributes".
- Click on the "Add New Attribute" button and create an attribute for size (e.g. Size).
- Once the attribute is created, you can add different size options as terms (e.g. Small, Medium, Large).
- Next, go to "Products" -> "All Products" and edit the products you want to associate with the size attribute. Under the "Product data" section, select the size attribute and assign the appropriate size option to the product.
- Now, go to your shop page and make sure that the filter by attribute widget is enabled. You can do this by going to "Appearance" -> "Widgets" and adding the "Filter Products by Attribute" widget to your sidebar or any other widget area.
- Configure the widget to display the size attribute and save the changes.
- Now, users will be able to filter products by size on your shop page. They can select a size option from the filter dropdown menu and view products that match their selected size.
By following these steps, you can easily change the filter for WooCommerce products by size on your site.
How to change filter woocommerce products by custom attribute?
To change the filter for WooCommerce products by a custom attribute, you can use the following steps:
- Go to your WordPress dashboard and navigate to "Products" -> "Attributes".
- Create a new attribute by clicking on the "Add New" button.
- Enter a name for your attribute and click on the "Add attribute" button.
- Now, go to "Products" -> "All Products" and edit the product you want to add the custom attribute to.
- Scroll down to the "Product Data" section and click on the "Attributes" tab.
- In the dropdown menu, select the attribute you created earlier and enter a value for the attribute for that product.
- Click on the "Save Changes" button to update the product.
To create a custom filter for WooCommerce products based on this custom attribute, you can use a plugin or custom code.
One popular plugin that allows you to create custom filters for WooCommerce products is "WooCommerce Product Filter". This plugin allows you to filter products by various criteria, including custom attributes.
Alternatively, you can create a custom filter using PHP code. You can use the "pre_get_posts" hook to modify the product query and add a filter based on the custom attribute. Here is an example code snippet that shows how to filter products based on a custom attribute:
add_action('pre_get_posts', 'custom_filter_products_by_attribute');
function custom_filter_products_by_attribute($query) { if( !is_admin() && is_post_type_archive('product') && $query->is_main_query() ) { $tax_query = array( array( 'taxonomy' => 'pa_custom_attribute', // change to your custom attribute taxonomy 'field' => 'slug', 'terms' => 'attribute-value', // change to the value of the attribute you want to filter by 'operator' => 'IN', ), );
    $query->set('tax\_query', $tax\_query);
}
}
Replace 'pa_custom_attribute' with the taxonomy of your custom attribute and 'attribute-value' with the value of the attribute you want to filter by in the above code snippet.
By following these steps, you can change the filter for WooCommerce products by a custom attribute.
What is the optimal number of filter options for woocommerce products?
There is no one-size-fits-all answer to this question as the optimal number of filter options for WooCommerce products will depend on the specific requirements of your store and your target customers.
However, it is generally recommended to keep the number of filter options to a minimum to avoid overwhelming customers with too many choices. It is important to offer a balance of key filter options that are relevant to your products and that will help customers streamline their search process.
A good starting point is to include filters for key attributes such as price, category, brand, color, size, and any other relevant product specifications. From there, you can assess customer feedback and data analytics to determine if additional filter options are needed or if any existing filters can be refined or removed.
Ultimately, the goal is to make it easy for customers to find the products they are looking for, so it is essential to strike a balance between providing enough filter options to be helpful without overwhelming the user experience.
What is the most effective strategy for implementing filter woocommerce products?
The most effective strategy for implementing filter WooCommerce products is to use the built-in product filtering options provided by WooCommerce. These options allow customers to filter products by various criteria such as price, color, size, category, and more. You can also use plugins or extensions to further customize and enhance the filtering options available on your site.
Here are some tips for effectively implementing filter WooCommerce products:
- Choose the right filtering options: Determine which criteria are most important for your customers when filtering products, such as price range, color, size, category, brand, etc. Make sure to include these filtering options on your product pages.
- Make filtering options easily accessible: Place the filtering options prominently on your product pages so that customers can easily find and use them to narrow down their search results.
- Use a plugin or extension: Consider using a plugin or extension that provides more advanced filtering options, such as AJAX filtering, live search, or custom fields.
- Test and optimize: Regularly test and optimize your filtering options to ensure they are working effectively and meeting the needs of your customers. Analyze data such as bounce rates, conversion rates, and user feedback to make improvements.
- Consider mobile users: Make sure that your filtering options are mobile-friendly and easy to use on smartphones and tablets. Mobile users should be able to filter products quickly and easily on their devices.
By following these tips, you can effectively implement filter WooCommerce products and provide a better shopping experience for your customers.
What is the ideal user interface for filter woocommerce products?
The ideal user interface for filtering WooCommerce products should be user-friendly, intuitive, and efficient. Some key features that can enhance the user experience include:
- Clear and organized filter options: Display all available filter options in a structured manner, making it easy for users to navigate and find the specific criteria they are looking for.
- Multi-select filters: Allow users to select multiple filter options at once to refine their search and find products that meet their specific requirements.
- Search bar: Include a search bar that allows users to quickly search for specific products or keywords within the filtered results.
- Visual representations: Use icons, colors, or other visual cues to help users quickly identify and select filter options.
- Mobile optimization: Ensure that the filter interface is responsive and optimized for mobile devices, allowing users to easily navigate and filter products on their smartphones and tablets.
- Instant updates: Implement real-time filtering functionality that updates product results instantly as users select or deselect filter options, providing immediate feedback and enhancing the overall user experience.
By incorporating these features into the filter interface for WooCommerce products, you can create a seamless and efficient shopping experience for users, ultimately improving customer satisfaction and increasing conversions.