Best Tools to Buy for Changing MySQL Database Directory in December 2025

SQL: Learn SQL (using MySQL) in One Day and Learn It Well. SQL for Beginners with Hands-on Project. (Learn Coding Fast with Hands-On Project Book 5)


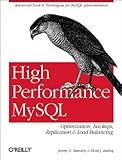
High Performance MySQL
- AFFORDABLE PRICES ON QUALITY BOOKS-SAVE MONEY WHILE READING!
- ECO-FRIENDLY CHOICE: GIVE BOOKS A SECOND LIFE AND REDUCE WASTE!
- CURATED SELECTION: DISCOVER HIDDEN GEMS IN OUR USED BOOK COLLECTION!


MySQL Cookbook: Solutions for Database Developers and Administrators


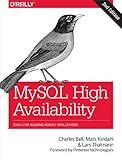
MySQL High Availability: Tools for Building Robust Data Centers


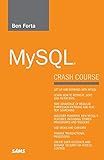
MySQL Crash Course


Linux Server Hacks: 100 Industrial-Strength Tips and Tools
- AFFORDABLE PRICES FOR QUALITY READS-GREAT VALUE FOR BOOK LOVERS!
- ECO-FRIENDLY OPTION: SAVE TREES BY CHOOSING USED BOOKS!
- UNIQUE FINDS: DISCOVER HIDDEN GEMS WITH EACH PURCHASE!


To change the MySQL database directory on XAMPP, you can follow these steps:
- Stop the MySQL server in XAMPP.
- Navigate to the XAMPP installation directory on your computer.
- Locate the "my.ini" file in the "xampp\mysql\bin" directory.
- Open the "my.ini" file with a text editor.
- Find the line that starts with "datadir=" in the "my.ini" file.
- Change the path after "datadir=" to the new directory where you want to store the MySQL databases.
- Save the changes to the "my.ini" file and close the text editor.
- Move the existing MySQL database directory to the new location.
- Start the MySQL server in XAMPP.
- Verify that the MySQL databases are now being stored in the new directory.
By following these steps, you can successfully change the MySQL database directory on XAMPP.
How to backup the mysql database before changing the directory on xampp?
To backup a MySQL database before changing the directory on XAMPP, you can use the mysqldump command in the Command Prompt or Terminal. Here's how you can do it:
- Open your Command Prompt or Terminal.
- Navigate to the XAMPP directory where the mysqldump command is located. This is usually located in the 'bin' folder of your XAMPP installation directory. For example, if your XAMPP is installed in the 'C:\xampp' directory, you can navigate to it by typing the following command:
cd C:\xampp\mysql\bin
- Once you are in the bin directory, you can use the mysqldump command to backup your MySQL database. The basic syntax of the mysqldump command is as follows:
mysqldump -u [username] -p [database_name] > [backup_file.sql]
Replace [username] with your MySQL username, [database_name] with the name of the database you want to backup, and [backup_file.sql] with the name you want to give to your backup file.
For example, if your username is 'root' and the database you want to backup is 'mydatabase', you can use the following command:
mysqldump -u root -p mydatabase > backup.sql
- Press Enter after typing the mysqldump command. You will be prompted to enter your MySQL password.
- Once you enter the password correctly, the backup process will begin, and the contents of your database will be stored in the specified backup file.
Remember to store the backup file in a safe location before proceeding to change the directory on XAMPP. This backup file can be used to restore your database if anything goes wrong during the directory change process.
How to optimize the database after changing the directory on xampp?
After changing the directory on XAMPP, it is important to optimize the database to ensure that it is running efficiently. Here are the steps to optimize your database:
- Access phpMyAdmin by going to http://localhost/phpmyadmin in your web browser.
- Select the database that you want to optimize from the list on the left-hand side.
- Click on the "Operations" tab at the top of the page.
- Under the "Table maintenance" section, you will see an option to "Optimize table". Click on this option to start the database optimization process.
- phpMyAdmin will then run the optimization process on the selected database tables. This may take some time depending on the size of your database.
- Once the optimization process is complete, you will see a message indicating that the tables have been optimized successfully.
By following these steps, you can optimize your database after changing the directory on XAMPP and ensure that it is running smoothly and efficiently.
What is the importance of backing up the mysql database before changing the directory on xampp?
Backing up the MySQL database before changing the directory on XAMPP is important because:
- Data protection: Backing up the database ensures that you have a copy of all your data in case something goes wrong during the directory change process. This way, you can easily restore your data if any errors or data loss occur.
- Prevent data loss: Changing the directory on XAMPP can sometimes lead to accidental deletion or loss of data. By backing up the database, you can prevent the risk of losing important information.
- Future references: Having a backup of your database allows you to refer back to previous data if needed. This can be helpful in tracking changes, troubleshooting issues, or restoring data in the future.
- Peace of mind: Knowing that your data is safely backed up can give you peace of mind during the directory change process. You can proceed with the changes confidently, knowing that your data is protected.
Overall, backing up the MySQL database before changing the directory on XAMPP is a crucial step to safeguard your data and ensure a smooth transition process.
What are the steps to follow when changing the mysql database directory on xampp for a live site?
- Backup your database: Before making any changes to your database, it's important to make a backup of all your data. This way, you can restore it in case anything goes wrong during the directory change process.
- Stop the MySQL server: In the XAMPP control panel, stop the MySQL server to prevent any data corruption while changing the database directory.
- Locate the existing MySQL data directory: The default data directory for MySQL in XAMPP is usually located in the "xampp/mysql/data" folder. Locate this folder on your system.
- Create a new data directory: Choose a new location on your system where you want to move the MySQL data directory. Create a new folder and name it something like "new_mysql_data".
- Copy the existing data directory: Copy all the files and folders from the existing MySQL data directory to the new directory you created in the previous step.
- Modify the MySQL configuration: Open the "my.ini" file located in the "xampp/mysql/bin" folder. Look for the "datadir" parameter and change the path to the new directory you created in step 4.
- Start the MySQL server: Launch the XAMPP control panel and start the MySQL server again. This will ensure that the changes to the data directory are applied.
- Test your site: Test your live site to make sure that everything is working correctly after changing the MySQL data directory.
By following these steps carefully, you should be able to successfully change the MySQL data directory for your live site on XAMPP.
