
Best Image Validation Tools to Buy in June 2026
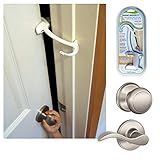
DOOR MONKEY Child Proof Door Lock & Pinch Guard - For Door Knobs & Lever Handles - Easy to Install - No Tools or Tape Required - Baby Safety Door Lock For Kids - Very Portable - Great for Dogs & Cats
-
QUICK, TOOL-FREE SETUP: INSTALLS IN SECONDS WITHOUT TOOLS OR TAPE.
-
DUAL SAFETY FEATURES: ACTS AS A LOCK AND PINCH GUARD FOR ADDED SAFETY.
-
UNIVERSAL FIT: WORKS WITH STANDARD DOOR KNOBS AND LEVER HANDLES.


Virginia Notarial Seal - Pink Notary Seal VA, Compliant with Virginia Notary Board, Ideal for Virginia Notary Public, 1-5/8 Dia Size - Essential Tool for Official Document Validation
-
PROFESSIONAL AUTHORITY: ELEVATE YOUR NOTARIZATION WITH A DISTINGUISHED SEAL.
-
ENHANCED SECURITY: FEATURES EMBOSSED DESIGN TO PREVENT FORGERY.
-
VIRGINIA COMPLIANT: MEETS ALL STATE REGULATIONS FOR OFFICIAL DOCUMENTS.
To check if a blob file is an image in Laravel, you can use the getimagesize() function. Here's an example:
- First, make sure you have the proper dependencies installed by running composer require ext-gd:* in your Laravel project's root directory.
- Next, you can use the getimagesize() function to check if the blob file is an image. Assuming you have the blob data stored in a variable called $blobData, you can do the following:
// Convert the blob data to a temporary file $tempFile = tempnam(sys_get_temp_dir(), 'image'); file_put_contents($tempFile, $blobData);
// Get the image size $imageInfo = getimagesize($tempFile);
// Check if it's an image $isImage = $imageInfo !== false;
// Delete the temporary file unlink($tempFile);
// Use the $isImage boolean to perform further operations if ($isImage) { // Blob file is an image // Perform necessary actions } else { // Blob file is not an image // Handle the case accordingly }
In the above code, we create a temporary file and store the blob data in it. Then, we use getimagesize() function to get the image size information. If the function returns false, it means that the file is not an image. We can then continue with our logic based on the value of the $isImage boolean.
Remember to handle the temporary file properly by deleting it in order to avoid cluttering your system.
What is the recommended way to store images as blob files in Laravel?
In Laravel, the recommended way to store images as blob files is by using the Storage facade and the put method. Here's how you can achieve that:
- Start by configuring your storage disk in the config/filesystems.php file. Here's an example using the public disk:
'disks' => [ 'public' => [ 'driver' => 'local', 'root' => public_path('storage'), 'url' => env('APP_URL').'/storage', 'visibility' => 'public', ], ],
- Next, you need to create a file input field in your HTML form to allow users to select and upload an image.
- In your controller, you can store the uploaded image in the storage disk using the put method.
use Illuminate\Support\Facades\Storage;
public function upload(Request $request) { // Validate the uploaded file $request->validate([ 'image' => 'required|image', ]);
// Store the uploaded image
$path = $request->file('image')->store('images');

// Get the full URL of the stored image
$url = Storage::url($path);

// You can save the $path or $url to your database if needed

// Redirect back or do something else
return redirect()->back()->with('success', 'Image uploaded successfully.');
}
- By default, the uploaded image will be stored in the configured disk's root directory (e.g., public/storage/images). You can change the directory by modifying the "images" parameter in the store method of $request->file('image')->store('images').
- Finally, you can use the Storage facade to retrieve and display the stored image by referencing the saved path or URL.
Remember to properly protect and validate user input to ensure secure and valid uploads.
What is the process to compress a blob image file in Laravel?
To compress a blob image file in Laravel, you can follow these steps:
- Install the "intervention/image" package using Composer:
composer require intervention/image
- Add the following line to the 'providers' array in the 'config/app.php' file:
Intervention\Image\ImageServiceProvider::class,
- Run the following command to publish the package configuration file:
php artisan vendor:publish --provider="Intervention\Image\ImageServiceProviderLaravel5"
- Open the 'config/image.php' file and make sure the 'driver' option is set to 'gd':
'driver' => 'gd',
- In your controller method where you handle the image upload, add the following code to compress the image:
use Intervention\Image\Facades\Image;
// ...
public function uploadImage(Request $request) { if ($request->hasFile('image')) { $image = $request->file('image'); $compressedImage = Image::make($image)->encode('jpg', 75);
    // Save the compressed image to storage or any other desired path
    $compressedImage->save('path/to/save/compressed\_image.jpg');

    // ... rest of your code ...
}
}
In the above code, we use the Intervention Image package to create an instance of the image and then use the encode method to compress it as a JPEG image format with a quality of 75. Finally, we save the compressed image to a specific path.
Remember to replace 'path/to/save/compressed_image.jpg' with the desired path to save the compressed image.
That's it! Now your blob image file will be compressed before saving it to your desired location.
What are the security considerations when handling blob image files in Laravel?
When handling blob image files in Laravel, there are several security considerations that should be taken into account:
- File Validation: Perform validation checks on the uploaded image file to ensure it meets the required format, size limits, and MIME type. Laravel provides built-in validation methods like mimes and max for this purpose.
- File Size Limit: Specify a maximum file size limit for the uploaded image to prevent the server from being overwhelmed with large files. Additionally, consider implementing client-side validation to check the file size before uploading it.
- File Naming: Generate a unique and secure filename for the image file to prevent any conflicts or security vulnerabilities. Avoid using user input directly as the filename and instead generate a random name or use a UUID.
- Image Processing Libraries: When manipulating or processing the image files, consider using trusted libraries like Intervention Image that have built-in security measures to prevent vulnerabilities like remote code execution or script injection.
- File Permissions: Ensure that the proper file permissions are set for the uploaded image files. Restrict public access to the files and store them outside of the publicly accessible web directory to prevent direct access.
- Secure File Storage: Store the image files in a secure location, such as a private directory outside the web root, to prevent unauthorized access or direct link sharing.
- Content Security Policy (CSP): Implement a Content Security Policy to restrict the sources from which images can be loaded. This prevents potential malicious content from being loaded by restricting image requests to trusted sources only.
- Image Size & Memory Limit: Consider setting limits on the image dimensions and memory usage during image processing to prevent potential DoS attacks or server resource exhaustion.
- CSRF Protection: When handling image uploads via forms, ensure that Laravel's CSRF protection is enabled to prevent cross-site request forgery attacks.
- Secure Image Delivery: Implement secure image delivery mechanisms, such as serving images over HTTPS to prevent Man-in-the-Middle attacks, or consider using a content delivery network (CDN) to offload image serving and improve performance.
By following these security considerations, the risk of vulnerabilities or attacks related to handling blob image files in Laravel can be significantly reduced.