
Best Laravel Image Storage Solutions to Buy in June 2026
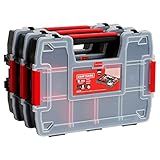
CRAFTSMAN Storage Organizer, Small Parts Organizer, 3-Packs with 10-Compartments, Lid Includes Secure Latch (CMST60964M)
- CUSTOMIZABLE DIVIDERS PERFECT FOR SMALL PARTS AND TOOLS STORAGE.
- SECURE LATCHES ENABLE STACKING AND KEEP CONTENTS SAFE INSIDE.
- INTERLOCKING LID DESIGN PREVENTS MOVEMENT OF SMALL PARTS.


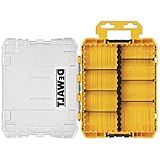
DEWALT Tool Box, Tough Case Organizer, Medium, 8-Compartments, for Small Tools and Accessories (DWAN2190)
-
OPTIMIZE STORAGE SPACE WITH OUR CONNECTABLE ACCESSORY SYSTEM!
-
PATENTED DESIGN FOR EASY BIT REMOVAL AND CUSTOMIZABLE PLACEMENT.
-
CLEAR LID FOR QUICK ACCESS AND SECURE CLIP LATCH FOR SAFETY.
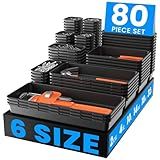
A-LuGei 【𝟲 𝗦𝗜𝗭𝗘】 Tool Box Organizer【Fits 100+ Tools】 Black Garage Organization and Storage Tray Divider Set, Desk Drawer Organizer, Toolbox for Rolling Tool Chest Cart WorkBench Small Part
-
VERSATILE SIZES: 80PCS IN 6 SIZES FOR ANY STORAGE NEED.
-
ULTRA-DURABLE: BUILT STRONG, HOLDS 220 LBS WITHOUT CRACKING.
-
CUSTOMIZABLE ORGANIZATION: SNAP, LOCK, AND MIX FOR NEAT ARRANGEMENTS.
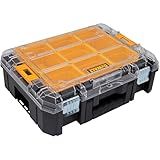
DEWALT TSTAK Tool Organizer, Small Parts and Screw Organizer Tool Box with Removable Compartments, (DWST17805)
- STRONG 44 LB LOAD CAPACITY FOR HEAVY TOOLS AND ACCESSORIES.
- CLEAR LID DESIGN FOR QUICK ACCESS AND VISIBILITY OF CONTENTS.
- EASY PORTABILITY WITH A WIDE HANDLE AND SECURE STACKING LATCHES.
Keter Masterloader Resin Rolling Tool Box with Locking System and Removable Bins – Perfect Organization and Storage Chest for Power Drill, Tape Measure, and Screwdriver Set, Black
- DURABLE DESIGN: ALL-WEATHER RESIN WITH 66 LB. CAPACITY FOR TOUGH JOBS.
- MOBILITY MADE EASY: LOCKING MECHANISM & HEAVY-DUTY WHEELS FOR TRAVEL.
- AMPLE STORAGE: INCLUDES 6 REMOVABLE BINS FOR ORGANIZED TOOL ACCESS.
Portable Tool Box - Small Parts Organizer with Drawers and Customizable Compartments for Hardware, Fishing Tackle, Beads, or Crafts by Stalwart (Gray)
-
MAXIMIZE SPACE: 4 REMOVABLE DRAWERS FOR CUSTOMIZABLE ORGANIZATION.
-
TRAVEL READY: LIGHTWEIGHT, SECURE DESIGN WITH CONVENIENT CARRYING HANDLE.
-
BUILT TO LAST: DURABLE, HIGH-IMPACT POLYPROPYLENE FOR LONG-LASTING USE.
CRAFTSMAN 10-Compartment Small Tool Storage Organizer, Plastic (CMST14021)
- CUSTOMIZABLE DIVIDERS FOR ANY TOOL OR PART SIZE NEEDED.
- STACKABLE DESIGN FOR SECURE TRANSPORT AND SPACE-SAVING.
- ROBUST LID STRUCTURE ENSURES RELIABLE SECURITY AND PROTECTION.
Makitoyo MP009 Hardware & Parts Organizers Versatile and Durable Storage Toolbox, 4PCS Set
- VERSATILE 4-PIECE SET FOR ALL YOUR HARDWARE AND STORAGE NEEDS.
- CUSTOMIZABLE DIVIDERS TO ORGANIZE SMALL PARTS EFFICIENTLY.
- DURABLE PP PLASTIC ENSURES LONG-LASTING USE FOR EVERY PROJECT.
WORKPRO Small Parts Organizer 3 Pieces, Portable Stackable Hardware Storage Case with Removable Dividers, Clear Lid Tool Box Organizer for Screws, Bolts, Nails, Craft Supplies and Small Accessories
- DURABLE MATERIALS ENSURE LONG-LASTING PERFORMANCE EVERY USE.
- STACKABLE DESIGN SAVES SPACE AND ENHANCES PORTABILITY EASILY.
- CUSTOMIZABLE DIVIDERS ADAPT TO YOUR STORAGE NEEDS EFFORTLESSLY.
In Laravel, there are multiple ways to store images and handle file uploads. One common approach is using the Laravel Storage facade, which provides a simple and consistent way to interact with various file storage systems.
To store images in Laravel, you can follow these steps:
- Configuring Storage Drivers: First, make sure to configure the appropriate drivers in the config/filesystems.php file. Laravel supports various storage drivers such as local, S3, Rackspace, and more. For example, if you want to use the local driver to store images on the local file system, set the driver option to 'local'.
- Creating A Form: Create a form in your view to allow users to upload images. Make sure to set the form's enctype attribute to "multipart/form-data" so that it supports file uploads.
- Handling Image Upload: In your controller, define a method to handle the image upload logic. You can use the store method provided by the Storage facade to store the uploaded image in the desired location. For example, if you want to store the image in the public/images directory, you can use:
$request->file('image')->store('public/images');
- Retrieving The Stored Image: If you need to retrieve and display the stored image, you can use the url method provided by the Storage facade. For example, to generate the URL for an image stored in the public/images directory, you can use:
$url = Storage::url('public/images/filename.jpg');
This will give you the public URL to access the image.
- Additional Options: Laravel's Storage facade offers various additional functionalities like renaming files, deleting files, checking file existence, and more. You can explore the Laravel documentation for more details on these features.
Remember to always handle validation and secure file uploads by checking file types, restricting file sizes, and sanitizing user inputs to prevent any security vulnerabilities.
Is it possible to store images in a separate database server in Laravel?
Yes, it is possible to store images in a separate database server in Laravel. Laravel provides a flexible file storage system called "Flysystem" that supports various drivers, including local, S3, FTP, and more.
To store images in a separate database server, you can choose a suitable driver like S3, which is a cloud storage service provided by Amazon. This allows you to store images in a remote server rather than storing them directly in the database.
Here are the steps to store images in a separate database server using Laravel and S3:
- Set up an S3 bucket on Amazon AWS console and obtain the access key, secret key, and bucket name.
- Install the aws-sdk-php package using Composer.
- Configure the S3 driver in your config/filesystems.php file:
'disks' => [ 's3' => [ 'driver' => 's3', 'key' => env('AWS_ACCESS_KEY_ID'), 'secret' => env('AWS_SECRET_ACCESS_KEY'), 'region' => env('AWS_DEFAULT_REGION', 'us-east-1'), 'bucket' => env('AWS_BUCKET'), ], ],
- Set the required environment variables (AWS_ACCESS_KEY_ID, AWS_SECRET_ACCESS_KEY, AWS_DEFAULT_REGION, and AWS_BUCKET) in your .env file or any other environment configuration file.
- Now, you can use the S3 driver to store images by specifying the disk as 's3' in your code:
use Illuminate\Support\Facades\Storage;
Storage::disk('s3')->put('path/to/image.jpg', $imageData);
- With this setup, the images will be stored in the configured S3 bucket instead of the default local storage.
Keep in mind that storing images in a separate database server like S3 provides scalability, durability, and availability benefits compared to storing them directly in the database, which is typically meant for textual and structural data.
What Laravel packages can help with image storage and manipulation?
There are several Laravel packages that can help with image storage and manipulation. Here are some popular ones:
- Intervention Image: This is a popular image handling and manipulation package for Laravel. It provides a fluent interface for image manipulation tasks such as resizing, cropping, rotating, and more. It also supports saving images to different locations such as the local disk, Amazon S3, and more.
- Flysystem: While not specifically an image manipulation package, Flysystem is a file storage abstraction library that can be used as a driver for various file storage providers, including local disks and cloud storage services like Amazon S3 and Google Cloud Storage. It can be combined with other image manipulation packages to store and retrieve images.
- Spatie Image Optimizer: This package provides a simple way to optimize images by reducing their size without significantly affecting their quality. It can optimize both local and remote images and supports various optimization libraries like JpegOptim, Pngquant, and OptiPNG.
- Glide: Glide is an efficient on-demand image manipulation package for Laravel. It generates optimized and cached images on the fly, allowing you to resize, crop, and apply filters to images dynamically. It supports various image manipulation parameters and outputs optimized images quickly.
- AWS SDK for PHP: If you are using Amazon S3 for image storage, the AWS SDK for PHP provides a Laravel-compatible package with comprehensive features for interacting with Amazon S3. It allows you to upload, download, and manage images stored on Amazon S3 easily.
These packages provide various capabilities for handling image storage and manipulation in Laravel. You can choose the ones that best suit your requirements and integrate them into your Laravel application.
What are some common ways to store images in Laravel?
There are several common ways to store images in Laravel:
- Local Storage: Laravel provides the default storage driver as local storage, where the images are stored in the local filesystem. You can store images in a designated folder within the public or storage directory of your Laravel application.
- Cloud storage: Laravel has built-in support for popular cloud storage services like Amazon S3, Google Cloud Storage, and Rackspace Cloud Storage. You can configure your application to store images directly to these cloud storage providers, enabling scalability, redundancy, and easy access to the images from anywhere.
- Database Storage: In some cases, you may choose to store the images directly in your database. Laravel supports database storage by using the BLOB data type to store the image binary data. However, this approach is not recommended for large-scale applications as it can affect performance and generate larger database sizes.
- External Image Hosting: Laravel allows you to store images on third-party image hosting platforms like Imgur or Cloudinary. You can use the API provided by these platforms to upload and manage the images, reducing the burden on your application server.
It's important to choose the right storage mechanism based on your application's requirements, scalability needs, and performance considerations.
How can I implement image thumbnail generation in Laravel?
To implement image thumbnail generation in Laravel, you can follow these steps:
- Install the Intervention Image package by running the following command:
composer require intervention/image
- After the package is installed, open the config/app.php file and add the following line to the providers array:
Intervention\Image\ImageServiceProvider::class,
- Also, add the following line to the aliases array in the same config/app.php file:
'Image' => Intervention\Image\Facades\Image::class,
- Create a new route in your routes/web.php file to handle the thumbnail generation. For example:
Route::get('/thumbnails/{filename}', 'ThumbnailController@show')->name('thumbnails.show');
- Next, create a new controller by running the following command:
php artisan make:controller ThumbnailController
- Open the ThumbnailController.php file and add the necessary import statements at the top:
use Illuminate\Support\Facades\Storage; use Intervention\Image\Facades\Image;
- In the show() method of the ThumbnailController, retrieve the original image and generate the thumbnail using Intervention Image:
public function show($filename) { $path = storage_path("app/public/images/$filename"); // Path to the original image
if (!Storage::disk('public')->exists("thumbnails/$filename")) {
    $image = Image::make($path)->fit(200, 200); // Generate a 200x200 thumbnail
    $image->save(storage\_path("app/public/thumbnails/$filename"));
}

$file = Storage::disk('public')->get("thumbnails/$filename");

return response($file, 200)->header('Content-Type', 'image/jpeg');
}
- Finally, store your original images in the storage/app/public/images directory and make sure you have a storage/app/public/thumbnails directory for storing the generated thumbnails.
Now you can access your image thumbnails by using the route() function with the appropriate filename:
Make sure to adjust the code according to your needs and folder structure.
Can Laravel automatically generate unique filenames for uploaded images?
Yes, Laravel can automatically generate unique filenames for uploaded images using the store() method from the UploadedFile or File facade. By default, Laravel stores the uploaded files in the storage/app/public directory and generates a unique filename using the hash method of the Str class.
Here's an example of how to store an uploaded image and generate a unique filename:
use Illuminate\Support\Facades\Storage; use Illuminate\Support\Str;
...
if ($request->hasFile('image')) { $image = $request->file('image');
// Generate a unique filename
$filename = Str::hash($image->getClientOriginalName()) . '.' . $image->getClientOriginalExtension();

// Store the uploaded file
Storage::disk('public')->putFileAs('images', $image, $filename);

// You can retrieve the full path of the stored image using the storage disk
$path = Storage::disk('public')->path('images/' . $filename);
}
In this example, the store() method automatically generates a unique filename for the uploaded image using the hash method from the Str class. It appends the original extension of the file to maintain its format. The putFileAs() method stores the image in the images directory inside the public disk.
Make sure to import the required classes and modify the code based on your specific needs, such as the destination directory or disk you want to use for storing the uploaded images.
How can I display images stored in Laravel in my views?
To display images stored in Laravel in your views, you can follow the steps below:
- First, make sure you have stored the images in the appropriate directory within your Laravel project. By convention, you can store them in the public folder. For example, if you have an image named example.jpg, place it in the public/images directory.
- In your Laravel view file, you can use the asset() helper function to generate the URL for the image. For example, if you want to display the example.jpg image, you can use the following code in your view file: Here, asset('images/example.jpg') generates the URL for the image based on its location in the public directory.
- After adding the above code, when you load the view, Laravel will generate the URL for the image, and the image will be displayed in the browser.
Note: If your Laravel project is not located in the web server's document root, you might need to create a symbolic link using the php artisan storage:link command. This will create a symbolic link from the public/storage directory to the storage/app/public directory, allowing you to access files stored in the storage folder.
Can Laravel handle file validation for uploaded images?
Yes, Laravel can handle file validation for uploaded images. Laravel provides the validate() method which is used to validate incoming HTTP requests. You can use this method to define validation rules for uploaded images.
To validate the uploaded image, you can use the dimensions rule to check the width and height of the image, the mimes rule to check the file extension, and the max rule to check the file size.
Here's an example of how you can validate an uploaded image in Laravel:
$request->validate([ 'image' => 'required|image|dimensions:min_width=100,min_height=100|mimes:jpeg,png|max:2048', ]);
In this example, the image field is required and must be an image file. It should have a minimum width and height of 100 pixels, be a JPEG or PNG file, and have a maximum size of 2MB (2048 kilobytes).
If the validation fails, Laravel will automatically redirect back with the validation errors. You can then display these errors in your views using the errors variable.
@if ($errors->any()) @foreach ($errors->all() as $error) {{ $error }} @endforeach @endif
You can also customize the error messages by defining them in the validation.php language file or by using the messages() method in your validation rules.
Overall, Laravel provides a convenient and flexible way to handle file validation for uploaded images.