Best WordPress Tools to Buy in February 2026

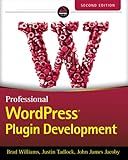
Professional WordPress Plugin Development, 2nd Edition


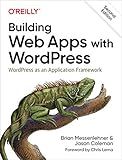
Building Web Apps with WordPress: WordPress as an Application Framework


WordPress Power Toolkit: Harness AI to build next-level websites


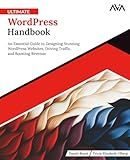
Ultimate WordPress Handbook: An Essential Guide to Designing Stunning WordPress Websites, Driving Traffic, and Boosting Revenue (English Edition)


WordPress Plugins: The 672 Best Free WordPress Plugins for Developing Amazing and Profitable Websites


WordPress Plugin Development Cookbook: Create powerful plugins to extend the world's most popular CMS, 2nd Edition


WordPress 5 Complete: Build beautiful and feature-rich websites from scratch, 7th Edition


Professional WordPress: Design and Development


101 WordPress Plugins… and Then Some : Build your dream website 2023


The Ultimate WordPress & WooCommerce Handbook: From Setup to Success in Online Selling


Creating a custom 404 error page in WordPress allows you to design a more user-friendly and personalized page for visitors who encounter broken or unavailable links. Here's how you can do it:
-
Access your WordPress dashboard by logging in as an administrator.
-
Go to "Appearance" and click on "Editor."
-
In the list of files on the right, locate and click on "404.php" or "404.php Template" if it's available. If you don't see it, proceed to the next step.
-
If there is no existing 404.php file, click on "Theme Functions" or "functions.php" in the list of files.
-
Insert the following code at the end of the file:
Oops! Page not found.
Sorry, but the page you requested could not be found.
Feel free to modify the
heading and
paragraph to match your preferred error message.
===============================================================
-
Click "Update File" to save the changes.
Now, when visitors encounter a 404 error on your WordPress website, they will see the custom error page you created instead of a generic error message. Remember to save a backup of your theme files before making any modifications to ensure you can revert the changes if needed.
How to add a search bar to a custom 404 error page in WordPress?
To add a search bar to a custom 404 error page in WordPress, you can follow these steps:
- Create a custom 404 error page template: Connect to your WordPress website via FTP or use a file manager in your hosting dashboard. Locate the theme folder you are using (e.g., wp-content/themes/your-theme). Create a new file and name it "404.php."
- Open the "404.php" file in a code editor and insert the following code:
            <h2><?php esc\_html\_e( 'Search for:', 'your-theme' ); ?></h2>
            <?php get\_search\_form(); ?>
        </div><!-- .page-content -->
    </section><!-- .error-404 -->
</main><!-- #main -->
This code includes a search bar using the get_search_form() function.
- Save the file and upload it to your theme's directory.
- Visit your website's URL followed by a non-existent page to observe the custom 404 error page with a search bar.
How can I make a custom 404 page in WordPress without coding?
To create a custom 404 page in WordPress without coding, you can follow these steps:
- Install and activate the "404page – your smart custom 404 error page" plugin from the WordPress Plugin Directory.
- Once activated, go to "Settings" > "404 Error Page" in your WordPress dashboard.
- In the plugin settings page, you can customize your 404 page by adding a title, content, and design elements. You have various options like adding text, images, videos, shortcodes, or even using the Gutenberg editor to design the page.
- Preview your changes by clicking the "Preview" button. If you're satisfied, save your changes.
- Finally, make sure to test your new 404 page by intentionally typing a non-existent URL on your website or using a website testing tool.
Note: The specific steps might vary depending on the plugin you choose, but the general concept remains the same. You can explore alternative "custom 404 page" plugins available in the WordPress Plugin Directory as well.
How to customize the 404 error page in WordPress?
To customize the 404 error page in WordPress, you can follow these steps:
- Login to the WordPress admin dashboard.
- Go to Appearance > Theme Editor.
- On the right-hand side, you will see the list of theme files. Look for the "404.php" file.
- If the 404.php file does not exist, you can create a new one. Click on "Create New File" on the top right corner.
- Name the new file "404.php" and click on the "Create" button.
- Once you have located or created the 404.php file, click on it to open the file editor.
- Inside the file editor, you can modify the HTML and PHP code to customize the appearance and content of the 404 error page.
- You can add your own content, images, or styling to make the page match your website's design.
- After making the desired customizations, click on the "Update File" button to save your changes.
Note: It is recommended to backup your theme files before making any changes to avoid any issues. Additionally, if you are using a child theme, it is best to copy the 404.php file from the parent theme to the child theme directory and make the modifications there to ensure your changes are not lost during theme updates.
What is the role of call-to-action buttons on a custom 404 error page?
The role of call-to-action buttons on a custom 404 error page is to provide users with alternative options or pathways to navigate through the website when they encounter a broken or non-existent page. These buttons aim to retain user engagement, prevent them from leaving the website, and guide them towards relevant content or actions. By offering suggestions such as returning to the homepage, exploring popular pages, searching for specific content, or contacting the website administrator, call-to-action buttons help improve the user experience, reduce frustration, and encourage further interaction with the website.
What is the importance of keeping the custom 404 error page within the main website design?
Keeping a custom 404 error page within the main website design is important for several reasons:
- User Experience: When a user encounters a broken link or a non-existent page, they are usually redirected to a default 404 error page provided by the server. This default page often lacks branding, navigation links, or any relevant information, leading to a poor user experience. By keeping a custom 404 error page within the main website design, you can maintain consistency, provide a branded experience, and offer helpful guidance to the users.
- Retaining Users: A well-designed custom 404 error page minimizes frustration and guides users back to your website. By providing clear navigation links, a search bar, or relevant suggestions, users are more likely to explore further and find the content they were looking for. This reduces bounce rates, increases user engagement, and helps retain potential customers.
- Branding and Messaging: A custom 404 error page allows you to reinforce your brand identity by incorporating your logo, color scheme, and overall design elements. It provides an opportunity to showcase your brand's personality, maintain consistency, and communicate your brand's voice through engaging content or clever error messages. This keeps your brand at the forefront, even in the face of errors.
- SEO Benefits: From an SEO perspective, a custom 404 error page helps in retaining the link equity of broken or dead links. When search engines encounter broken links, they follow the 404 status code. By guiding users to relevant content or providing search options on the custom error page, you can ensure that link equity is redirected back into your website instead of being lost.
- Error Tracking and Analysis: By integrating error tracking tools or analytics into your custom 404 error page, you can gather valuable insights about broken links, user behavior, common errors encountered, and the paths users take to navigate back to your site. This data can help identify patterns, prioritize fixes, and improve the overall user experience.
In summary, keeping a custom 404 error page within the main website design is important to optimize user experience, retain users, strengthen branding, enhance SEO, and gather valuable insights for website improvement.
