Best Chart.js Resources to Buy in June 2026

Learning Resources Good Job Reward Chart - 91 Piece Set, Custom Magnetic Chore and Responsibility Chart for Kids, Chore Magnets for Toddlers, Kids Job Chart
- ENGAGE KIDS WITH FUN MAGNETIC TASKS AND REWARD SYSTEM!
- 90-PIECE SET FOR CUSTOMIZABLE GOALS AND DAILY CHORES.
- PERFECT GIFT FOR LEARNING: HOLIDAYS, BIRTHDAYS, AND MORE!


Learning Resources Magnetic Pocket Chart Squares - Set of 4, Classroom Pocket Charts, Classroom/Teacher Organizer, Classroom Supplies, Homeschool Supplies, Teaching Materials,Back to School Supplies
- ENGAGE STUDENTS WITH MAGNETIC CHARTS FOR INTERACTIVE LEARNING.
- VERSATILE TOOL: PERFECT FOR GROUP ACTIVITIES AND INDIVIDUAL LESSONS.
- DURABLE DESIGN WITH 5 CLEAR POCKETS FOR ENDLESS TEACHING POSSIBILITIES.
Learning Resources Junior Organization Station, Classroom Pocket Charts, Back To School Supplies, Homeschool
- BOOST HAND-WASHING TRACKING & BEHAVIOR MANAGEMENT IN CLASSROOMS!
- SPACE-SAVING SOLUTION FOR ORGANIZED CLASSROOMS AND HOMES!
- EXCEPTIONAL VALUE WITH 32 NAME CARDS & DOUBLE-SIDED TITLES INCLUDED!
Learning Resources Hundred Pocket Chart, 120 Cards, Grades K+, Classroom Counting Organizer,Back to School Supplies,Teacher Supplies
- EFFORTLESSLY TEACH MATH CONCEPTS WITH OUR WASHABLE POCKET CHART!
- ENGAGE STUDENTS WITH 120 COLORFUL CARDS FOR INTERACTIVE LEARNING.
- BOOST CLASSROOM ORGANIZATION WITH TRUSTED RESOURCES FOR 40 YEARS!

Pajean 253 Pcs Student Behavior Pocket Chart for Classroom Behavior Management Resources Track Reward Bulletin Board Customizable Class Jobs for Home Preschool Daycare Back to School Teacher Supplies
-
BRIGHT, ENGAGING COLORS: CAPTIVATES STUDENTS TO ENHANCE BEHAVIOR MANAGEMENT.
-
DURABLE, WATERPROOF MATERIALS: ENSURES LONG-LASTING CLASSROOM DECORATION USE.
-
VERSATILE CHART DESIGN: IDEAL FOR REWARDS, JOBS, AND ORGANIZATIONAL NEEDS.
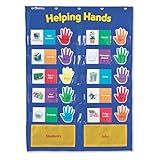
Learning Resources Helping Hands Pocket Chart, 30 Card, Classroom Organization, Teacher Accessories,Teacher Supplies for Classroom,Back to School Supplies
- FOSTER TEAMWORK WITH CUSTOMIZABLE CLASS JOB CARDS FOR STUDENTS.
- BOOST SELF-ESTEEM AS STUDENTS TAKE RESPONSIBILITY IN THE CLASSROOM.
- ENHANCE LEARNING WITH TRUSTED TOOLS FROM LEARNING RESOURCES SINCE 1984.
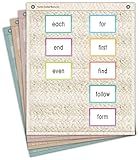
Teacher Created Resources Woven Magnetic Mini Pocket Charts (14" x 17") (TCR20108)
-
VIBRANT DESIGNS KEEP STUDENTS ENGAGED IN LEARNING ACTIVITIES.
-
VERSATILE USE: PERFECT FOR WHOLE-CLASS OR SMALL GROUP LESSONS.
-
HYGIENIC AND EASY TO CLEAN-IDEAL FOR SAFE CLASSROOM SETTINGS.
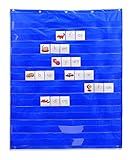
Learning Resources Standard Pocket Chart, Classroom Supplies, Homeschool, Gifts for Teachers, Pocket Chart, Ages 3+
-
ENGAGING HANDS-ON ACTIVITIES ENHANCE STUDENT LEARNING AND PARTICIPATION.
-
FEATURES 10 LARGE SEE-THROUGH POCKETS FOR VERSATILE TEACHING OPTIONS.
-
IDEAL GIFT FOR KIDS, HIGHLY RECOMMENDED FOR HOLIDAYS AND HOMESCHOOL USE!
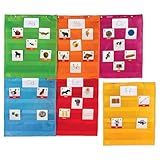
Learning Resources Magnetic Pocket Chart Squares, Classroom/Teacher Organizer, Various Colors, Back to School Resources for Teachers, All Grades, Set of 6
- VIBRANT COLORS ENHANCE ORGANIZATION AND BOOST PRODUCTIVITY!
- DURABLE POCKETS FIT PENS, PAPERS, AND MORE FOR ULTIMATE CONVENIENCE!
- VERSATILE HANGING OPTIONS FOR CUSTOMIZABLE CHART ARRANGEMENTS!
Teacher Created Resources Colorful Numbers 1-100 Chart, 17" x 22"
- DURABLE 17 X 22 CHARTS FOR MAXIMUM VISIBILITY IN ANY SETTING.
- ENGAGING LESSONS AND ACTIVITIES INCLUDED ON THE BACK.
- STANDARD SIZE FOR EASY INTEGRATION INTO ANY LEARNING ENVIRONMENT.
To create a time series line graph in chart.js, you first need to include the chart.js library in your HTML file. Next, you will need to create a canvas element and give it a unique ID. After that, you can write a JavaScript code to configure the line chart by specifying the type as 'line', providing data as an array of objects with x and y values, and setting options such as scales, title, and tooltips. Finally, you can instantiate a new Chart object with the canvas element and configuration options. When you render the HTML file in a browser, you will see a line graph displaying the time series data according to your configuration.
How to customize the appearance of a line graph in Chart.js?
To customize the appearance of a line graph in Chart.js, you can use various options and configuration settings available in the Chart.js library. Here are some steps you can follow to customize the appearance of a line graph:
- Set options for the line graph: You can customize the appearance of the line graph by setting various options such as the title, legend, tooltips, scales, and grid lines. These options can be defined in the options object when creating the chart.
- Customize the line style: You can customize the style of the line in the line graph by setting properties such as color, thickness, and type of line (solid, dashed, etc.). You can use the 'borderColor' and 'borderWidth' properties to customize the line style.
- Customize the data points: You can customize the appearance of the data points in the line graph by setting properties such as the color, size, and shape of the data points. You can use the 'pointBackgroundColor', 'pointBorderColor', and 'pointRadius' properties to customize the data points.
- Add animations: You can add animations to the line graph to make it more dynamic and engaging. You can use the 'animation' property to customize the animation settings such as duration and easing.
- Use plugins: Chart.js has various plugins that you can use to further customize the appearance of the line graph. For example, you can use the annotation plugin to add annotations to the line graph or the datalabel plugin to display labels on the data points.
Overall, customizing the appearance of a line graph in Chart.js involves exploring and utilizing the various options and settings available in the library to achieve the desired visual result. Experimenting with different configurations and settings can help you create a unique and visually appealing line graph.
What is the role of interpolation in creating a smooth line graph?
Interpolation plays a crucial role in creating a smooth line graph by filling in the gaps between data points with estimated values. This helps to create a continuous and visually appealing line that represents the trend or pattern of the data more accurately. Interpolation methods such as linear interpolation, polynomial interpolation, or cubic spline interpolation can be used to connect the data points in a way that minimizes sharp angles or abrupt changes in the graph, resulting in a smoother and more understandable representation of the data.
How to add labels to the x-axis in Chart.js?
To add labels to the x-axis in Chart.js, you can use the "labels" option within the "xAxis" configuration of your chart. Here's an example:
var myChart = new Chart(ctx, { type: 'bar', data: { labels: ['January', 'February', 'March', 'April', 'May'], datasets: [{ label: 'Sales', data: [150, 200, 250, 180, 220] }] }, options: { scales: { xAxes: [{ ticks: { beginAtZero: true } }], yAxes: [{ ticks: { beginAtZero: true } }] } } });
In this example, the "labels" array contains the labels for the x-axis (i.e. January, February, March, April, May). These labels will be displayed on the x-axis of the chart. You can customize the appearance of the x-axis labels further by adjusting the ticks configuration within the "xAxes" option in the scales configuration.
How to install Chart.js in my project?
To install Chart.js in your project, you can follow these steps:
- Download Chart.js from the official website: https://www.chartjs.org/
- Once you have downloaded the Chart.js library, move the file to your project directory.
- Include the Chart.js file in your HTML document by adding the following script tag in the section of your HTML document:
Replace "path/to/chart.min.js" with the actual path to the Chart.js file in your project directory.
- Now you can start using Chart.js in your project by creating a new chart instance. You can refer to the Chart.js documentation for examples and usage instructions: https://www.chartjs.org/docs/latest/
- You can also install Chart.js via npm or yarn by running the following commands in your project directory:
npm install chart.js
or
yarn add chart.js
After installing Chart.js via npm or yarn, you can import it into your project using:
import Chart from 'chart.js';
That's it! You have now successfully installed Chart.js in your project and can start creating interactive and visually appealing charts.
How to format the date on the x-axis in Chart.js?
To format the date on the x-axis in Chart.js, you can use the 'options' object to configure the scales of the chart. Here's an example code snippet that demonstrates how to format the date on the x-axis:
var ctx = document.getElementById('myChart').getContext('2d'); var myChart = new Chart(ctx, { type: 'line', data: { labels: ['2021-01-01', '2021-01-02', '2021-01-03', '2021-01-04', '2021-01-05'], datasets: [{ label: 'Sales', data: [12, 19, 3, 5, 2], backgroundColor: 'rgba(255, 99, 132, 0.2)', borderColor: 'rgba(255, 99, 132, 1)', borderWidth: 1 }] }, options: { scales: { x: { type: 'time', time: { unit: 'day', displayFormats: { day: 'YYYY-MM-DD' } } } } } });
In this code snippet, we're using the 'time' type for the x-axis scale and setting the 'unit' to 'day'. We're also using the 'displayFormats' option to specify the date format as 'YYYY-MM-DD'. You can customize the date format as per your requirements by changing the 'displayFormats' option.
How to add data points to the line graph in Chart.js?
To add data points to a line graph in Chart.js, you need to provide the data in an array format within the 'data' property of the dataset object. Each data point should be an object with 'x' and 'y' properties representing the x and y coordinates on the graph.
Here's an example of how to add data points to a line graph in Chart.js:
var ctx = document.getElementById('myChart').getContext('2d'); var myLineChart = new Chart(ctx, { type: 'line', data: { datasets: [{ label: 'My Dataset', data: [ { x: 0, y: 10 }, { x: 1, y: 20 }, { x: 2, y: 30 }, { x: 3, y: 25 }, { x: 4, y: 35 } ] }] }, options: { // Additional options can be added here } });
In the above code snippet, we have added data points with x and y values to the 'data' array within the dataset object. You can add as many data points as needed to represent your data on the line graph.
Remember that Chart.js offers a wide range of options to customize your line graph, including colors, labels, tooltips, and more. You can explore the Chart.js documentation to learn more about the available customization options.