Best Chart Management Tools to Buy in June 2026

General Tools 715 Tap and Drill Reference Table
- DUAL-SIDED DESIGN: GET BOTH TAP DRILL CHARTS AND CONVERSIONS IN ONE TOOL!
- PRECISE MEASUREMENTS: 6-INCH RULER GRADUATED IN 64THS FOR ACCURACY.
- UNIVERSAL COMPATIBILITY: WORKS WITH VARIOUS THREAD TYPES FOR VERSATILITY.


NELOMO 11.8” X 7.9” Toolbox Reference Card Toolbox Accessories Conversion Chart Card SAE Metric Ruler Standard Metric Conversion Charts Tap Drill Sizes Wrench Conversion Chart
- ALL-IN-ONE REFERENCE: CONVERT SAE/METRIC, FIND DRILL SIZES EFFORTLESSLY!
- BUILT TO LAST: DURABLE, LAMINATED CARD WITHSTANDS HEAVY TOOL USE.
- PORTABLE & VERSATILE: PERFECT FOR GARAGE OR ON-THE-GO TOOLBOXES!
Rose Book of Bible Charts, Maps, and Time Lines
The Living Legacy of Trauma Flip Chart: A Psychoeducational In-Session Tool for Clients and Therapists
All-in-One Quilter's Reference Tool: Updated
- COMPREHENSIVE GUIDE FOR ALL QUILT TECHNIQUES AND TIPS.
- PORTABLE DESIGN FOR QUILTERS ON THE GO, EASY TO USE AND CARRY.
- UPDATED CONTENT WITH THE LATEST TRENDS AND TOOLS FOR QUILTERS.
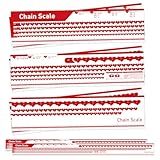
Maitys 2 Pack Chainsaw Chain Measuring Chart Scale Drive Link Measuring Chart Chainsaw Chain Alignment Tool
- PORTABLE DESIGN: CARRY TWO MEASURING CHARTS FOR CONVENIENCE ANYWHERE.
- DURABLE MATERIAL: WATERPROOF, TEAR-RESISTANT, AND EASY TO CLEAN FOR LONGEVITY.
- USER-FRIENDLY: CLEAR SCALE AND SIMPLE OPERATION FOR QUICK, ACCURATE RESULTS.
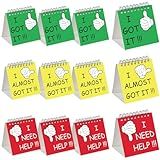
Harloon 24 Pcs I Need Help Mini Flip Chart Signs Self Assessment Cards Behavior Management Classroom Tools for Kids Teachers Classroom School Behavior Educational and Learning Activities Supplies
- 24 COLORFUL TOOLS FOSTER BETTER CLASSROOM COMMUNICATION AND MANAGEMENT.
- DURABLE DESIGN ENSURES LONGEVITY AND EASY VISIBILITY FOR TEACHERS.
- COMPACT SIZE MAXIMIZES CLASSROOM SPACE WHILE ENHANCING ORGANIZATION.
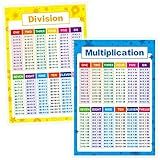
SpriteGru Laminated Educational Math Posters, Multiplication and Division Math Learning Tools Educational Table Chart Posters for Kids, Elementary Middle School Classroom (2 pieces)
- DURABLE, ERASABLE POSTERS ENSURE A LONG-LASTING, CLEAN LEARNING EXPERIENCE.
- EYE-CATCHING DESIGN WITH LARGE FONTS KEEPS KIDS FOCUSED AND ENGAGED.
- SAFE, ECO-FRIENDLY MATERIALS MAKE IT PERFECT FOR KIDS' ROOMS AND CLASSROOMS.
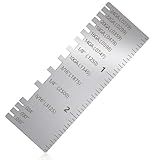
Feehope Metal Thickness Gauge, Stainless Steel Metal Thickness Gauge Tool with Wire Size Chart AWG, Multi-Function Sheet Metal Gauge for Wire – High Precision Measurement.
- DUAL SCALES FOR EASY MEASUREMENTS: EFFORTLESSLY SWITCH BETWEEN MM/INCH.
- RUST-RESISTANT DESIGN: DURABLE STAINLESS STEEL ENSURES LONG-LASTING USE.
- PORTABLE & LIGHTWEIGHT: IDEAL FOR ON-SITE ACCURATE WIRE MEASUREMENTS.

2 in 1 Bedtime/Morning Routine Chart for Kids Toddlers, Magnetic Chore Chart for Kids, Cute Visual Schedule for Kids Schedule Board for Home, Kids Checklist to Do List ADHD Tools for Kids
- INTERACTIVE SLIDERS ENGAGE KIDS AND SIMPLIFY ROUTINE TRACKING!
- DURABLE DESIGN REPLACES FLIMSY CHARTS-PERFECT FOR DAILY USE!
- FOSTERS INDEPENDENCE AND BUILDS POSITIVE HABITS FOR SUCCESS!
To delete an instance of a chart using chart.js, you can first retrieve the chart instance that you want to delete by using the Chart.get(chartId) method. Once you have the chart instance, you can call the destroy() method on it to remove the chart from the DOM and clean up any associated resources. This will effectively delete the instance of the chart and free up any memory that was being used. Remember to also remove any references to the chart instance to prevent memory leaks.
How do I create a new instance of a chart in chart.js?
To create a new instance of a chart in chart.js, you will need to follow these steps:
- First, include the Chart.js library in your HTML file. You can do this by adding the following script tag in the head section of your HTML file:
- Next, create a canvas element in your HTML file where you want the chart to be displayed. Give it an id attribute so you can reference it later. For example:
- In a separate script tag or external JavaScript file, instantiate a new Chart object by passing in the canvas element and a configuration object with the data and options for the chart. Here's an example configuration object to create a simple line chart:
var ctx = document.getElementById('myChart').getContext('2d'); var myChart = new Chart(ctx, { type: 'line', data: { labels: ['January', 'February', 'March', 'April', 'May', 'June', 'July'], datasets: [{ label: 'Sales', data: [10, 20, 15, 25, 30, 35, 20], backgroundColor: 'rgba(54, 162, 235, 0.2)', borderColor: 'rgba(54, 162, 235, 1)', borderWidth: 1 }] }, options: { scales: { y: { beginAtZero: true } } } });
- Customize the chart by modifying the data or options object as needed. You can create different types of charts (e.g., line, bar, pie, etc.) and customize their appearance and behavior using the configuration object.
That's it! Your new instance of a chart in chart.js should now be displayed on the canvas element you specified. Feel free to explore the Chart.js documentation for more advanced customization options and features.
What is the data structure used in chart.js?
Chart.js uses a data structure called an array of objects to store and represent data for creating charts. Each object in the array represents a data point and can contain properties such as the value, label, and other relevant information for each data point. This data structure allows for easy manipulation and rendering of data in various types of charts.
How to add tooltips to a chart in chart.js?
To add tooltips to a chart in Chart.js, you can use the "tooltips" configuration option. Here's how you can do it:
- First, include Chart.js in your HTML file:
- Next, create a canvas element to render the chart:
- Now, initialize the chart using JavaScript and configure the tooltips option to display tooltips on hover:
var ctx = document.getElementById('myChart').getContext('2d'); var myChart = new Chart(ctx, { type: 'bar', data: { labels: ['Red', 'Blue', 'Yellow', 'Green', 'Purple', 'Orange'], datasets: [{ label: '# of Votes', data: [12, 19, 3, 5, 2, 3], backgroundColor: [ 'red', 'blue', 'yellow', 'green', 'purple', 'orange' ] }] }, options: { tooltips: { enabled: true } } });
In this example, we have created a bar chart with some data and configured the tooltips to be enabled. You can further customize the tooltips by specifying various options like the background color, border color, font size, etc.
For more information on customizing tooltips in Chart.js, you can refer to the documentation here: https://www.chartjs.org/docs/latest/configuration/tooltip.html
How to create a radar chart in chart.js?
To create a radar chart in Chart.js, you will need to follow these steps:
- Include the Chart.js library in your HTML file. You can either download the library and include it locally, or use a CDN link to include it in your project. Here is an example of including Chart.js through a CDN link:
- Create a canvas element in your HTML file where you want the radar chart to be displayed:
- Create a JavaScript file where you will write the code to generate the radar chart. In this file, you will need to write the code to fetch the data, configure the radar chart, and then create the chart using Chart.js. Here is an example of the JavaScript code to create a radar chart:
// Fetch the data for the radar chart const data = { labels: ['label1', 'label2', 'label3', 'label4', 'label5'], datasets: [{ label: 'Dataset', data: [10, 20, 30, 40, 50], backgroundColor: 'rgba(255, 99, 132, 0.2)', borderColor: 'rgba(255, 99, 132, 1)', borderWidth: 1 }] };
// Configure the radar chart const config = { type: 'radar', data: data, };
// Create the radar chart var radarChart = new Chart( document.getElementById('radarChart'), config );
- Save the JavaScript file and link it to your HTML file using a tag:
- Open your HTML file in a web browser to see the radar chart generated by chart.js.
That's it! You have successfully created a radar chart using Chart.js. You can customize the chart further by modifying the data, labels, colours, and other configurations in the JavaScript file.