Best Tools to Deploy React Apps to GitHub Pages to Buy in February 2026

Mastering React JS From Development to Deployment: Become React JS Expert


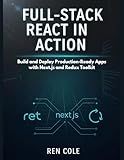
Full-Stack React in Action: Build and Deploy Production-Ready Apps with Next.js and Redux Toolkit


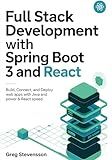
Full Stack Development With Spring Boot 3 And React: Build, Connect, and Deploy Web Apps with Java Power and React Speed


React Fundamentals: A Beginner’s Guide to JavaScript, TypeScript, HTML, and CSS


To deploy a React app to GitHub Pages, first ensure your app is set up with a proper build process. This typically involves creating a production build of your app using a command like npm run build.
Once your build is ready, you need to create a GitHub repository for your project if you haven't already. Push your project files to the repository using git push commands.
Next, navigate to the repository settings on GitHub and scroll down to the "GitHub Pages" section. Here, you can choose the branch that contains your build files (often gh-pages) and save the settings.
After saving, GitHub Pages will automatically deploy your React app from the selected branch. You can access your deployed app at the provided URL.
Remember to update your deployed app whenever you make changes to your React project by repeating the build and push process. This ensures your GitHub Pages site stays up to date with your latest changes.
How to create a React app?
To create a React app, you can use the create-react-app tool which is a command line utility that allows you to quickly create a new React project with all the necessary configuration set up for you.
Here's how you can create a React app using create-react-app:
- Install create-react-app globally by running the following command in your terminal:
npm install -g create-react-app
- Once create-react-app is installed, navigate to the directory where you want to create your new React project and run the following command to create a new project:
npx create-react-app my-app
Replace 'my-app' with the name you want to give to your React project.
- Once the project is created, navigate to the project directory by running:
cd my-app
- You can start the development server by running:
npm start
This will start the development server and open your React app in a new browser window.
That's it! You have successfully created a new React app using create-react-app. You can now start building your React components and adding functionality to your app.
What is a React app?
A React app is a web application built using the JavaScript library React. React is used for building user interfaces and allows developers to create interactive, dynamic, and efficient applications. React apps are typically composed of reusable components that manage their own state, making it easy to maintain and scale applications.
How to configure custom build settings for a React app?
To configure custom build settings for a React app, you can use a tool like react-scripts which is provided by Create React App, or directly use a custom webpack configuration.
Here are the steps to configure custom build settings for a React app using Create React App:
- Install Create React App globally if you haven't already:
npm install -g create-react-app
- Create a new React app using Create React App:
npx create-react-app my-app
- Navigate to the project directory:
cd my-app
- Create a .env file in the root of your project and add any custom build settings you want to configure. For example, you can add environment variables like:
REACT_APP_API_URL=http://my-api-url.com
- Use these custom build settings in your React components by accessing them through process.env:
const apiUrl = process.env.REACT_APP_API_URL;
- To build the app with the custom settings, run:
npm run build
If you want to use a custom webpack configuration for your React app, you can eject from Create React App or use react-app-rewired which allows you to override the webpack configuration without ejecting.
Here are the steps to use react-app-rewired for custom build settings:
- Install react-app-rewired and customize-cra:
npm install react-app-rewired customize-cra
- Create a config-overrides.js file in the root of your project with your custom webpack configuration:
const { override, addWebpackPlugin } = require('customize-cra'); const webpack = require('webpack');
module.exports = override( addWebpackPlugin( new webpack.DefinePlugin({ 'process.env.API_URL': JSON.stringify('http://my-api-url.com'), }) ) );
- Modify the scripts section in your package.json file to use react-app-rewired instead of react-scripts:
"scripts": { "start": "react-app-rewired start", "build": "react-app-rewired build", "test": "react-app-rewired test", "eject": "react-app-rewired eject" }
- Use the custom build settings in your React components:
const apiUrl = process.env.API_URL;
- Build the app with the custom settings by running npm run build.
By following these steps, you can configure custom build settings for your React app either using Create React App or a custom webpack configuration.
How to delete a GitHub repository?
To delete a GitHub repository, you can follow these steps:
- Go to the repository you want to delete on GitHub.
- Click on the "Settings" tab on the right side of the repository.
- Scroll down to the Danger Zone section.
- Click on the "Delete this repository" button.
- Confirm the repository name.
- Click on the "I understand the consequences, delete this repository" button.
Please note that once you delete a repository, all of its contents, including issues, pull requests, and wiki pages, will be permanently removed and cannot be recovered. Make sure you have backed up any important data before proceeding with the deletion.
What is the purpose of the predeploy script in package.json?
The predeploy script in the package.json file is used to define custom actions that should be executed before deploying the application. This could include tasks such as running tests, building the application, or any other necessary setup processes before the deployment. This allows developers to automate these tasks and ensure that all necessary steps are completed before deploying the application.
What is the purpose of the -d flag in the deploy script?
The purpose of the -d flag in the deploy script is to specify a directory where the deployment will take place. This flag is used to indicate the destination directory where files or software will be deployed or copied to during the deployment process. By using the -d flag, the user can specify the exact location where the deployment should occur, providing more control over the deployment process.
