Best Hosting Solutions to Buy in June 2026
WordPress To Go: How To Build A WordPress Website On Your Own Domain, From Scratch, Even If You Are A Complete Beginner


3-Pack Halloween Decorations Indoor, Black Lace Spider Web Lampshade Cover, 20" x 60" – Reusable Polyester Halloween Lamp Shade Topper & Party Decor
-
ALL-IN-ONE 3-PACK FOR MAXIMUM DECOR VERSATILITY AT GREAT VALUE!
-
ELEGANT SPIDER WEB DESIGN ELEVATES YOUR HALLOWEEN AMBIANCE EFFORTLESSLY.
-
DURABLE, MACHINE-WASHABLE FABRIC ENSURES LONG-LASTING FESTIVE USE.
Modern Web Development: A Beginner's Guide to HTML, CSS, Hosting, and SEO

Creating a Website: The Missing Manual
Full Stack Web Development for 2025: The Complete Guide to Modern Web Apps
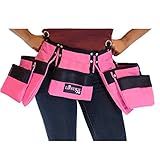
Pink Tool Belt For Women. Keep Your Gardening and Home Improvement Tools Within Hands Reach. Ladies Stylish Belt W/Pouches Carry Your Supplies W/You. Use It For Leisure Or Take It To Work (Adult)
- 6 POCKETS & HAMMER HOOKS FOR EASY TOOL ACCESS!
- ADJUSTABLE STRAPS FOR A PERFECT FIT (SIZES 2-12)!
- DURABLE, STYLISH DESIGN FOR EVERY DIY AND PROFESSIONAL TASK!
Building Tools with GitHub: Customize Your Workflow
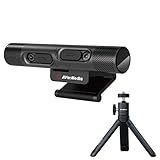
AVerMedia PW313D DualCam, 2-in-1 Webcam for Remote Learning, Conferencing and Hosting Meetings, 2 Autofocus Cameras and Mics, Works with Zoom, Teams and Skype, TAA/NDAA Compliant
-
ELEVATE VIDEO QUALITY WITH 2K DUAL CAMERAS FOR SEAMLESS STREAMING.
-
AI NOISE REDUCTION ENHANCES VOICE CLARITY, MINIMIZING DISTRACTIONS.
-
CUSTOMIZABLE CAMENGINE SOFTWARE FOR ENGAGING, PROFESSIONAL CALLS.

How to Create a Website that Generates Leads for Your Business. What Your Web Developer Doesn't Want You to Know (Digital Marketing Secrets Book 1)

Direct Sales Online Party Planner: Host Successful Online Events & Parties - Planning Journal - MultiLevel Marketing Business Tool - Small Business - Network Marketer ( 8 x 10 )
To deploy MODX on HostGator, you need to follow these steps:
- Sign up for a HostGator account and log in to your cPanel.
- In cPanel, find the "Software" section and click on the "QuickInstall" or "Softaculous" icon.
- Look for MODX in the list of available applications or search for it using the search bar.
- Click on the MODX icon to start the installation process.
- You will be prompted to select the domain where you want to install MODX. Choose your desired domain from the dropdown menu.
- Optionally, you can specify a subdirectory in which MODX should be installed. If you want it to be installed directly on your domain, leave the "directory" field empty.
- Fill in the necessary details such as site name, description, admin username, password, and email address.
- Choose the desired language for your MODX installation.
- Click on the "Install" button to start the installation process. Wait for a few moments until the installation is complete.
- Once the installation is finished, you will see a success message along with the admin URL and login credentials.
- Access the admin URL provided, and log in using the admin username and password you set during the installation.
- Congratulations! You have successfully deployed MODX on HostGator. You can now start building your website using MODX's powerful content management system.
How to set up a multilingual MODX site on HostGator?
To set up a multilingual MODX site on HostGator, you can follow these steps:
- Sign in to your HostGator account and navigate to cPanel.
- Scroll down to the "Software" section and click on "QuickInstall".
- On the QuickInstall page, click on the "Content Management Systems" tab on the left sidebar, and then click on "MODX".
- Click on the "Install MODX" button to start the installation process.
- Fill in the required details such as your domain name, admin email, username, password, and language preference.
- Choose the domain you want to install MODX on, and select the directory you want to install it in, or leave it blank to install in the root directory.
- Scroll down and click on the "Install" button to initiate the installation.
- Once the installation is complete, you will be provided with the MODX administration login credentials.
- Access your MODX site by visiting your domain followed by "/manager" (e.g., www.yourdomain.com/manager).
- Log in with the admin credentials provided during the installation process.
- After logging in, you will be in the MODX Manager. Click on the "System" menu and choose "Contexts". Here, you can create additional contexts for different languages.
- To enable multilingual support, you can use the Babel Extra. To install Babel, go to the "Extras" menu and select "Installer". Search for "Babel" and click on "Install" to add it to your MODX site.
- Once Babel is installed, you can access its settings under the "Extras" menu. Configure the language settings and translation options as per your requirements.
- Now, you can create different resources for each language and assign them to the respective contexts you created earlier. This way, you can have the same content in different languages on your multilingual site.
Remember to regularly update and maintain your MODX installation and plugins to ensure security and optimal performance.
What is the role of .htaccess in a MODX deployment on HostGator?
The .htaccess file is an important file in a MODX deployment on HostGator. It is used to configure various server settings and enable certain features within the MODX CMS.
Here are some of the roles of the .htaccess file in a MODX deployment on HostGator:
- URL rewriting: The .htaccess file contains rules to rewrite URLs in a user-friendly and search engine optimized manner. It helps to remove the "index.php" from the URLs, making them cleaner and easier to understand.
- Security: The .htaccess file includes rules to enhance the security of the MODX installation. It can protect sensitive files and directories from unauthorized access, prevent directory listings, and block certain IP addresses or user agents.
- Cache settings: It allows configuring caching for improved performance. It can enable browser caching, gzip compression, and other caching mechanisms to speed up the delivery of web pages.
- Error handling: The .htaccess file can specify how server errors are handled and displayed to the users. It allows redirecting users to custom error pages, such as 404 (page not found) or 500 (internal server error) pages.
- PHP configuration: It can set various PHP configuration options, such as memory limits, maximum file upload sizes, and execution time limits. These settings can be adjusted to meet the requirements of the MODX installation.
- SEO settings: The .htaccess file provides options for configuring search engine optimization (SEO) settings. It can redirect old URLs to new ones, set canonical tags, and customize the default document (e.g., from "index.html" to "index.php").
Overall, the .htaccess file plays a crucial role in configuring the server environment for a MODX deployment on HostGator. It helps to optimize performance, enhance security, and provide a user-friendly URL structure.
How to troubleshoot common issues with MODX on HostGator?
Here are some steps to troubleshoot common issues with MODX on HostGator:
- Review error logs: Check the error logs in the MODX manager or in the file system (e.g., MODX's error.log or HostGator's error logs). Look for any specific error messages that can help identify the issue.
- Clear MODX cache: In the MODX manager, go to System -> Clear Cache and clear all cache. Sometimes, cache files can cause issues, and clearing them can resolve the problem.
- Check file/folder permissions: Ensure that the file and folder permissions are correctly set. The recommended permissions for most files are 644, and for directories are 755. Incorrect permissions can cause various issues, such as 500 internal server errors.
- Disable extensions or plugins: Disable any recently installed extensions or plugins one by one to pinpoint if any specific one is causing the issue. Sometimes, incompatible or faulty extensions can disrupt the functionality of MODX.
- Switch to default theme: Temporarily switch to a default MODX theme to see if the issue persists. If the issue is resolved with the default theme, the problem might be with the custom theme or template being used.
- Check database connectivity: Verify that the MODX installation is correctly connected to the database. Ensure that the database credentials (database name, username, and password) are accurate in the MODX configuration file (config.core.php).
- Increase PHP memory limit: Increase the PHP memory limit in case the issue is related to insufficient memory. Edit the php.ini or .htaccess file to increase the memory limit. If you're on a shared hosting environment, you may need to contact HostGator support for assistance.
- Disable server-level security measures: Some security measures implemented by HostGator can interfere with the functioning of MODX. Disable any server-level security measures or ask HostGator support to exclude your MODX installation from such security measures.
- Update MODX and its components: Ensure that MODX and its components (e.g., extra packages) are up to date. Outdated versions can have compatibility issues and vulnerabilities that might cause problems.
- Seek support: If the troubleshooting steps don't resolve the issue, consider reaching out to HostGator's support team or posting on the MODX community forums for further assistance. Provide them with specific details, error messages, and steps to reproduce the problem for faster resolution.
Note: It's always recommended to backup your website before making any changes or attempting troubleshooting steps.
How to customize the MODX Manager interface on HostGator?
To customize the MODX Manager interface on HostGator, follow these steps:
- Log in to your HostGator cPanel account.
- Navigate to the File Manager section and open it.
- Locate the root directory of your website and open it (usually public_html).
- Look for the MODX installation folder and open it.
- Locate the file called manager and open it.
- Inside the manager folder, you will find several subfolders. The most important ones for customization are "assets," "connectors," "media," and "templates."
- To customize the interface layout and design, navigate to the "manager/templates/default" folder. Here you will find the default manager template files.
- To modify the appearance of the manager interface, you can edit the CSS files located in the "manager/templates/default/css" folder. You can modify the existing CSS or add your own stylesheets.
- To modify the HTML structure of the manager interface, you can edit the PHP files located in the "manager/templates/default/tpl" folder. These files control the layout and structure of the different sections and elements within the manager interface.
- To customize icons and images used in the manager interface, you can edit or replace the files located in the "manager/templates/default/images" folder.
- To customize the login page, navigate to the "manager/templates/default/login" folder. Here you will find the login template files, including the CSS, HTML, and images used on the login page.
- After making the desired changes, save the modified files.
- To see the changes, access your MODX Manager by visiting the /manager URL of your website in a web browser.
- Note that if you update your MODX installation or apply a theme/plugin update, your customizations might be overwritten. It's recommended to keep backups of your modified files to restore them if necessary.
Remember, customizing the MODX Manager interface requires basic knowledge of HTML, CSS, and PHP. It's essential to be cautious and make backups before making any changes to avoid irreversible damage.