
Best CodeIgniter Techniques to Buy in June 2026

FOXWELL NT301 OBD2 Scanner Live Data Professional Mechanic OBDII Diagnostic Code Reader Tool for Check Engine Light
- EFFORTLESSLY READ AND CLEAR DTCS TO ENSURE VEHICLE PERFORMANCE.
- USER-FRIENDLY DESIGN WITH INSTANT I/M READINESS STATUS INDICATORS.
- COMPATIBLE WITH MOST VEHICLES FOR RELIABLE DIAGNOSTICS EVERYWHERE.


FOXWELL NT201 OBD2 Scanner Code Reader for Cars and Trucks - Reset Check Engine Light, Read and Clear Fault Codes, Live Data Diagnostic Tool for All Cars Since 1996
-
QUICKLY READ & CLEAR FAULT CODES: SAVE ON COSTLY MECHANIC TRIPS!
-
LIVE DATA ACCESS: INSTANTLY IDENTIFY ENGINE ISSUES WITH REAL-TIME INFO.
-
ONE-KEY EMISSION TESTS: SIMPLIFY PRE-INSPECTION CHECKS WITH EASE!
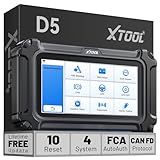
XTOOL D5 Car Code Reader and Reset Tool, Engine ABS SRS Transmission Car Diagnostic Tool with EPB Service, ABS Bleed, Throttle Relearn, Clear Check Engine Light Code Reader with 10 Resets, Free Update
-
SIMPLIFY REPAIRS: 10 ESSENTIAL RESET FUNCTIONS STREAMLINE DIAGNOSTICS.
-
REAL-TIME DATA: MONITOR LIVE ENGINE DATA TO CATCH ISSUES EARLY.
-
BROAD COMPATIBILITY: WORKS WITH 90+ BRANDS; CONFIRM COMPATIBILITY BEFORE PURCHASE.

Docker para CodeIgniter 4 e PHP: Práticas Seguras, Documentação Automática e Casos de Uso (Portuguese Edition)
In CodeIgniter, you can generate an auto increment ID manually by using the following steps:
- First, open your model file where you want to generate the auto increment ID.
- Add the following code to the constructor of your model to load the database library: $this->load->database();
- Next, create a function in your model to generate the auto increment ID. You can use the following code snippet as an example: public function generate_auto_increment_id($table){ $query = $this->db->query("SELECT MAX(id) as max_id FROM $table"); $row = $query->row(); $max_id = $row->max_id; $auto_increment_id = $max_id + 1; return $auto_increment_id; }
- In the above code, replace "id" with the name of the primary key column in your table, and $table with the name of the table for which you want to generate the auto increment ID.
- You can now call this function in your controller to generate the auto increment ID whenever needed.
By following these steps, you can manually generate an auto increment ID using CodeIgniter.
What is the syntax for generating auto increment id in MySQL?
To generate an auto increment id in MySQL, you can use the following syntax when creating a table:
CREATE TABLE table_name ( id INT AUTO_INCREMENT PRIMARY KEY, column1 datatype, column2 datatype, ... );
In this syntax, the id column is defined as INT AUTO_INCREMENT PRIMARY KEY, which will automatically generate a unique id for each row inserted into the table.
How to reset auto increment id in MySQL database?
To reset the auto increment id in a MySQL database, you can use the following SQL query:
ALTER TABLE table_name AUTO_INCREMENT = 1;
Replace table_name with the name of the table you want to reset the auto increment id for. This query will reset the auto increment value back to 1 for the specified table.
How to connect CodeIgniter with a database?
To connect CodeIgniter with a database, you can follow these steps:
- Open the database configuration file located in the application/config directory of your CodeIgniter project.
- Update the database settings with your database information such as hostname, username, password, and database name.
- You can also set the database driver, which can be MySQL, PostgreSQL, SQLite, etc. By default, CodeIgniter uses the MySQL driver.
- Once you have updated the database configuration file, you can now load the database library in your controller or model. You can do this by using the following code:
$this->load->database();
- Now you can run queries against your database using the CodeIgniter Active Record class or by writing raw SQL queries.
For example, to fetch data from a table using the Active Record class, you can use the following code:
$query = $this->db->get('my_table'); $result = $query->result();
Alternatively, you can write raw SQL queries like this:
$query = $this->db->query("SELECT * FROM my_table"); $result = $query->result();
That's it! You have successfully connected CodeIgniter with a database and can now perform database operations in your application.
How to implement auto increment id generation in a CodeIgniter controller?
To implement auto increment id generation in a CodeIgniter controller, you can follow these steps:
- Create a function in your controller to generate the auto increment id:
public function generateAutoIncrementId(){ $lastId = $this->db->select('id')->order_by('id', 'DESC')->limit(1)->get('your_table_name')->row();
if(empty($lastId)){
    $newId = 1;
} else {
    $newId = $lastId->id + 1;
}

return $newId;
}
- Call the generateAutoIncrementId() function in your controller method where you want to create a new record with the auto increment id:
public function createRecord(){ $newId = $this->generateAutoIncrementId();
$data = array(
    'id' => $newId,
    // other data for the new record
);

$this->db->insert('your\_table\_name', $data);

// Redirect or do something else after creating the record
}
- Update the your_table_name with the actual name of your database table.
- Make sure to load the database library in your controller before using the $this->db object:
$this->load->database();
By following these steps, you can generate auto increment id for your records in a CodeIgniter controller.
How to handle concurrency issues when generating auto increment id in CodeIgniter?
There are several approaches to handling concurrency issues when generating auto increment IDs in CodeIgniter:
- Use CodeIgniter's built-in database functionality to generate auto increment IDs. CodeIgniter's database library handles concurrency issues related to the generation of auto increment IDs.
- Use a dedicated database table to store and increment a counter value for generating unique IDs. This can help avoid concurrency issues by centralizing the ID generation process.
- Implement a custom ID generation logic that uses a combination of timestamp, random values, and other unique identifiers to generate IDs. This can reduce the likelihood of collisions and concurrency issues.
- Use database transactions to ensure that the ID generation process is atomic and isolated from other concurrent operations.
- Monitor and log any concurrency issues that arise during the ID generation process, and implement proactive measures to prevent them from occurring in the future.