Best Animation Tools to Buy in June 2026
Moho Pro 13.5 | The all-in-one animation tool for professionals and digital artists | Software for PC and Mac OS
-
EFFORTLESSLY INTEGRATE PSD FILES TO STREAMLINE YOUR ANIMATION PROCESS.
-
ADVANCED RIGGING TOOLS MAKE 2D ANIMATION INTUITIVE AND VERSATILE.
-
CREATE 3D-LIKE EFFECTS WITH EASE USING POWERFUL MESH MANIPULATION TOOLS.


LitEnergy A4 LED Copy Board Light Tracing Box, Ultra-Thin Adjustable USB Power Artcraft LED Trace Light Pad for Tattoo Transferring, Drawing, Streaming, Sketching, Animation, Stenciling
-
ULTRA-SLIM & PORTABLE: LIGHTWEIGHT DESIGN (0.2’’ THICK) FOR EASY TRANSPORT.
-
CUSTOM BRIGHTNESS CONTROL: ADJUSTABLE BRIGHTNESS FOR OPTIMAL VISIBILITY.
-
VERSATILE USE CASES: PERFECT FOR STENCILING, DRAWING, AND MORE CREATIVE PROJECTS.
Honbay Comic Tool Stainless Steel Ruler Fixed Paper Feet for Fixing Animation Position Paper
- STAINLESS STEEL DESIGN ENSURES DURABILITY AND LONGEVITY.
- THREE-HOLE POSITIONING KEEPS PAPER STABLE FOR PRECISE ANIMATION.
- COMPACT SIZE PERFECT FOR EASY HANDLING AND STORAGE.
Digital Drawing Glove 2 Pack,Artist Glove for Drawing Tablet,ipad,Sketching,Art Glove with Two Finger for Right Hand and Left Hand (Smudge Guard, Medium,3.15x8.58inch
- FIXED DESIGN: ENJOY A COMFORTABLE FIT THAT KEEPS YOUR TABLET CLEAN.
- VERSATILE USE: PERFECT FOR DIGITAL ART, SKETCHING, AND PAINTING.
- SMOOTH MOVEMENT: GLIDE EFFORTLESSLY WITHOUT SCREEN FRICTION OR MARKS.
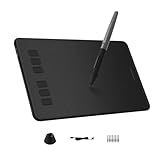
HUION Inspiroy H640P Drawing Tablet, 6x4 inch Digital Art with Battery-Free Stylus, 8192 Pen Pressure, 6 Hot Keys, Graphics Tablet for Drawing, Writing, Design, Teaching, Work with Mac, PC & Mobile
-
CUSTOMIZE WORKFLOWS FOR EFFICIENCY WITH 6 PROGRAMMABLE KEYS.
-
ENJOY NATURAL DRAWING WITH A BATTERY-FREE STYLUS-8192 PRESSURE LEVELS!
-
COMPACT DESIGN FOR PORTABILITY-IDEAL FOR WORK, SCHOOL, AND TRAVEL!
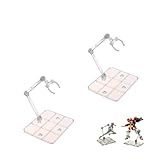
TSY TOOL 2 Pcs of HG144 Action Figure Stand, Display Holder Base, Doll Model Support Stand Compatible with 6" HG RG SD SHF Gundam 1/44 Toy Clear
- QUICK ASSEMBLY: NO TOOLS REQUIRED-JUST PRESS AND DISPLAY YOUR FIGURES!
- BUILT TO LAST: DURABLE DESIGN KEEPS YOUR ACTION FIGURES SECURELY DISPLAYED.
- UNIVERSAL FIT: COMPATIBLE WITH VARIOUS ACTION FIGURE LINES FOR VERSATILE USE.
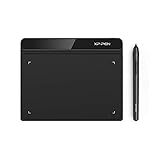
Drawing Tablet XPPen StarG640 Digital Graphic Tablet 6x4 Inch Art Tablet with Battery-Free Stylus Pen Tablet for Mac, Windows and Chromebook (Drawing/E-Learning/Remote-Working)
-
BATTERY-FREE STYLUS: ENJOY UNINTERRUPTED DRAWING WITH NO CHARGING NEEDED!
-
VERSATILE COMPATIBILITY: PERFECT FOR ONLINE EDUCATION AND MICROSOFT OFFICE APPS.
-
PORTABLE DESIGN: ULTRA-SLIM 2MM THICKNESS FOR EASY ON-THE-GO CREATIVITY.
HUION Inspiroy H1060P Graphics Drawing Tablet with 8192 Pressure Sensitivity Battery-Free Stylus and 12 Customized Hot Keys, 10 x 6.25 inches Digital Art Tablet for Mac, Windows PC and Android
- SPACIOUS 10 X 6.25 AREA WITH SLEEK, MINIMALIST DESIGN FOR COMFORT.
- BATTERY-FREE STYLUS WITH ±60° TILT FOR PRECISE, UNINTERRUPTED DRAWING.
- 28 CUSTOMIZABLE KEYS MAKE WORKFLOWS FASTER AND MORE EFFICIENT!
Light Box Drawing Pad, Tracing Board with Type-C Charge Cable and Brightness Adjustable for Artists, AnimationDrawing, Sketching, Animation, X-ray Viewing (A4) Not Rechargeable
-
FLICKER-FREE LIGHTING: PROTECTS EYES FOR COMFORTABLE USE ANYTIME!
-
HIGH-QUALITY PMMA: SUPERIOR CLARITY AND DURABILITY FOR VIBRANT ARTWORK.
-
ULTRA-SLIM & PORTABLE: LIGHTWEIGHT DESIGN PERFECT FOR ON-THE-GO CREATIVITY!
To implement animations with SvelteMotion, you can follow these steps:
- Import the necessary functions from the svelte-motion library. For example, you might import motion from svelte-motion to enable animations.
- Wrap the component or element that you want to animate with the motion component. This component will enhance the element with animation properties and enable you to apply animation effects.
- Use the available animation properties provided by motion to animate your component. These properties can include animate, initial, exit, transition, and more. For example, you could use the animate property to define the starting and ending positions of your component during the animation.
- Define the desired animation effects using keyframes, easing functions, or other options provided by the motion component. For instance, you might use easing functions like linear, easeIn, easeOut, or easeInOut to control the pace of your animation.
- Customize the animation by modifying properties like duration, delay, and repeat count. You can adjust these properties to make your animation last longer, start after a delay, or repeat a certain number of times.
- Optionally, you can also use the transform property to apply visual transformations to your component during the animation. This can include scaling, rotating, skewing, and other 2D or 3D transformations.
- Take advantage of the transition property to define how the animation should smoothly transition between different states. This can involve specifying the duration, easing, and other transition-related properties.
- Test and run your Svelte app to see the animations in action. You can make further adjustments and refinements as needed until you achieve the desired animation effects.
By following these steps, you can easily implement animations with SvelteMotion and create captivating visual effects for your Svelte applications.
How to animate SVG elements with SvelteMotion?
To animate SVG elements with SvelteMotion, you can follow these steps:
Step 1: Install the required dependencies
npm install svelte-motion
Step 2: Import the necessary components in your Svelte file
import { motion } from "svelte-motion";
Step 3: Wrap your SVG element inside a motion component
<motion.svg>
</motion.svg>
Step 4: Add the animation properties to the SVG elements
<motion.svg> <motion.circle cx="50" cy="50" r="40" fill="red" animate={{ opacity: 0.5, y: 100 }} /> </motion.svg>
Here, the animate prop is used to define the animation properties. In the example above, the circle element starts with an opacity of 1 and y position of 0, and animates to an opacity of 0.5 and y position of 100.
Step 5: Specify the animation duration and easing function
<motion.svg> <motion.circle cx="50" cy="50" r="40" fill="red" animate={{ opacity: 0.5, y: 100 }} transition={{ duration: 0.5, ease: "easeInOut" }} /> </motion.svg>
Here, the transition prop is used to specify the animation duration and easing function. In the example above, the animation will take 0.5 seconds with an ease-in-out easing.
You can also animate other SVG attributes such as x, y, width, height, etc., by adding them to the animate prop.
Note: SvelteMotion offers additional features such as drag and gesture animations. You can refer to the SvelteMotion documentation for more details on these advanced animations.
What is the difference between SvelteMotion and other animation libraries?
SvelteMotion is not a separate animation library, but a specific integration of the popular animation library, Framer Motion, into the Svelte framework. Therefore, the difference lies between Framer Motion (and similar animation libraries) and native Svelte animation features.
- Integration: SvelteMotion provides seamless integration between Framer Motion and Svelte, allowing developers to easily add animations to their Svelte components. In contrast, other animation libraries may require additional configuration or setup to work with Svelte.
- Syntax: SvelteMotion leverages Framer Motion's declarative syntax for defining animations. This syntax emphasizes readability and ease of use, allowing developers to describe desired animations using simple and intuitive attributes. Other animation libraries may have their own distinct syntax or API.
- Performance: SvelteMotion, being built on Framer Motion, benefits from the performance optimizations and best practices provided by Framer Motion. Framer Motion is known for its focus on efficient rendering and smooth animations, resulting in a performant user interface. Other animation libraries may have varying performance characteristics.
- Ecosystem: Framer Motion, the underlying library of SvelteMotion, has a large and active community and extensive documentation. This means that developers using SvelteMotion can benefit from a wealth of resources, tutorials, and examples available for Framer Motion. Other animation libraries may have their own ecosystems with different levels of community support and available resources.
Overall, SvelteMotion offers a convenient and efficient way to incorporate animations into Svelte components by leveraging the features and benefits of Framer Motion.
What is the recommended approach for animating responsive designs with SvelteMotion?
When animating responsive designs with SvelteMotion, the recommended approach is to use the useMedia hook provided by the @sveltejs/kit/hooks package. This hook allows you to dynamically change animation parameters based on the current viewport size.
Here's a step-by-step guide on how to approach animating responsive designs with SvelteMotion:
- Install the necessary packages: npm install framer-motion @sveltejs/kit/hooks
- Import the required dependencies: import { motion } from "framer-motion"; import { useMedia } from "@sveltejs/kit/hooks";
- Use the useMedia hook to get the current viewport size: const { breakpoint } = useMedia();
- Define animation variants for different viewport sizes: const variants = { small: { opacity: 0, x: -100, }, medium: { opacity: 1, x: 0, }, large: { opacity: 1, x: 100, }, };
- Use the motion component to animate your design elements:
In this example, the element will be initially hidden (opacity: 0) and positioned -100px to the left on small viewports. On medium and large viewports, it will smoothly animate to opacity: 1 and x: 0, or x: 100 respectively.
By using the useMedia hook and defining animation variants specific to different viewport sizes, you can create responsive animations that adapt to the user's screen size.
What is the role of presence in animation transitions with SvelteMotion?
In animation transitions with SvelteMotion, the role of presence is to manage the visibility and presence of elements during animations. It allows you to smoothly transition elements in and out of the DOM, creating seamless and immersive animation effects.
The "presence" property in SvelteMotion is used to orchestrate these transitions. It tracks the presence of an element and enables automatic entering and exiting animations based on whether the element is present or not.
When an element is removed from the DOM (e.g., when it is conditionally rendered), SvelteMotion will animate the exit of that element. Similarly, when an element is added to the DOM, it will animate the entrance of the element. This ensures that the transitions are handled smoothly and adds a sense of realism to the animations.
The presence feature in SvelteMotion helps in creating visually appealing and interactive user interfaces by providing an easy and efficient way to handle animations when elements are dynamically added or removed from the DOM.