
Best Authentication Tools to Buy in June 2026

Authentication and Access Control: Practical Cryptography Methods and Tools


Pro ASP.NET Core Identity: Under the Hood with Authentication and Authorization in ASP.NET Core 5 and 6 Applications

Modern Authentication with Azure Active Directory for Web Applications (Developer Reference)
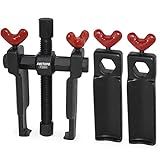
FIRSTINFO F3393 Patented Universal Windshield Wiper Arm Puller/Battery Terminal Removal Tool-Heavy Duty, Adjustable, Made in Taiwan
- QUICK WIPER REMOVAL: SAVE EFFORT WITH A 1/2-INCH WRENCH DESIGN.
- VERSATILE FIT: TWO-RADIUS HOOKS ADAPT TO VARIOUS WINDSHIELD MODELS.
- PREMIUM QUALITY GUARANTEE: ORIGINAL PATENTED TOOL WITH 12+10 MONTH WARRANTY.

Apostille Journal of Authentications
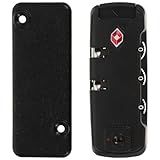
Balacoo Luggage Locks TSA Approved: Safety Locks Suitcase Lock TSA Authentication Password Lock Padlocks Combination Lock for Travel Outdoor Use
- TSA APPROVED: PROTECTS LUGGAGE WHILE ALLOWING TSA INSPECTION.
- RESETTABLE COMBINATION: CUSTOMIZE YOUR LOCK FOR ADDED SECURITY.
- VERSATILE USE: PERFECT FOR LUGGAGE, BACKPACKS, AND TOOLBOXES.

Launch X431 PRO3S+ V5.0,2025 Upgrade All-in-One Bidirectional Scan Tool,HD Trucks Scan,Topology Map,ECU Coding,55+ Service,Full System,CANFD&DOIP,DBSCar VII VCI 2-Year Update
- WIDER VEHICLE COVERAGE: SUPPORTS 200+ BRANDS, 10,000+ MODELS GLOBALLY.
- ADVANCED FEATURES: OFFERS ECU CODING, ACTIVE TESTING, AND 55+ RESETS.
- FREE UPDATES: ENJOY 2 YEARS OF FREE SOFTWARE UPDATES FOR OPTIMAL USE.

.NET MAUI Cookbook: Build a full-featured app swiftly with MVVM, CRUD, AI, authentication, real-time updates, and more
To implement authentication in a Svelte application, you can follow these steps:
- Set up a backend server with authentication endpoints: Start by building a backend server using your preferred framework, such as Node.js with Express or Django. Create endpoints for user registration, login, and logout.
- Create a user model: Define a user model that contains information about each user, such as their username, email, and password. This model will be used for user registration and authentication.
- Set up the registration form: Create a registration form in your Svelte application where users can input their desired username, email, and password. When the form is submitted, send a request to the backend server to handle user registration.
- Implement the login form: Create a login form where users can enter their credentials (username/email and password). When the form is submitted, send a request to the backend server to authenticate the user.
- Store the authentication token: Once the user is authenticated, store the authentication token returned by the backend server in the browser's local storage or session storage. This token will be used to authenticate subsequent requests.
- Protect routes: To restrict access to certain pages or routes in your Svelte application, check for the presence of the authentication token before rendering those pages. If the token is not present, redirect the user to the login page.
- Handle logout: Implement a logout functionality that clears the authentication token from the browser's local storage or session storage. This ensures the user is logged out and cannot access protected routes.
- Handle authentication errors: Make sure to handle authentication errors returned by the server appropriately. Display error messages or redirect the user to the login page if there is an authentication failure.
By following these steps, you can successfully implement authentication in a Svelte application and provide secure access to your users.
How to implement account lockouts in a Svelte application's authentication?
To implement account lockouts in a Svelte application's authentication, you will need to follow these steps:
- Set up a backend server: Before implementing account lockouts, you need to have a backend server in place that handles user authentication. This server will store user credentials and track login attempts.
- Track login attempts: Add functionality to your backend server to track the number of unsuccessful login attempts for each user. You can achieve this by storing a counter in your user database or using a dedicated login attempt tracking mechanism.
- Define lockout logic: Determine the conditions under which an account should be locked. For example, you may decide to lock an account after a certain number of unsuccessful login attempts within a specific timeframe. Consider parameters such as the maximum number of login attempts and the lockout duration.
- Implement lockout mechanism: In your backend server's authentication logic, check the number of login attempts for a user against the defined thresholds. If these thresholds are exceeded, set a flag or timestamp in the user database to indicate that the account is locked.
- Disable login functionality: In your Svelte application, handle the locked account scenario by disabling the login functionality or displaying an appropriate message to the user. You can conditionally disable the login form or show an error message when a locked account is detected.
- Reset lockouts: To ensure usability, implement a mechanism to reset lockouts after a specified period. For instance, you might automatically unlock an account after a certain duration has passed since the last failed login attempt.
It's important to evaluate your specific requirements and tailor the lockout implementation accordingly. Additionally, consider incorporating secure practices like password policies, multi-factor authentication, and rate limiting to enhance the security of your authentication system.
How to create login forms in Svelte?
To create a login form in Svelte, you can follow these steps:
- Set up a new Svelte project by using a code editor (such as Visual Studio Code) and a terminal. Run the command npx degit sveltejs/template svelte-login-form in the terminal to set up a basic project structure for Svelte.
- Change the directory to the project folder by running cd svelte-login-form in the terminal.
- Open the project in the code editor. You'll see a few files in the project, including App.svelte and main.js.
- Replace the contents of App.svelte with the following code:
<label for="password">Password:</label>
<input type="password" id="password" bind:value={password} />

<button type="submit">Login</button>
- Save the changes to App.svelte and return to the terminal. Start the development server by running npm run dev.
- Visit http://localhost:5000 in your browser to see the login form.
Now you have a basic login form in Svelte that captures the email and password provided by the user. You can add your own login logic inside the handleSubmit function. For example, you can make an API call to verify the login credentials or store them in a local storage for further use.
How to handle session expiration in a Svelte app?
In a Svelte app, you can handle session expiration by using a combination of client-side and server-side techniques. Here's an approach you can follow:
- Set a session timeout on the server: Determine the session expiration time on the server side and include it in the session data. This could be stored in a cookie or sent along with the API response.
- Track session timeout on the client-side: In your Svelte app, create a timer that counts down the session timeout duration. You can either use a setTimeout function or an interval to decrement the timer periodically.
- Handle session expiration: When the timer reaches zero, trigger a function that handles session expiration. This can involve showing a modal or redirecting the user to a login page.
- Renew the session: If the user interacts with the app before the session expires, reset the timer and renew the session on the server side. You can achieve this by making an API call to refresh the session or send a keep-alive request to the server.
- Implement automatic redirection: To ensure that the user is automatically redirected when the session expires, you can use Svelte's built-in redirect capabilities. For example, you can conditionally redirect to a login page in the component that handles session expiration.
By combining these techniques, you can handle session expiration in a Svelte app and provide a seamless user experience while ensuring the security of your application.