
Best Web Hosting Tools to Buy in June 2026

WordPress To Go: How To Build A WordPress Website On Your Own Domain, From Scratch, Even If You Are A Complete Beginner


3-Pack Halloween Decorations Indoor, Black Lace Spider Web Lampshade Cover, 20" x 60" – Reusable Polyester Halloween Lamp Shade Topper & Party Decor
- ALL-IN-ONE VALUE PACK: THREE STYLISH LACE COVERS FOR DECORATING EASE.
- ELEGANT SPIDER WEB DESIGN: ELEVATE YOUR HALLOWEEN DECOR WITH FLAIR!
- DURABLE & REUSABLE: MACHINE WASHABLE FABRIC FOR LONG-LASTING USE.

Modern Web Development: A Beginner's Guide to HTML, CSS, Hosting, and SEO

Creating a Website: The Missing Manual

Full Stack Web Development for 2025: The Complete Guide to Modern Web Apps

Pink Tool Belt For Women. Keep Your Gardening and Home Improvement Tools Within Hands Reach. Ladies Stylish Belt W/Pouches Carry Your Supplies W/You. Use It For Leisure Or Take It To Work (Adult)
-
STAY ORGANIZED: 6 DEEP POCKETS & 2 HOOKS FOR ALL YOUR TOOLS!
-
COMFORTABLE FIT: ADJUSTABLE STRAPS FOR SIZES 2-12, HASSLE-FREE!
-
DURABLE DESIGN: HEAVY-DUTY MATERIAL FOR LASTING PERFORMANCE!
Building Tools with GitHub: Customize Your Workflow
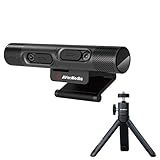
AVerMedia PW313D DualCam, 2-in-1 Webcam for Remote Learning, Conferencing and Hosting Meetings, 2 Autofocus Cameras and Mics, Works with Zoom, Teams and Skype, TAA/NDAA Compliant
- PROFESSIONAL-GRADE 2K/HD VIDEO FOR FLAWLESS REMOTE PRESENTATIONS.
- DUAL-CAMERA DESIGN FOR VERSATILE STREAMING AND ENHANCED ENGAGEMENT.
- AI NOISE REDUCTION FOR CRYSTAL-CLEAR AUDIO IN EVERY CALL.

How to Create a Website that Generates Leads for Your Business. What Your Web Developer Doesn't Want You to Know (Digital Marketing Secrets Book 1)

Direct Sales Online Party Planner: Host Successful Online Events & Parties - Planning Journal - MultiLevel Marketing Business Tool - Small Business - Network Marketer ( 8 x 10 )
To install Microweber on Bluehost, follow these steps:
- Log in to your Bluehost account using your username and password.
- Navigate to the "My Sites" section in the top menu.
- Click on the "WordPress" icon under the "Create a New Site" section.
- On the next page, click the "Install" button to begin the installation process.
- You will be prompted to choose the domain where you want to install Microweber. Select the domain from the dropdown menu.
- If you want to install Microweber in a subdirectory, enter the folder name in the "Directory" field. Otherwise, leave it blank to install in the root directory.
- Click the "Check Domain" button to verify the domain and proceed.
- On the next page, enter the desired website name, admin username, and password for your Microweber installation. Make sure to choose a strong password.
- Provide an email address for administrative purposes.
- You can also customize the website settings, including language, plugin selection, and theme. However, these are optional and can be modified later in the Microweber dashboard.
- Once you have filled in the necessary information, click the "Install" button.
- Bluehost will install Microweber on your chosen domain.
- After the installation is complete, you will receive a confirmation message with the URL and login details for your Microweber website.
- You can now access your Microweber website by visiting the provided URL and log in using the admin username and password you specified during the installation process.
- Start building your website using Microweber's intuitive interface and extensive features.
Remember to keep your Microweber installation and plugins/themes up to date to ensure optimal security and performance.
What is the process to manage and fulfill orders with Microweber on Bluehost?
Here are the steps to manage and fulfill orders with Microweber on Bluehost:
- Sign in to your Bluehost account and navigate to the cPanel dashboard.
- Locate and click on the "Softaculous Apps Installer" under the Website section.
- In the Softaculous Apps Installer, search for "Microweber" in the search bar and click on the application.
- On the Microweber panel, click on the "Install" button to start the installation process.
- Fill in the required information like domain, directory, admin username, password, etc., and click on the "Install" button.
- Wait for the installation process to complete. Once done, you will receive a confirmation message.
- Open a new tab in your web browser and access your Microweber website by entering the domain or directory where you installed Microweber.
- Login to the Microweber admin panel using the admin username and password you provided during the installation.
- In the admin panel, go to the "Ecommerce" section and click on "Orders" to view all the orders received.
- Here, you can see the list of orders placed on your Microweber website. You can search, filter, and sort the orders as per your requirements.
- To fulfill an order, click on the desired order from the list to view its details.
- In the order details screen, you can see the customer's information, shipping details, and ordered items.
- To mark the order as fulfilled, click on the "Fulfill Order" button.
- You can also update the order status, add tracking information, and communicate with the customer through the communication section within the order.
- Once the order is fulfilled, you can generate an invoice, packing slip, or shipping label if required.
- The customer will be notified about the order fulfillment through email or any other configured notification method.
Note: This is a general guideline for managing and fulfilling orders with Microweber on Bluehost. The actual steps may vary slightly based on the version and setup of your Microweber installation.
How to upload the Microweber installation package to Bluehost?
To upload the Microweber installation package to Bluehost, follow these steps:
- Log in to your Bluehost account.
- Navigate to the cPanel (Control Panel) by clicking on the "Hosting" tab.
- In the cPanel, scroll down and find the "Files" section. Click on "File Manager".
- A popup window will appear. Choose the "Web Root (public_html/www)" option and make sure the "Show Hidden Files (dotfiles)" box is checked. Then, click on "Go".
- The File Manager will open in a new tab. Locate the directory where you want to upload the Microweber files. If you want to install Microweber in the root directory (e.g., www.yourdomain.com), select the "public_html" folder. If you want to install it in a subdirectory (e.g., www.yourdomain.com/blog), navigate to that specific folder.
- Once you are in the desired directory, click on the "Upload" button from the top menu.
- In the upload window, click on the "Select File" button and locate the Microweber installation package (.zip file) on your computer.
- After selecting the file, click on the "Open" button to start the upload process. The progress bar will indicate the file upload status.
- Once the upload is complete, return to the File Manager tab and locate the uploaded Microweber installation package (.zip file).
- Right-click on the file and choose "Extract" to unzip the package. This will create a new folder containing the Microweber files.
- If you want Microweber to be installed in the root directory, you can move the contents of the extracted folder directly into the "public_html" folder. If you are installing it in a subdirectory, you can create a new directory within "public_html" and move the contents of the extracted folder into it.
- Depending on your preferences, you may also need to create a new MySQL database and user in Bluehost. You can do this by going back to the cPanel, finding the "Databases" section, and clicking on "MySQL Database Wizard". Follow the prompts to create the database and user, making note of the details (database name, username, and password).
- Once the files and database are set up, you can access the Microweber installation by navigating to your website's URL in a web browser and following the on-screen instructions to complete the installation process.
Remember to always refer to Bluehost's documentation or contact their support team for specific instructions or if you encounter any difficulties during the process.
How do I download Microweber?
To download Microweber, follow these steps:
- Visit the Microweber website at https://microweber.com/.
- Click on the "Download" button on the top menu or scroll down to the bottom of the homepage where you'll find a download button.
- On the download page, you'll see different options to choose from, including the Microweber CMS or the Microweber Website Builder. Select the one that suits your needs.
- After selecting your preferred option, you can choose either the "Free Download" or "Premium Download" button. The free version includes basic features, while the premium version provides additional functions and support.
- Click on the appropriate download button, and your download will start automatically.
Once the download is complete, you can find the Microweber setup file in your designated downloads folder. From there, you can proceed with the installation and setup process according to the instructions provided by Microweber.
What is the default admin username and password for Microweber on Bluehost?
The default admin username and password for Microweber on Bluehost will vary depending on the setup and installation process. It is recommended to refer to the documentation or support provided by Bluehost for the specific username and password for Microweber on their platform.