
Best Inventory Management Tools for Shopify to Buy in June 2026

Zonon 001-2000 Pieces Inventory Number Sticker Labels Self Adhesive Waterproof Labels Vinyl Consecutive Number Stickers for Indoor, Outdoor, Storage, Classification, Supplies, 0.39 x 0.78 Inch
- STREAMLINE ORGANIZATION WITH VERSATILE INVENTORY LABELS FOR ANY USE.
- DURABLE, WATERPROOF LABELS ENSURE LONG-LASTING, OUTDOOR RELIABILITY.
- SELF-ADHESIVE DESIGN SIMPLIFIES TAGGING AND ENHANCES EFFICIENCY QUICKLY.


BookFactory Inventory Log Book/Small Business Inventory Tracker/Tracking Register - Wire-O, 100 Pages, 6'' x 9'' (Made in USA)
- VETERAN-OWNED & MADE IN USA: SUPPORT LOCAL & HONORABLE BUSINESSES!
- SIMPLE INVENTORY TRACKING FOR SMALL BUSINESSES-EFFORTLESS MANAGEMENT!
- PERFECT FOR PLANT SHOWS & BARS-TRACK 100 PRODUCTS WITH EASE!
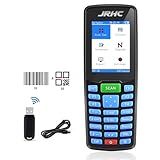
1D 2D Barcode Scanner Wireless, JRHC Portable Inventory Scanner & Data Collector Data Terminal PDT Inventory Device with Long Transmission Distance 2.4G Wireless Bar Code Reader with 2.8" LCD Screen
-
3-IN-1 FUNCTIONALITY: VERSATILE MODES FOR SEAMLESS INVENTORY MANAGEMENT.
-
LONG-DISTANCE WIRELESS: CONNECTS UP TO 492 FEET FOR EFFICIENT SCANNING.
-
ROBUST DATA STORAGE: STORES 100,000 BARCODES OFFLINE FOR ULTIMATE FLEXIBILITY.
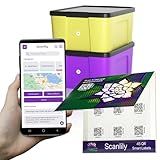
Scanlily Smart QR Label System Using AI for Inventory and Organization (90 White 2cm Diameter Stickers)
-
EFFORTLESS INVENTORY CREATION: USE AI TO CATALOG BELONGINGS FAST!
-
NO APP NEEDED FOR VIEWING: EASY SHARING THROUGH QR CODES!
-
OWN YOUR DATA: FREE CSV EXPORT, NO SUBSCRIPTIONS REQUIRED!

Inventory Optimization: Models and Simulations
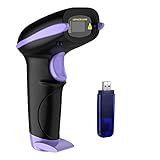
NADAMOO Wireless Barcode Scanner 328 Feet Transmission Distance USB Cordless 1D Laser Automatic Barcode Reader Handhold Bar Code Scanner with USB Receiver for Store, Supermarket, Warehouse - Violet
-
LONG-RANGE TRANSMISSION: 400M IN OPEN AIR, 100M INDOORS-NO CABLES NEEDED.
-
30 DAYS OF BATTERY LIFE: SCANS 2000 BARCODES DAILY WITH 2600MAH BATTERY.
-
FLEXIBLE PAIRING MODES: ONE-TO-ONE OR MULTIPLE-TO-ONE FOR EFFICIENT SCANNING.
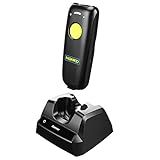
NADAMOO 2D Wireless Barcode Scanner Compatible with Bluetooth, Portable USB 1D 2D QR Code Scanner for Inventory, Bar Code Image Reader for Tablet iPhone iPad Android iOS PC POS, with Charging Dock
-
CONVENIENT CHARGING DOCK: ALWAYS READY, JUST PLACE IT TO POWER UP!
-
VERSATILE CONNECTIONS: BLUETOOTH, 2.4G, OR WIRED-CONNECT TO ANY DEVICE!
-
LONG-RANGE SCANNING: CAPTURE BARCODES UP TO 164FT, ANYWHERE YOU GO!
Inventory Check Out Sheets: Equipment Sign Out Logbook for Small Business | Track Assets Checked Out & Returned | 100 Double-Sided Pages

Inventory Management for Veterinary Professionals
Managing inventory in Shopify is crucial for any e-commerce business. It helps ensure that you have accurate stock levels, prevent overselling, and maintain customer satisfaction. Here are some key aspects to consider when managing inventory in Shopify:
- Product creation: Start by adding your products to your Shopify store. Each product should have a title, description, SKU (Stock Keeping Unit), price, and any variants (like size or color) associated with it. This information helps you organize and identify products.
- Stock counting: Regularly count your physical inventory to ensure accuracy. You can use this information to update your Shopify inventory levels manually or use third-party inventory management apps that integrate with Shopify for automating this process.
- Adjusting inventory levels: Whenever you sell a product, whether it's through Shopify or another channel like a retail store, manually adjust the inventory levels to reflect the sale. This is important to prevent selling products that are out of stock. Shopify can automatically decrease stock levels when orders are placed, but it's still essential to keep manual track.
- Stock keeping: Assign a designated storage location for your products. Proper stock keeping allows you to locate and fulfill orders efficiently and minimizes the risk of misplaced or lost inventory items.
- Inventory forecasting: Analyze your sales data to forecast future demand for your products. This helps you make informed decisions regarding restocking and purchasing inventory in advance, preventing stockouts or excess inventory.
- Low stock alerts: Shopify allows you to set up low stock alerts to notify you when certain products or variants reach a predetermined inventory level. This helps you identify when to restock and avoid running out of popular items.
- Backorders and pre-orders: If you allow backorders or pre-orders, clearly communicate the estimated availability dates to customers to manage their expectations accurately.
- Bundles and kits: Track and manage inventory for bundled products or kits. Shopify allows you to create these product types and automatically deducts inventory for the individual components, ensuring accurate tracking.
- Integrations and apps: Shopify has various inventory management apps that offer advanced features and integrations with other systems like point-of-sale (POS), shipping, or accounting tools. Explore these options to streamline your inventory management process.
By following these guidelines, you can maintain accurate inventory levels, prevent stockouts, and deliver a seamless shopping experience to your customers.
How to add products to the inventory in Shopify?
To add products to the inventory in Shopify, follow these steps:
- Log in to your Shopify account.
- From your Shopify admin dashboard, click on "Products" in the left-hand menu.
- On the Products page, click on the "Add product" button.
- In the Add Product form, enter the relevant information such as the product's title, description, and images.
- Under Pricing, specify the product's price and any other pricing details like compare at price or cost per item.
- In the "Inventory" section, provide the SKU (stock keeping unit) or barcode of the product if applicable.
- Choose the product's inventory policy, which can be "Shopify tracks this product's inventory" or "Don't track inventory for this product."
- If you selected to track inventory, enter the quantity of the product available in the "Quantity" field.
- Optionally set up product variants (if your product has multiple options like size or color) by clicking on the "Add variant" button.
- Configure additional options like product visibility, collection assignments, and search engine optimization settings, if desired.
- Once you've filled all the necessary information, click on "Save" to add the product to your inventory.
Repeat these steps for each product you want to add to your Shopify inventory.
How to import inventory from a CSV file to Shopify?
To import inventory from a CSV file to Shopify, you can follow these steps:
- Prepare your CSV file: Make sure the inventory data is properly organized in a CSV file. Each column should represent a specific field such as SKU, title, variant, cost, price, quantity, etc.
- Access Shopify Admin: Log in to your Shopify account and go to the Shopify Admin portal.
- Go to the Products section: Click on the "Products" tab from the left-hand side menu in the Shopify Admin.
- Click on "Import": Once you are in the Products section, you will see an "Import" button. Click on it to start the import process.
- Select the CSV file: Shopify will prompt you to select a CSV file from your computer. Choose the CSV file containing the inventory data you want to import.
- Map CSV columns to Shopify fields: In this step, you need to map the columns from your CSV file to the corresponding fields in Shopify. For example, map the SKU column to the SKU field, title column to the title field, and so on. This step ensures that the data is correctly matched during the import.
- Review the Import Settings: Shopify provides several options to configure during the import process. Make sure to review the import settings and select the appropriate options based on your requirements.
- Import the inventory: Once you have configured all the settings, click on the "Import" button to start importing the inventory from the CSV file to Shopify.
- Monitor the import process: Shopify will display the progress of the import process. Monitor the progress and ensure that no errors occur during the import.
- Verify the imported inventory: After the import process is completed, review the newly imported inventory in the Products section of your Shopify Admin. Validate that the data is accurate and matches the information from the CSV file.
By following these steps, you can successfully import inventory from a CSV file to Shopify.
How to manage inventory for pre-orders in Shopify?
To manage inventory for pre-orders in Shopify, you can follow these steps:
- Enable pre-orders: Go to your Shopify admin panel and navigate to Settings > Checkout. Under the Order processing section, select the option to "Allow customers to purchase this product when it's out of stock."
- Set stock level: Enter the initial stock level for the pre-ordered product. This should be the number of units that you anticipate will be available for pre-order.
- Set availability date: Specify the expected availability date for the pre-ordered product. This will let customers know when they can expect to receive their orders.
- Add disclaimer: Consider adding a disclaimer to the product description or at checkout to inform customers that the product is on pre-order and the estimated availability date. This helps manage customer expectations and reduces inquiries.
- Track and fulfill orders: As pre-orders come in, track them separately from regular orders. You can create a separate order status or tag to identify these orders easily.
- Adjust stock levels: Monitor the quantity of pre-orders received and adjust the stock level accordingly. This ensures you don't oversell the product and disappoint customers.
- Communicate with customers: Keep customers informed about the progress of their pre-orders. Provide updates on manufacturing, shipping, or any delays that may occur. Send automated emails or messages to keep them engaged until the product is ready to ship.
- Fulfill orders when stock arrives: When the pre-ordered product is available, fulfill the orders as per your standard fulfillment process. Update the tracking details and inform customers that their orders have shipped.
By following this approach, you can effectively manage inventory for pre-orders in Shopify while keeping customers informed and satisfied throughout the process.
How to manage inventory for seasonal or limited-edition products in Shopify?
Managing inventory for seasonal or limited-edition products in Shopify can be done using the following steps:
- Set up product variants: Create different product variants for each option, such as size, color, or pattern. This allows you to accurately track inventory for each specific combination of options.
- Set stock quantity: Assign an initial stock quantity to each product variant. This should reflect the number of units you have available for sale.
- Enable inventory tracking: Enable Shopify's inventory tracking feature. This ensures that inventory levels are automatically updated as customers make purchases.
- Set inventory policy: Choose an inventory policy for each product variant. The options are "Shopify tracks this product's inventory" or "Don't track inventory" based on whether you want Shopify to manage your inventory or not.
- Set up low stock notifications: Configure email notifications for low stock levels. This helps you stay informed about inventory levels and restock in a timely manner.
- Limit purchase quantities: If needed, set purchase limitations on specific product variants to prevent customers from buying excessive quantities.
- Set up pre-order options: If you offer pre-orders for seasonal or limited-edition products, utilize Shopify’s pre-order feature to allow customers to reserve items before they become available.
- Regularly monitor inventory: Keep a close eye on your inventory levels to ensure accurate tracking and avoid overselling or running out of stock.
- Product availability messaging: If a product variant is out of stock or unavailable, clearly communicate this to customers on the product page. Shopify allows you to display custom messages for different stock scenarios.
- Remove or archive products: Once a seasonal or limited-edition product has sold out or is no longer available, consider archiving or removing it from your active product list. This helps reduce clutter and keeps your inventory organized.
By following these steps, you can effectively manage inventory for your seasonal or limited-edition products in Shopify, ensuring accurate tracking, timely restocking, and a positive customer experience.
How to generate inventory reports in Shopify?
To generate inventory reports in Shopify, you can follow these steps:
- Log in to your Shopify account and go to the "Products" tab.
- Click on the "Inventory" tab on the left-hand side.
- In the "Inventory" page, you will see a list of all your products along with their inventory information.
- To generate a report, click on the "Export" button located on the right-hand side of the page.
- Shopify provides various report options, like CSV, Excel, or plain text. Choose the format that suits your needs.
- Select the specific information you want to include in your report, such as SKU, product name, quantity, etc.
- Once you have selected your preferences, click on the "Export" button to generate the report.
- Wait for the report to be generated, and then click on the download link to save it to your computer.
- Open the downloaded file, and you will have your inventory report with the selected information.
By following these steps, you can easily generate inventory reports in Shopify to keep track of your product stock levels, monitor sales trends, and make data-driven decisions.