
Best Ember.js Tools to Buy in June 2026
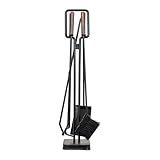
Modern Ember Levi 5 Piece Fireplace Tool Set in Black with Walnut Wood Handles | Includes Brush, Shovel, Fire Poker, Tongs, and Stand | Heavy-Duty Steel | Heat-Resistant Powder Coating
- ALL-IN-ONE SET: INCLUDES BRUSH, SHOVEL, POKER, TONGS, AND STAND.
- BUILT TO LAST: HEAVY-DUTY STEEL WITH HEAT & CORROSION RESISTANCE.
- STYLISH DESIGN: COMPLEMENTS ANY DÉCOR WITH WALNUT WOOD HANDLES.


Modern Ember Cascade 5 Piece Fireplace Tool Set in Black | Includes Brush, Shovel, Fire Poker, Tongs, and Stand | Heavy Guage, Coated Steel | Heat-Resistant Plating | Sleek Rounded Handles
- COMPLETE 5-PIECE SET FOR EFFORTLESS FIREPLACE MAINTENANCE.
- HEAVY-GAUGE STEEL ENSURES LASTING DURABILITY AND PERFORMANCE.
- STYLISH DESIGN COMPLEMENTS ANY DECOR, ENHANCING HOME AESTHETICS.
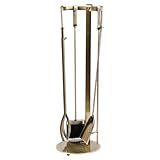
Modern Ember Knoll Fireplace Tool Set in Aged Brass - Includes Brush, Shovel, Fire Poker, Tongs, and Stand - Steel Construction
- ELEGANT AGED BRASS FINISH ELEVATES ANY FIREPLACE DECOR.
- DURABLE STEEL CONSTRUCTION ENSURES LONG-LASTING USE AND STYLE.
- QUICK SETUP LETS YOU ENJOY YOUR FIREPLACE TOOLS IN MINUTES!

Ember's Hollow
To re-render a template using a cached property in Ember.js, you can make use of the @cached decorator. This decorator is used to create a property that returns a cached value, which will only be re-calculated if one of its dependencies changes.
To implement this, you can define a cached property in your Ember component or controller using the @cached decorator on a getter method. This cached property can then be used in your template to display the cached value.
Whenever one of the dependencies of the cached property changes, Ember will automatically re-calculate the cached value and re-render the template. This helps to improve the performance of your Ember application by avoiding unnecessary re-calculations of the cached property.
Overall, using the @cached decorator in Ember.js allows you to efficiently re-render a template using a cached property that is only recalculated when needed.
How to trigger a re-render using a cached property in ember.js?
In Ember.js, you can trigger a re-render using a cached property by using the notifyPropertyChange method. This method will notify any observers that the property has changed and trigger a re-render of the related components.
To use notifyPropertyChange, you need to call it with the name of the cached property that you want to update. For example, if you have a cached property called cachedProperty and you want to trigger a re-render when it changes, you can use the following code:
this.notifyPropertyChange('cachedProperty');
You can call this method in a setter function or any other method where the cached property value is updated. This will ensure that any components that are dependent on this property will re-render when it changes.
By triggering a re-render with notifyPropertyChange, you can keep your UI in sync with the latest data and ensure that any changes to your cached properties are reflected in the user interface.
How to create a computed property based on a cached property in ember.js?
In Ember.js, you can create a computed property that depends on a cached property by using the computed helper function. Here's an example of how to create a computed property based on a cached property:
import Ember from 'ember';
export default Ember.Component.extend({ // Cached property cachedProperty: 'cached value',
// Computed property that depends on the cached property computedProperty: Ember.computed('cachedProperty', function() { let cachedValue = this.get('cachedProperty');
// Perform some calculation or transformation on the cached value
let computedValue = cachedValue.toUpperCase();

return computedValue;
}) });
In this example, the computedProperty will automatically update whenever the cachedProperty changes because it is dependent on it. You can use the computedProperty in your template or in other parts of your Ember application.
What is a cached property in ember.js?
In Ember.js, a cached property is a property that is computed only once and then cached for subsequent access. This means that when the property is accessed multiple times, the computed value is returned from the cache instead of being recomputed each time.
Cached properties are created using the @computed decorator in Ember.js, which allows developers to define properties that depend on other properties and automatically update when those dependent properties change.
Using cached properties can improve performance in Ember.js applications by reducing unnecessary computations and re-renders when the property value has not changed.
What is the syntax for caching a property in ember.js?
In Ember.js, you can cache a property by using the @cached decorator. Here's the syntax for caching a property:
import { tracked, cached } from '@glimmer/tracking';
export default class YourComponent extends Component { @tracked someData = 'Some data';
@cached get cachedData() { // Perform expensive computation, API call, or other operations here return this.someData; } }
In this example, the @cached decorator is used to cache the result of the cachedData getter function. The cached value will be computed once and then returned on subsequent calls without recalculating it.
How to improve performance using cached properties in ember.js?
Using cached properties in Ember.js can significantly improve performance by avoiding unnecessary recalculations of expensive operations or data fetches. This can be achieved by creating computed properties that rely on a cached value that only updates when necessary.
Here are some tips on how to effectively use cached properties to improve performance in Ember.js:
- Use @cached decorators: The @cached decorator is a built-in feature in Ember Octane that allows you to create cached properties. By using this decorator, the computed property will recompute and update its value only when the dependent properties change. This can help reduce unnecessary recalculations and improve performance.
- Minimize side effects: When creating cached properties, it's important to minimize side effects and ensure that the computed property is pure, meaning it only depends on its input values and does not trigger any external changes. This will make the caching mechanism more reliable and predictable.
- Consider using Ember.computed function: If you're working with older versions of Ember.js that do not support the @cached decorator, you can use the Ember.computed function to define cached properties. By setting the volatile property to false, you can create a computed property that caches its value.
- Use memoization: Another technique for caching property values is memoization, which involves storing the result of an expensive function call and returning the cached value when the function is called with the same arguments again. This can be achieved by using closures or higher-order functions in JavaScript.
- Monitor performance with Ember Inspector: To monitor the performance impact of cached properties in your Ember.js application, you can use the Ember Inspector tool to inspect the cache hits and misses for each computed property. This can help you identify any bottlenecks and optimize the caching strategy.
By following these tips and best practices, you can effectively use cached properties to improve the performance of your Ember.js application and enhance the user experience.
How to access a cached property in ember.js?
In Ember.js, you can access a cached property by referring to it in your template or in your JavaScript code. Cached properties are calculated properties that are only re-evaluated when their dependent keys change.
To access a cached property in a template, you can use the {{}} syntax and reference the property name. For example, if you have a cached property named fullName in your component, you can access it in your template like this:
To access a cached property in your JavaScript code, you can use the get method on the Ember object. For example, if you have a computed property named fullName in your component, you can access it in your JavaScript code like this:
this.get('fullName')
By accessing cached properties in this way, you can ensure that the property is only recalculated when its dependent keys change, improving performance in your Ember.js application.