
Best Shipping Rate Tools to Buy in June 2026
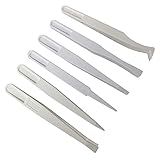
FEITA Precision Plastic Tweezers Kit - Plastic Anti static Tweezers Set Pickup Craft Electronics DIY Repair Tool - White - 6Pcs
-
SAFE FOR ELECTRONICS: ANTI-STATIC DESIGN PREVENTS DAMAGE TO SENSITIVE COMPONENTS.
-
VERSATILE USE: PERFECT FOR MOBILE REPAIRS, LABS, AND PRECISION WORK.
-
DURABLE & COST-EFFECTIVE: STRONG, ELASTIC, AND SCRATCH-FREE COMPARED TO METAL TWEEZERS.


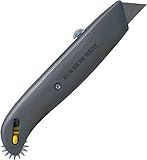
Box Resizer Tool with Scoring Wheel - Utility Knife Cardboard Scorer, Reducer - Box Cutter Sizer Tool for Resizing Reducing Size of Shipping Boxes
- VERSATILE TOOL: RESIZE BOXES, CUT PACKAGES, AND SCORE WITH EASE!
- COST-SAVING DESIGN: REUSE BOXES AND REDUCE WASTE EFFORTLESSLY.
- CONVENIENT AND COMPACT: EASILY REPLACEABLE BLADE FOR LONG-TERM USE!

3-IN-ONE Professional Grade Pneumatic Tool Oil, 4 OZ
- FAST-ACTING FORMULA DISSOLVES GUM, SLUDGE, AND PREVENTS RUST.
- WATERPROOF DESIGN ENSURES TOOLS STAY RUST-FREE IN EXTREME CONDITIONS.
- PRECISE MARKSMAN TWIST SPOUT FOR TARGETED APPLICATION AND CONTROL.
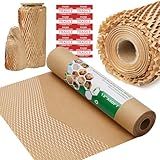
Honeycomb Packing Paper Wrap 12"x60' Recycled Bubble Cushioning Wrap Roll Eco Friendly Shipping Boxes Moving Wrap Packing Supplies Material with 10 Fragile Sticker Labels
-
PROTECT FRAGILE ITEMS: HONEYCOMB WRAP CUSHIONS GOODS FOR SAFE TRANSPORT.
-
SPACE-SAVING DESIGN: ECO-FRIENDLY WRAP TAKES LESS SPACE THAN BUBBLE WRAP.
-
BIODEGRADABLE & SUSTAINABLE: OUR PAPER IS FULLY COMPOSTABLE, NO PLASTIC USED.
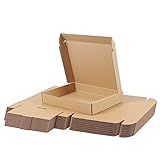
PHAREGE 12x9x2 inch Shipping Boxes Bulk 25 Pack Brown, Tab Lock Tuck Top Mailer Boxes for Packaging Small Business, Medium Cardboard Gift Boxes for Wrapping Mailing Present
- STURDY KRAFT CARDBOARD ENSURES SAFE MAILING OF SMALL ITEMS.
- PERFECT FOR SMALL BUSINESSES AND GIFT WRAPPING CREATIVITY.
- QUICK ASSEMBLY WITH SECURE TUCK TOP DESIGN FOR EFFICIENCY.
2 Pcs Polyurethane Foam Sheet- 16 x 12 x 1.5 Inch Cuttable Foam Inserts for Cases- Packing Foam Pads for Toolbox Camera Storage and Crafts
-
VERSATILE FOAM: CUSTOMIZE DESIGN FOR ANY FRAGILE ITEM STORAGE NEEDS.
-
DURABLE PROTECTION: LIGHTWEIGHT, SOFT FOAM GUARDS VALUABLES DURING TRANSPORT.
-
EASY TO CUT: SIMPLE SHAPING ALLOWS FOR TAILORED STORAGE SOLUTIONS.

PerKoop 12"x175' Inflatable Air Pillows for Shipping Large Bubble Cushioning Wrap Packing with Pump Bubble Cushioning Wrap Roll with Fragile Stickers for Heavy Duty Moving Protection
- COMPREHENSIVE KIT: INCLUDES ALL ESSENTIALS: WRAP, PUMP, AND STICKERS.
- DURABLE PROTECTION: 55UM THICKNESS ENSURES SAFE TRANSIT FOR FRAGILE ITEMS.
- VERSATILE USE: PERFECT FOR PACKING WINE BOTTLES, CERAMICS, AND ELECTRONICS.

XAQISHIRE 8in 4 Way Wood Rasp File, Premium Grade High Carbon Hand File and Round Rasp, Half Round Flat & Needle Files, Multifunctional Hand File for Sharping Wood, Soft Metal, Plastic Tool - - 1PC
-
FOUR TOOLS IN ONE: TRIM PLANES AND CURVES EFFICIENTLY.
-
DURABLE HIGH-CARBON STEEL ENSURES LONG-LASTING, EFFECTIVE USE.
-
ERGONOMIC HANDLE REDUCES FATIGUE, ENHANCING USER COMFORT AND ACCURACY.
To set up shipping rates in Shopify, you can follow these steps:
- Log in to your Shopify admin panel.
- Click on "Settings," then select "Shipping and delivery" from the dropdown menu.
- On the Shipping page, scroll down to the "Shipping rates" section.
- Click on "Add rate" to create a new shipping rate.
- In the "Name" field, enter a name for the shipping rate, such as "Standard Shipping" or "Express Shipping."
- In the "Price" field, specify how much you want to charge customers for this shipping rate.
- Next, define the conditions under which this shipping rate will apply. You can set it based on weight, price, or location.
- If you want to offer free shipping for certain orders, you can choose to enable the "Free shipping" rate and configure the conditions accordingly.
- Under the "Rest of the world" section, you can set up international shipping rates if you ship internationally.
- Once you have filled in all the necessary details, click on the "Save" button to save the shipping rate.
By following these steps, you can set up and customize shipping rates in Shopify to provide accurate and transparent shipping costs to your customers.
How to track shipped orders in Shopify?
To track shipped orders in Shopify, follow these steps:
- Login to your Shopify account.
- From your Shopify admin dashboard, go to the "Orders" tab on the left-hand side.
- Click on the specific order you want to track.
- In the Order details page, scroll down to the "Fulfillment" section.
- You will see the fulfillment status of the order (e.g., unfulfilled, partially fulfilled, or fulfilled).
- If the order has been fulfilled, you will find a tracking number in the "Tracking number" field.
- Copy the tracking number.
- Go to the carrier's website (e.g., FedEx, USPS, UPS) and navigate to their tracking page.
- Paste the tracking number into the tracking field and click "Track" or similar.
You will then be able to see the status and location of your shipped order. Note that the tracking information provided by carriers may take some time to update, so check back periodically for the most accurate details.
How to set up free shipping for orders over a certain amount in Shopify?
To set up free shipping for orders over a certain amount in Shopify, follow these steps:
- Log in to your Shopify admin.
- Click on "Settings" in the bottom-left corner of your dashboard.
- From the dropdown menu, select "Shipping and delivery."
- Scroll down to the "Shipping" section and click on "Manage rates" next to your desired shipping zone.
- Under the "Add shipping rate" section, click on "Add rate" > "Based on order price."
- Set a minimum order value by entering a price in the "Over" field. For example, if you want to offer free shipping for orders over $50, enter "50" in this field.
- In the "Rate" field, enter "0.00" to indicate that there will be no shipping charge for orders over the minimum value.
- Provide an appropriate name for the shipping rate, such as "Free Shipping" or "Orders Over $50."
- Click on "Done" to save the changes.
- Repeat steps 5-9 if you have multiple shipping zones that you want to offer free shipping for.
Once you've completed these steps, your customers will be offered free shipping automatically when their order total meets or exceeds the minimum value you specified.
What is Shopify shipping insurance and how to add it to orders?
Shopify shipping insurance is a service offered by Shopify that protects merchants against loss, damage, or theft of their shipments during transit. It covers the cost of the item(s) and shipping charges.
To add shipping insurance to orders, you can follow these steps:
- Go to your Shopify admin dashboard and click on "Settings" located at the bottom left of the page.
- From the dropdown menu, select "Shipping and delivery."
- Scroll down to the "Shipping rates" section and click on "Manage rates."
- Choose the shipping zone you want to add insurance to, and click on the corresponding "Edit rate" link.
- In the "Add conditions" section, click on "Add condition," and select "Order subtotal" from the dropdown menu.
- Set the minimum value where you want the insurance coverage to apply.
- Scroll down to the "Add Price" section and enable the "Add insurance price" toggle. Enter the amount of insurance coverage you want to provide (usually a percentage of the order value or a fixed amount).
- Save your changes, and the insurance coverage will be added to the shipping rate for orders that meet the set conditions.
Please note that shipping insurance may require additional fees or may not be available in all regions. Make sure to review Shopify's documentation or contact their support for any specific details or questions regarding their shipping insurance service.
How to set up shipping rates for international orders in Shopify?
To set up shipping rates for international orders in Shopify, follow these steps:
- Log in to your Shopify admin panel.
- Go to the "Settings" section and click on "Shipping and delivery" or "Shipping" depending on your Shopify version.
- In the "Shipping and delivery" section, scroll down to the "Shipping zones" area.
- Click on the "Add shipping zone" button.
- Enter a name for the shipping zone (e.g., "International" or the name of a specific region).
- Under the "Countries" section, click on "Add countries" or "Rest of the world" depending on your preference.
- Select the countries you want to offer international shipping to, or choose "All countries" to include all available destinations.
- Click on the "Add rate" button below the selected countries.
- In the "Add shipping rate" pop-up window, enter a name for the shipping rate (e.g., "International Standard" or "Express Shipping"), and set the price for the shipping rate.
- Choose the shipping rate calculation method by selecting either weight-based rates or price-based rates.
- Provide the details required for the selected calculation method such as weight ranges, price ranges, or a combination.
- If desired, you can also select additional options like package size, shipping label display, or estimated delivery times.
- Click on "Done" to save the shipping rate.
- Repeat steps 8-13 to add more shipping rates for the same shipping zone or other international shipping zones.
- Once you've added all the desired shipping rates, click on "Save" to save the shipping zone settings.
You have now set up shipping rates for international orders in Shopify. These rates will be displayed to your customers during checkout, based on their shipping destination.
How to set up shipping rates based on location in Shopify?
To set up shipping rates based on location in Shopify, follow these steps:
- Log in to your Shopify account and go to the "Settings" tab.
- From the dropdown menu, select "Shipping and delivery."
- Under the "Shipping profiles" section, click on the shipping profile you want to set up location-based rates for.
- Scroll down to the "Shipping rates and methods" section and click on the "Edit" button next to the shipping method you want to configure.
- In the "Zones" section, click on the "Add zone" button to create a zone for a specific location.
- Name the zone and select the country or countries where the specific location(s) are situated.
- Once the zone is created, click on the "Add rate" button under the zone.
- Specify the shipping rate for that zone, which can be either a fixed rate or a calculated rate based on weight, price, or both.
- If you want to add more specific rates for different regions or states within that zone, click on the "Add rate" button again and set the rates accordingly.
- Save your changes, and the shipping rates based on location will be applied to your store.
Repeat the process for each shipping profile or method you want to configure based on location. Remember to save your changes after setting up each shipping zone and rate.