Best React Development Books to Buy in February 2026

The Road to React: Your journey to master plain yet pragmatic React.js


Modern Full-Stack React Projects: Build, maintain, and deploy modern web apps using MongoDB, Express, React, and Node.js


Learn React with TypeScript: A beginner's guide to building real-world, production-ready web apps with React 19 and TypeScript


React Key Concepts: An in-depth guide to React's core features


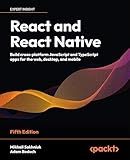
React and React Native: Build cross-platform JavaScript and TypeScript apps for the web, desktop, and mobile


Learning React: Modern Patterns for Developing React Apps


Full Stack Development with Spring Boot 3 and React: Build modern web applications using the power of Java, React, and TypeScript


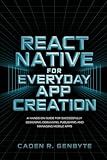
React Native for Everyday App Creation: A Hands-On Guide for Successfully Designing, Debugging, Publishing and Managing Mobile Apps


In React, state is used to keep track of data that may change over time in a component. To use state in React components, you need to first initialize it in the constructor of the component by calling super(props) and setting this.state to an object containing the initial state values.
You can then access and update the state using this.state and this.setState(). When updating the state, it is important to use this.setState() instead of directly mutating the state, as React will not re-render the component if the state is mutated directly.
To access the state in your components, you can simply use this.state followed by the key of the state value you want to access. You can also pass the state down as props to child components to share the state between different components.
Overall, using state in React components allows you to keep track of dynamic data and efficiently update the UI based on changes in the state.
What is the difference between state and props in React?
In React, both state and props are used to pass data and manage the behavior of components, but they serve different purposes and have some key differences.
- State:
- State is an internal data storage maintained by a component.
- State can be changed within the component using the setState() method.
- State is owned and controlled exclusively by the component where it is declared.
- Changes in state trigger a re-render of the component.
- State should only be used for data that can change during the lifetime of the component.
- State can only be modified within the component that owns it.
- Props:
- Props (short for properties) are used to pass data from a parent component to a child component.
- Props are like function arguments or parameters in the sense that they are passed from a parent component and remain immutable within the child components unless changed by the parent component.
- Props are read-only and cannot be modified within the child component.
- Props help in making components reusable and maintainable.
- Changes in props passed from a parent component trigger a re-render of the child component.
- Props provide a way to pass data and events down the component hierarchy.
In summary, state is used for internal data storage within a component, while props are used for passing data and events between components in a React application.
How to handle asynchronous state updates in React?
To handle asynchronous state updates in React, you can use the useState hook and useEffect hook to manage state changes and side effects respectively. Here is an example of how you can handle asynchronous state updates in React:
- Create a state variable using the useState hook:
const [data, setData] = useState(null);
- Use the useEffect hook to fetch data asynchronously and update the state:
useEffect(() => { const fetchData = async () => { try { const response = await fetch('https://api.example.com/data'); const result = await response.json(); setData(result); } catch (error) { console.error('Error fetching data: ', error); } };
fetchData(); }, []);
- Update the component to display the fetched data:
return (
By using the useState and useEffect hooks in React, you can easily manage asynchronous state updates and handle side effects in your components.
How to use the useReducer hook in React for state management?
The useReducer hook in React is used for state management, similar to the useState hook. However, useReducer is more suitable for managing complex state logic in your React components.
Here's how you can use the useReducer hook in React for state management:
- Import the useReducer hook from the 'react' package:
import React, { useReducer } from 'react';
- Create a reducer function that defines how the state should be updated based on the action type:
const initialState = { count: 0 };
const reducer = (state, action) => { switch (action.type) { case 'increment': return { count: state.count + 1 }; case 'decrement': return { count: state.count - 1 }; default: return state; } };
- Call the useReducer hook with the reducer function and initial state to create a state and dispatch function:
const [state, dispatch] = useReducer(reducer, initialState);
- You can now use the state and dispatch function in your component to manage the state:
return (
By following these steps, you can effectively use the useReducer hook in React for state management in your components.
How to handle state synchronization in React?
There are a few different ways to handle state synchronization in React:
- Lift state up: This means keeping the shared state in the closest common parent component of the components that need to access it. By doing this, you can pass the state down to the child components as props, allowing them to stay in sync with each other.
- Use context: React Context allows you to pass data through the component tree without having to pass props down manually at every level. This can be a good option for sharing state between components that are not directly related in the component tree.
- Use a state management library: Libraries like Redux or Mobx can help manage complex state synchronization in larger React applications. These libraries provide a centralized store for managing state that can be accessed and updated by any component in the application.
- Use useEffect hook: You can use the useEffect hook to trigger side effects in response to changes in the component's state. This can be useful for synchronizing state with external data sources or for performing actions in response to state changes.
Overall, the best approach for handling state synchronization in React will depend on the specific requirements of your application. It's important to consider the complexity of your state management needs and choose the approach that best suits your use case.
What is a controlled component in React and how does it relate to state?
In React, a controlled component is a component that takes its current value and updates from its parent component, typically through props. This means that the parent component has full control over the child component's value and can update it at any time.
A controlled component is usually tied to a specific piece of state in the parent component, which is passed down to the child component as a prop. When the value of the controlled component is changed, it calls a function from the parent component that updates the state, causing a re-render of the parent and child components with the new value.
By using controlled components, React ensures that the data flow is unidirectional, making it easier to manage and debug the application's state. Controlled components also allow for more predictable behavior and easier testing, as the state of the component is centralized in a single location.
How to use stateful functional components in React?
Stateful functional components in React can be created using the useState hook. Here is a simple example of how to use stateful functional components in React:
- Import the useState hook from React:
import React, { useState } from 'react';
- Create a functional component and define state using the useState hook:
const Counter = () => { const [count, setCount] = useState(0);
const increment = () => { setCount(count + 1); };
return ( Count: {count} Increment ); };
- In this example, the useState hook is used to create a state variable count initialized with a value of 0 and a function setCount to update the count state. We also define an increment function that increments the count when the button is clicked.
- You can then use the Counter component in your application like any other React component:
function App() { return ( Stateful Functional Component ); }
- And that's it! You've successfully created a stateful functional component in React using the useState hook. When you click the "Increment" button, the count will increase and be displayed on the screen.
