Best Timezone Tools to Buy in June 2026
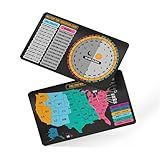
Military Time Conversion Chart & USA Time Zone Map Chart | Full Color Pocket Reference Guide | Stainless Steel Wallet-Sized ID Card 3.5" x 2.25" | Desk Accessories for Nurse, Military, and Businesses
-
ESSENTIAL TIME MANAGEMENT TOOL: BOOST CUSTOMER SERVICE WITH EASE!
-
DURABLE DESIGN: WALLET-SIZED, HIGH-QUALITY STEEL FOR ON-THE-GO USE.
-
VIBRANT & EDUCATIONAL: COLORFUL CHEAT SHEET FOR QUICK MILITARY TIME CHECKS!


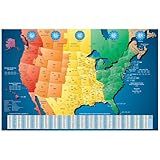
ImageAbility North America Laminated Gloss Time Zone Area Code Maps with Reverse Lookup, Set of 6 Desk Size 11 by 17 Inches
-
COLORFUL 3D DESIGN: STUNNING VISUALS MAKE TIME ZONES EASY TO LOCATE.
-
UPDATED AREA CODE TABLE: EASILY FIND CODES AND TIME ZONES BY STATE.
-
DURABLE & CONVENIENT: LAMINATED FOR PROTECTION; PERFECT FOR DESK USE.
In Laravel, using timezones is straightforward and allows you to easily manipulate and display dates and times according to different regions. Here's how you can use timezones in Laravel:
- Configuring the Timezone: Laravel uses the configuration file config/app.php to set the default timezone for your application. You can modify the timezone option to the desired timezone, such as 'UTC' or 'America/New_York'.
- Setting the Timezone for a Request: You can set the timezone dynamically for a specific request by using the timezone method provided by Laravel's Carbon library. For example, you can set the timezone to 'America/Chicago' by calling Carbon::setTimezone('America/Chicago') during the execution of a request.
- Displaying Date and Time in a Specific Timezone: Laravel's Carbon library provides convenient methods to manipulate and display dates and times in different timezones. You can use the setTimezone method on a Carbon instance to convert the time to the desired timezone. For instance, if you have a Carbon instance $date and you want to display it in the 'Europe/Paris' timezone, you can call $date->setTimezone('Europe/Paris').
- Converting Timezones in Database Queries: Laravel's query builder and Eloquent ORM provide methods to convert timezones directly in database queries. For example, you can use the CONVERT_TZ function provided by your database to convert a datetime column to a specific timezone while querying the database. Laravel offers the whereTimezone method which can be used to convert a datetime column to a specific timezone in a query.
- Localization and Timezones: If your application requires language localization, you can also specify the timezone for localized date and time formats. Laravel uses the config/app.php file to configure the default locale. You can modify the locale option to the desired locale, such as 'en' or 'fr', and Laravel will automatically apply the date and time formats according to that locale's conventions.
By utilizing these features offered by Laravel, you can easily work with timezones, convert between different regions, and display dates and times according to user preferences or specific requirements.
How to display the current timezone in Laravel?
To display the current timezone in Laravel, you can use the timezone method of the Carbon class which is the default DateTime library in Laravel.
Here's an example code snippet to display the current timezone in Laravel: