
Best Tools to Work With Static Files in Next.js to Buy in June 2026

Hurricane 21 PCS Interchangeable Metal File Set,8 inch File Tool Set Include Flat/Triangle/Half-Round/Round Large Files & 12 Needle Files with Universal Quick Change Handles and Carrying Bag
-
COMPLETE 21-PIECE SET FOR ALL YOUR FILING NEEDS.
-
ERGONOMIC QUICK-CHANGE HANDLE FOR ULTIMATE COMFORT.
-
HIGH-GRADE ALLOY STEEL FOR PRECISION & DURABILITY.


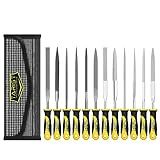
Hi-Spec 17 Piece Metal Hand & Needle File Tool Kit Set. Large & Small Mini T12 Carbon Steel Flat, Half-Round, Round & Triangle Files. Complete in a Zipper Case with a Brush
- ALL-IN-ONE SET FOR METAL, WOOD, AND PLASTICS-VERSATILE FILING TOOLS!
- EXCEPTIONAL DURABILITY WITH HEAT-TREATED T12 CARBON STEEL CONSTRUCTION.
- ORGANIZED STORAGE CASE FOR EASY TRANSPORT AND QUICK ACCESS TO TOOLS.
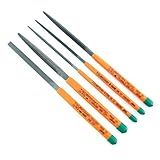
Tsubosan Hand tool Workmanship file set of 5 ST-06 from Japan
- PRECISION FILING FOR SMOOTH, ACCURATE FINISHES ON VARIOUS MATERIALS.
- ERGONOMIC DESIGN FOR COMFORTABLE, EFFICIENT HANDLING AND CONTROL.
- DURABLE CONSTRUCTION ENSURES LONG-LASTING PERFORMANCE AND RELIABILITY.
TARIST 12PCS Needle File Set with Tool Bag, Small File Set Includes 6pcs Jewlers Files & 6 Steel Files for Metal, Jewlers, Wood, Leather and Plastic
- PREMIUM CARBON STEEL FOR DURABLE, HIGH-PERFORMANCE FILING EFFICIENCY.
- VERSATILE FOR METAL, WOOD, JEWELRY, PLASTICS, CERAMICS, AND GLASS.
- RELIABLE AFTER-SALES SUPPORT ENSURES YOUR SATISFACTION WITHIN 24 HOURS.

Small Hand Files Set for Detail and Precise Work, Hardened Alloy Strength Steel File Tools Includes Square,Equaling,Round,Flat Warding,Triangle
- DURABLE CARBON STEEL ENSURES LONG-LASTING CUTTING PERFORMANCE.
- ERGONOMIC RUBBER HANDLE OFFERS A COMFORTABLE GRIP IN ANY CONDITION.
- VERSATILE FOR DETAILING WOOD, METAL, GLASS, AND MORE PRECISION WORK.
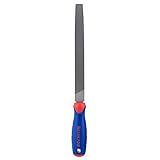
WORKPRO W051002 10 In. Flat File – Durable Steel File to Sharpen Tools and Deburr, Comfortable Anti-Slip Grip, Double Cut – Tool Sharpener for Professionals and DIY (Single Pack)
- ERGONOMIC ANTI-SLIP GRIP FOR COMFORTABLE, PRECISE TOOL SHARPENING.
- DURABLE 10” FILE WITH DOUBLE-CUT AND SINGLE-CUT PRECISION TEETH.
- VERSATILE TOOL FOR DEBURRING AND VARIOUS DIY PROJECTS.

E•Werk - 6-pc Needle File Set for Wood, Metal, Plastic & Jewelry - Small Round, Half-Round, Square, Triangle, Flat & Flat Pointed Files - Handy Tools for Fine Finishing w/Ergonomic Handles
- VERSATILE FOR ALL MATERIALS: PERFECT FOR METAL, WOOD, GLASS, AND MORE!
- COMPLETE SET OF 6 MINI FILES: IDEAL FOR FINE FINISHING ON ANY PROJECT!
- ERGONOMIC DESIGN: NON-SLIP GRIP FOR PRECISION AND MAXIMUM CONTROL!

17Pcs File Tool Set with Carry Case,Premium Grade T12 Drop Forged Alloy Steel, Precision Flat/Triangle/Half-round/Round Large File and 12pcs Needle Files/1 brush
Working with static files in Next.js is relatively straightforward. Next.js provides a built-in way to serve static files such as images, stylesheets, or other assets alongside your application code. Here's how you can work with static files in Next.js:
- Create a folder called public in the root directory of your Next.js project.
- Place your static files inside the public folder. For example, if you have an image file named logo.png, you would put it in public/logo.png.
- In your components or pages, you can reference the static files using their path relative to the public folder. For example, if you want to use the logo.png image, you can reference it as /logo.png.
- Next.js will automatically serve the static files under the /public URL path. So, if your Next.js project is running on localhost:3000, you can access the logo.png image at localhost:3000/logo.png.
That's it! Next.js will take care of handling and serving the static files for you. This approach allows Next.js to optimize the serving of static files by utilizing techniques like automatic caching and serving from a CDN (Content Delivery Network).
By following these steps, you can easily work with static files in Next.js without the need for any additional configuration or setup.
What are the supported file formats for static files in Next.js?
Next.js supports a wide range of static file formats, including but not limited to:
- Images: JPEG, PNG, GIF, SVG, WebP, etc.
- Fonts: TTF, OTF, WOFF, WOFF2, etc.
- Icons: ICO, SVG, etc.
- Stylesheets: CSS, SCSS, LESS, etc.
- JavaScript: JS, JSON, etc.
- HTML: HTML, HTM, etc.
- Videos: MP4, WEBM, etc.
- Audio: MP3, WAV, etc.
- Documents: PDF, DOC, DOCX, etc.
Note that Next.js treats these static files as webpack assets, so you can import them directly in your code and use them as appropriate.
How to handle file name conflicts for static files in Next.js?
To handle file name conflicts for static files in Next.js, you can follow these steps:
- Create a dedicated folder for static assets, such as public or static, in the root of your Next.js project.
- Put your static files (e.g., images, fonts, videos) in this folder. You can organize them into sub-folders if needed.
- Use a unique naming convention for your files to minimize conflicts. For example, you can prefix each file with a specific identifier or use a naming scheme that includes the file's purpose or category.
- If you encounter a file name conflict, consider renaming the conflicting file to make it unique. Make sure to update all references to the file within your application.
- In your Next.js code, refer to the static files using their relative paths from the root of the static assets folder. For instance, if you have an image in the public/images folder named logo.png, you can refer to it as /images/logo.png in your code.
Note: When Next.js builds your application, the contents of the public or static folder are automatically mapped to the root of the deployed application, allowing you to reference them in your code using their relative paths from the root.
By following this approach, you can effectively handle file name conflicts for static files in Next.js while ensuring that your application assets are organized and accessible.
How to handle file uploads in Next.js applications with static files?
Next.js applications handle file uploads with static files using the following steps:
- Create a new folder called uploads in the root directory of your Next.js application. This folder will be used to store the uploaded files.
- Install the multer package, which is a middleware for handling file uploads in Node.js. Run the following command in your terminal:
npm install multer
- Create a new file called upload.js in the pages/api directory. This file will contain the code for handling file uploads.
- Import the necessary modules in the upload.js file:
import multer from 'multer';
// Configure the storage location for uploaded files const storage = multer.diskStorage({ destination: './uploads', filename: (req, file, callback) => { callback(null, file.originalname); }, });
// Create the multer middleware instance const upload = multer({ storage });
- Define an API route in the upload.js file and use the upload middleware to handle file uploads:
export default function handler(req, res) { upload.single('file')(req, res, (err) => { if (err instanceof multer.MulterError) { // Handle multer errors res.status(500).json(err); } else if (err) { // Handle other errors res.status(500).json(err); } else { // File upload was successful res.status(200).json({ success: true, filename: req.file.filename, }); } }); }
- In your front-end component, create a file input field and a submit button for file uploads, and handle the form submission:
import React, { useState } from 'react';
export default function UploadForm() { const [file, setFile] = useState(null);
const handleFileChange = (event) => { setFile(event.target.files[0]); };
const handleSubmit = async (event) => { event.preventDefault();
const formData = new FormData();
formData.append('file', file);

try {
  const res = await fetch('/api/upload', {
    method: 'POST',
    body: formData,
  });

  const data = await res.json();
  console.log(data);

  // Handle the response data
} catch (err) {
  console.error(err);
}
};
return ( Upload ); }
- Run your Next.js application and test the file upload functionality. When a file is selected and the form is submitted, the file will be uploaded and saved in the uploads folder.
Note: This implementation uploads files to the server file system. If you want to store files in a cloud storage service, you can modify the code accordingly.
What is the process to generate responsive images dynamically in Next.js?
To generate responsive images dynamically in Next.js, you can follow these steps:
-
Install the necessary packages: npm install next/image
-
Create an Image component wrapper: In your Next.js project, create a new component for the image wrapper. You can create a new file, let's say components/CustomImage.js. Import the required modules and create a new component like this: import Image from 'next/image'; const CustomImage = ({ src, alt, ...props }) => { return
; }; export default CustomImage;
-
Use the CustomImage component in your pages or components: Import the CustomImage component wherever you want to use responsive images. You can pass the src, alt, and any other Image component props to this component. import CustomImage from '../components/CustomImage'; const MyPage = () => { return (
); }; export default MyPage;
-
Specify image sizes using layout prop: The Image component offers different layout options (layout="fill", layout="responsive", layout="fixed", etc.) to handle different scenarios. For responsive images, you can use the layout="responsive" prop. This allows Next.js to generate the necessary responsive image sizes.
-
Configure Image Optimization: By default, Next.js optimizes images on-demand using sharp and generates multiple image sizes. However, you can further customize the image optimization by configuring Next.js' Image component. To do this, create or update the next.config.js file in the root of your project. module.exports = { images: { deviceSizes: [640, 750, 828, 1080, 1200, 1920, 2048, 3840], // Specify the sizes you want to generate imageSizes: [16, 32, 48, 64, 96, 128, 256], // Specify the sizes set in width and height props domains: ['example.com'], // Add any image domains you require path: '/_next/image', // The image path within the project loader: 'default', // The loader to use for images }, };
-
Build and test your application: Run your Next.js application and test the responsive images. Next.js will generate multiple image sizes according to the specified deviceSizes and imageSizes.
That's it! You have now implemented dynamic generation of responsive images in Next.js using the Image component.
How to handle responsive images using static files in Next.js?
To handle responsive images using static files in Next.js, you can follow these steps:
- Create a folder named public in the root folder of your Next.js project.
- Inside the public folder, create a subfolder called images to store your images.
- Place your responsive images in the images folder. You can have multiple versions of the same image with different sizes or resolutions.
- In your Next.js component that uses the image, import the Image component from the next/image package.
- Use the Image component to render the image, specifying the src prop as the path to the image file within the public folder. For example, if your image is located at public/images/my-image.jpg, you would set the src prop as /images/my-image.jpg.
- Use the width and height props to specify the dimensions of the image within the component. This is important for Next.js to optimize the image loading and rendering.
Here's an example of using a responsive image in a Next.js component:
import Image from 'next/image';
const MyComponent = () => { return ( ); };
export default MyComponent;
When Next.js builds your application, it automatically optimizes the images for different screen sizes and generates multiple versions of the same image. It serves the appropriate version depending on the device's screen size, resulting in faster and more efficient loading of images on your website.
What is the file caching mechanism for static files in Next.js?
Next.js uses automatic file-based caching for static files. When you build your Next.js application, it generates optimized static files based on the pages and the data dependencies used in those pages. These static files are then cached by default inside the .next/static directory.
Next.js automatically ensures that when a file changes, its corresponding static file is invalidated and regenerated during the build process. This helps in efficient caching and avoids serving stale content to the users. Additionally, Next.js also supports HTTP caching headers to control the caching behavior for static files, allowing you to set custom caching rules.
How to deploy static files in Next.js applications?
To deploy static files in Next.js applications, you can follow these steps:
- Create a "public" directory in the root of your Next.js project.
- Place your static files, such as images, fonts, and CSS files, inside the "public" directory. For example, you could put an image called "logo.png" in "public/images/logo.png".
- Use the "next/image" component to display images in your Next.js components. The "next/image" component automatically optimizes and serves the images from the "public" directory. For example:
import Image from 'next/image';
function MyComponent() { return ( ); }
export default MyComponent;
- For other static files, such as CSS files, you can reference them directly in your HTML or import them in your components. Next.js will automatically serve these files from the "public" directory. For example:
To reference a CSS file in your HTML:
To import a CSS file in your JavaScript code:
import '../path/to/css/file.css';
- To deploy your Next.js application, you can use platforms like Vercel, Netlify, or Heroku. These platforms have built-in support for Next.js and will automatically handle the deployment process, including serving the static files from the "public" directory.
Note: If you're using Next.js version 9.5 or earlier, you can use the "static" directory instead of the "public" directory. Starting from Next.js 9.5, the "public" directory was introduced as the new standard for serving static files.