
Best Contact Form Tools to Buy in June 2026
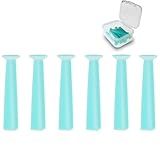
eagosion 6PCS Hard Contact Lens Remover Tool with Storage Box Eye Care Inserts Removes Reusable Suction Cup Remover Contact Plunger Eye Contact Remover for RGP/OK/Hard Lenses
- PERFECT FOR HARD & RGP LENSES: EFFICIENT, GENTLE REMOVAL TOOL.
- STRONG SUCTION: EASY, QUICK REMOVAL FOR FIRST-TIME USERS.
- TRAVEL-FRIENDLY 6-PACK: COMPACT CASE KEEPS TOOLS ORGANIZED.


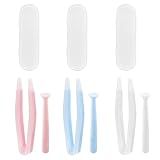
BlingKingdom 3 PCS Contact Lens Applicator Kit, Portable Contact Lens Remover and Inserter Tool with Tweezers Suction Stick Storage Case (Pink, White, Blue)
- EASY LENS HANDLING: REDUCE FINGER CONTACT, ENSURING IRRITATION-FREE USE.
- TRAVEL-FRIENDLY DESIGN: LIGHTWEIGHT TOOLS WITH A STORAGE CASE FOR CONVENIENCE.
- VERSATILE COMPATIBILITY: WORKS WITH SOFT, HARD, AND COLORED CONTACT LENSES.
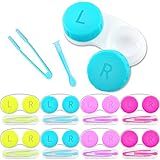
12-Pack Silicone Hard Contact Lens Remover Tools – Hard Scleral Lens Applicator with Suction Cup Grip(Blue)
- SECURELY REMOVES LENSES WITHOUT DISCOMFORT OR IRRITATION.
- 12 INDIVIDUAL TOOLS IN PORTABLE BOXES FOR CONVENIENCE ANYWHERE.
- BRIGHT BLUE DESIGN FOR EASY VISIBILITY DURING URGENT MOMENTS.
VOCOOL 16 Pcs Portable Contact Lens Tools Set, Inserter/Remover and Tweezer with Soft Tip Mini Eye Contact Case Box for Travel
-
DISTINCTIVE COLORS: 16-PACK FEATURES VIBRANT COLORS FOR EASY LENS IDENTIFICATION.
-
LEAK-PROOF DESIGN: STURDY CAPS KEEP LENSES SAFE AND HYDRATED WITHOUT LEAKS.
-
PORTABLE CONVENIENCE: LIGHTWEIGHT CASES EASILY FIT IN POCKETS OR BAGS FOR TRAVEL.
6-Pack Contact Lens Removal Tool Set, Tweezers & Suction Stick Combo for Daily Contact Lenses Colored Contacts & RGP Lenses
- 6-PACK CONVENIENCE: VERSATILE TOOLS FOR HOME, TRAVEL, OR BACKUP.
- SAFE & GENTLE: SOFT SILICONE PROTECTS EYES AND LENSES FROM DAMAGE.
- EASY HANDLING: ERGONOMIC DESIGN ENSURES SIMPLE, HYGIENIC LENS USE.

LeyJin 10 Pack Hard Contact Lens Remover & Insertion Tool,RGP Plunger Suction Cup for Hard Lenses(Green)
-
SAFE & SOFT SILICONE: NON-TOXIC, GENTLE FOR HARD AND RGP LENSES.
-
PORTABLE CONVENIENCE: INDIVIDUALLY PACKAGED FOR EASY STORAGE AND TRAVEL.
-
EFFORTLESS USE: DESIGNED FOR SIMPLE REMOVAL WITH EFFECTIVE GRIP.

Jowxsx 5Pcs Colorful Contact Lens Tool Case Set Remover and Inserter, Contact Applicator with Soft Tip, Suitable for Contact Lens User, Practical Tools Cases
- COMPLETE SET OF 5 CASES FOR EASY LENS HANDLING ON-THE-GO!
- SOFT TIP DESIGN ENSURES GENTLE, COMFORTABLE LENS INSERTION/REMOVAL.
- COLOR-CODED CASES FOR QUICK ORGANIZATION AND EASY IDENTIFICATION!
To create a contact form in Shopify, you can follow these steps:
- Log in to your Shopify account and navigate to the Shopify Admin page.
- Click on the "Online Store" option in the left-hand sidebar.
- From the dropdown menu, select "Pages" or "Blog Posts," depending on where you want to add the contact form.
- Choose the specific page or blog post where you want the contact form to appear.
- Click on the "Edit" button next to the selected page or blog post.
- In the editor, locate the area where you want to insert the contact form.
- Click on the "Insert Point" button, which looks like a plus sign (+), and select "Form" from the options.
- A contact form will appear on your page or blog post. You can customize its appearance and fields by clicking on it.
- To add or remove fields, click on the "Add Field" or "Remove" options respectively.
- Customize each field by clicking on it and editing the label, required option, or placeholder text.
- If you want to collect specific information from customers, you can edit the default fields.
- To rearrange the order of fields, click on a field and drag it to the desired position.
- After you've finished customizing the contact form, click anywhere outside the form to save your changes.
- Preview the page or blog post to ensure the contact form is displayed correctly.
- Publish your changes by clicking on the "Save" or "Publish" button.
That's it! You have successfully created a contact form in Shopify.
How to enable a contact form on specific pages in Shopify?
To enable a contact form on specific pages in Shopify, you can follow these steps:
- Login to your Shopify admin panel.
- Go to "Online Store" and click on "Themes."
- Locate the theme you are currently using and click on "Actions" > "Edit code".
- In the left sidebar, click on "Sections" folder, and open the "contact-template.liquid" file (if it exists). If it doesn't, skip to step 7.
- Find the code within the contact-template.liquid file that looks like this:
- Copy the entire code block and close the file.
- In the left sidebar, click on "Pages" folder and open the page where you want to enable the contact form.
- Locate the code block where you want the contact form to appear and paste the copied code from step 6.
- Save the changes and repeat steps 7-9 for any other pages where you want the contact form to appear.
By following these steps, you can selectively enable a contact form on specific pages in your Shopify store.
How to test if a contact form is working in Shopify?
To test if a contact form is working in Shopify, follow these steps:
- Go to your Shopify store's homepage.
- Locate the contact form section or link on your website, usually found in the footer or a dedicated contact page.
- Fill out the contact form by entering your name, email address, subject, and message.
- After filling out the form, click on the submit or send button.
- Check if you receive a confirmation message or see a success notification stating that your message was sent successfully.
- Navigate to the email address you provided in the contact form and check if you have received an email notification with the details of your message.
- Open the received email and ensure all information you entered in the contact form is accurate and included in the email.
- Reply to the email to verify if you receive a response or an auto-reply from the store owner.
- If all the above steps are completed successfully, it confirms that the contact form is working correctly in your Shopify store.
By following these steps, you can effectively test and ensure that the contact form on your Shopify store is functioning properly.
What is the best format for collecting phone numbers in a contact form?
The best format for collecting phone numbers in a contact form can vary depending on the specific requirements and preferences of the website or organization. However, here are a few common formats that are widely used:
- Standard numeric format: This format simply requires users to enter their phone number using numbers only, without any additional symbols or characters. For example: 1234567890.
- Parentheses and hyphens format: This format provides a more visually appealing presentation by allowing users to enter their phone number with parentheses surrounding the area code and a hyphen separating the digits. For example: (123)456-7890.
- International format: If the contact form is intended for global users or if international phone numbers are expected, using the international format can be helpful. This format typically includes the country code, area code, and the phone number. For example: +1 123-456-7890.
It is generally recommended to provide clear instructions or placeholder text to guide users on how to enter their phone numbers in the desired format. Additionally, it is important to validate the input to ensure that it meets the required format or provide error messages to users if the entered phone number is in an incorrect format.
How to customize a contact form in Shopify?
To customize a contact form in Shopify, follow these steps:
- Login to your Shopify account and go to your Shopify admin dashboard.
- Navigate to the "Online Store" section and select "Themes".
- Find the theme you are using and click on "Actions" -> "Edit Code".
- In the editor, locate the "Templates" folder and then click on "Add a new template".
- Choose "page" from the available options, and name the template file as "contact".
- Open the newly created "contact.template" file and add the following code:
{% layout none %}
        <input type="hidden" name="form\_type" value="contact">
        <input type="hidden" name="utf8" value="✓">

        <label for="ContactFormName">Name</label>
        <input type="text" name="contact\[name\]" id="ContactFormName" required>

        <label for="ContactFormEmail">Email</label>
        <input type="email" name="contact\[email\]" id="ContactFormEmail" required>

        <label for="ContactFormMessage">Message</label>
        <textarea name="contact\[body\]" id="ContactFormMessage" required></textarea>

        <input type="submit" value="Send Message">
      </form>
    </div>
  </div>
</div>
- Save the changes to the "contact.template" file.
- Now, navigate to the "Sections" folder and click on the "schema" folder.
- Open the "page.contact.schema.json" file and add the following code:
{ "name": "Contact", "settings": [], "blocks": [], "presets": [ { "category": "Custom", "name": "Contact", "settings": [] } ] }
- Save the changes to the "page.contact.schema.json" file.
- Go back to your Shopify admin dashboard and click on "Online Store" -> "Pages".
- Create a new page or edit the existing contact page.
- Under the "Template" section, select "page.contact" from the drop-down menu.
- Save the changes to the page.
- Preview or visit your Shopify store to see the customized contact form in action.
Note: If you have a different theme or want to further customize the contact form, the code above may need to be adjusted accordingly.
What is the benefit of having a contact form on your website?
Having a contact form on your website offers several benefits:
- Enhanced communication: Contact forms provide a direct and convenient way for your website visitors or potential customers to reach out to you. It allows them to express their inquiries, suggestions, or feedback without needing to use external email service providers or contact you through other channels.
- Improved user experience: Contact forms simplify the communication process for visitors, as they don't have to copy or remember your contact information, open their email client, and manually send a message. It streamlines the interaction, making it more user-friendly and encouraging people to reach out.
- Effective lead generation: Contact forms can serve as a tool to generate leads or potential customers for your business. By including specific fields such as name, email address, and phone number, you can collect valuable contact information from your visitors. This allows you to follow up with them, send newsletters, promotions, or other relevant information to nurture the relationship and potentially convert them into paying customers.
- Spam protection: Contact forms often have built-in spam protection mechanisms, such as CAPTCHA or anti-spam plugins, which reduce the likelihood of receiving spam emails. This helps maintain the quality and efficiency of your communication channels.
- Organization and efficiency: Contact forms ensure that all inquiries or messages are delivered directly to your preferred email address or stored in a centralized database. This makes it easier to manage incoming messages, respond promptly, and keep track of conversations, thus improving your overall customer service.
- Analytics and tracking: Some contact form plugins or tools offer analytics features, allowing you to track and analyze data such as the number of submissions, the most common inquiries, or the effectiveness of specific marketing campaigns. This information can help you optimize your website, improve your products or services, and enhance customer satisfaction.
Overall, having a contact form on your website fosters seamless communication, boosts lead generation efforts, and facilitates efficient customer engagement, which can ultimately contribute to the growth and success of your business.
How to troubleshoot common issues with contact forms in Shopify?
- Verify contact form settings: Start by checking the settings for your contact form in Shopify. Ensure that the form is properly configured and that the necessary fields are included. Confirm that the form's email address is set correctly and that notifications are enabled.
- Check email configurations: Ensure that your email configurations are set up correctly in Shopify. Confirm that your email provider details (SMTP settings) are accurate. Test the email functionality by sending a test message from the contact form and verifying that it arrives in the designated email inbox.
- Clear cache and cookies: If the contact form is not loading or behaving strangely, try clearing your browser's cache and cookies. Old cached data can sometimes interfere with the functioning of the form. After clearing the cache, refresh the page and see if the issue persists.
- Disable conflicting apps or themes: If you have recently installed or updated any apps or themes in your Shopify store, they could be causing conflicts with the contact form. Disable these apps or revert to the previous theme to see if the contact form starts working correctly. Sometimes, certain apps or themes may have conflicting code that affects the form's functionality.
- Test on different devices and browsers: Ensure that the issue is not specific to one device or browser. Test the contact form on different devices (e.g., desktop, mobile, tablet) and various web browsers (e.g., Chrome, Firefox, Safari). If the problem is isolated to a specific device or browser, it may indicate an issue with compatibility or browser extensions.
- Update Shopify and contact form app: Keep your Shopify platform and any contact form apps/plugins up to date. Check if there are any updates available for Shopify or the specific app you are using for the contact form. Outdated versions can sometimes have bugs or compatibility issues that affect form functionality.
- Check for coding errors: If you have customized your contact form using HTML or liquid code, review the code for any syntax errors or mistakes. Incorrect coding can cause the form to malfunction. If you recently made changes to the code, consider reverting to the original code or seeking assistance from a Shopify developer.
- Reach out to Shopify Support: If none of the troubleshooting steps resolve the issue, reach out to Shopify Support for further assistance. They can investigate the problem and provide specific guidance tailored to your Shopify store setup.