Best Database Management Tools to Buy in February 2026

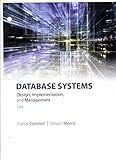
Database Systems: Design, Implementation, & Management


Database Systems: Design, Implementation, & Management


Concepts of Database Management (MindTap Course List)


Data Mining: Practical Machine Learning Tools and Techniques (Morgan Kaufmann Series in Data Management Systems)
- EXCLUSIVE FIRST ACCESS FOR EARLY ADOPTERS!
- LIMITED-TIME OFFER: SPECIAL PRICE FOR NEW CUSTOMERS!
- EXPERIENCE THE LATEST INNOVATION BEFORE ANYONE ELSE!


Concepts of Database Management


Customer Relationship Management: Concept, Strategy, and Tools (Springer Texts in Business and Economics)


The Enterprise Data Catalog: Improve Data Discovery, Ensure Data Governance, and Enable Innovation


The Manga Guide to Databases (The Manga Guides)


To create a user in MySQL, you can use the "CREATE USER" statement followed by the username and identified by a password. Here's an example:
CREATE USER 'username'@'localhost' IDENTIFIED BY 'password';
The "username" should be the desired name for the user, while 'localhost' refers to the host where the user can connect from. You can replace 'localhost' with the IP address or hostname if you want to allow connections from a different location.
The "IDENTIFIED BY" clause sets the password for the user. Replace 'password' with the actual password you want to assign.
After executing the above statement, a new user named 'username' will be created in MySQL with the defined password. However, this user will not have any privileges to access or modify databases.
If you want to grant specific privileges to the user, you can use the "GRANT" statement. For example, to grant all privileges on a specific database, you can execute:
GRANT ALL PRIVILEGES ON database_name.* TO 'username'@'localhost';
Replace "database_name" with the actual name of the database you want to grant access to. This statement provides the user with all privileges (e.g., SELECT, INSERT, UPDATE, DELETE, etc.) on that specific database.
Remember to replace 'username' and 'localhost' if desired.
How to view the list of all users in MySQL?
To view the list of all users in MySQL, you can execute the following query:
SELECT user, host FROM mysql.user;
This query retrieves the user and host columns from the mysql.user table, which contains information about all the users in your MySQL server. The user column represents the username, and the host column represents the hostname or IP address from which the user is allowed to connect.
What is the significance of the FLUSH PRIVILEGES command in MySQL?
The FLUSH PRIVILEGES command in MySQL is significant because it reloads the grant tables of MySQL server. When new privileges or changes in privilege assignments are made using the GRANT statement, the changes are not immediately activated. The FLUSH PRIVILEGES command is then used to tell the server to reload the grant tables from disk, so that it can take the new privileges into account.
This command is essential to ensure that the changes made to user privileges or access rights are enforced by the server. Without running FLUSH PRIVILEGES, the changes would not be recognized and active until the next server restart. So, it is commonly executed after granting or revoking privileges to ensure the changes take effect immediately.
In summary, the FLUSH PRIVILEGES command plays a vital role in applying and activating changes made to user privileges in MySQL.
What is the process for dropping a user from MySQL?
To drop a user in MySQL, you can follow these steps:
- Connect to the MySQL server using a client, such as the MySQL command-line client or a GUI tool like phpMyAdmin.
- Identify the username of the user you want to drop.
- Run the following SQL command to drop the user:
DROP USER 'username'@'host';
Replace 'username' with the actual username you wish to drop and 'host' with the actual host or IP address from which the user is allowed to connect. If the user can connect from any host, you can use '%' as the host value.
- After executing the command, the user will be dropped from the MySQL server, and all associated privileges and settings will be removed. Make sure to verify the user you want to drop before executing the command, as this action cannot be undone.
What is the syntax for creating a user in MySQL?
To create a user in MySQL, you would use the CREATE USER statement. Here is the syntax for creating a user:
CREATE USER 'username'@'hostname' IDENTIFIED BY 'password';
Here's a breakdown of the syntax elements:
- 'username' specifies the name you want to assign to the user.
- 'hostname' specifies the host or IP address from where the user can connect to the server. For local connections, you can use 'localhost'.
- 'password' specifies the password for the user.
You can also grant privileges to the user using the GRANT statement. For example, to grant all privileges to the user on a specific database, you can use the following syntax:
GRANT ALL PRIVILEGES ON database_name.* TO 'username'@'hostname';
Remember to execute the FLUSH PRIVILEGES; statement to apply the changes immediately after creating or modifying a user.
