Best Cloud Hosting Solutions to Buy in February 2026

Embracing the Power of Cloud Hosting for Banking Solutions: A Handful Guide for Professionals


Steadfast Self-Hosting: Rapid-Rise Personal Cloud


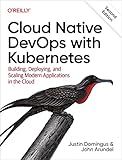
Cloud Native DevOps with Kubernetes: Building, Deploying, and Scaling Modern Applications in the Cloud


Microsoft Azure Administrator Exam Ref AZ-104


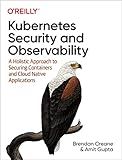
Kubernetes Security and Observability: A Holistic Approach to Securing Containers and Cloud Native Applications


Cosmic Clouds Clear Hookah Set with Everything - Acrylic Glass Hookah with LED Light and Remote Control | Electric Hookah Heat Management Device, Includes Steel Coal Tongs, Shisha Fork, 2 Silicone Hoses, Brush, Custom Carry Case & 2 Extra Silicone Tips
-
ULTIMATE HOOKAH EXPERIENCE: ELECTRIC HEAT MANAGEMENT FOR FLAVORFUL SESSIONS.
-
CUSTOMIZABLE AMBIANCE: REMOTE-CONTROLLED LED LIGHTS FOR EVERY OCCASION.
-
PORTABLE & EASY TO CLEAN: CARRY CASE INCLUDED FOR EFFORTLESS TRANSPORT AND MAINTENANCE.


Step by Step Instructions to Hosting a WordPress Website on a DigitalOcean Cloud: Step by step instructions to setup, optimize and secure your WordPress powered website on a cloud based hosting


To launch Joomla on Google Cloud, follow these steps:
- Sign in to the Google Cloud Platform Console (console.cloud.google.com).
- Create a new project or select an existing project to host your Joomla website.
- In the GCP Console, click on the Navigation menu and select "Compute Engine."
- Click on "VM instances" and then click on the "Create" button to create a new virtual machine instance.
- Provide a name for your instance, select a region and zone, and select desired machine configuration (CPU, RAM, etc.).
- Under the "Boot Disk" section, click on "Change" and select "Debian" or any other preferred Linux operating system.
- Enable the "Allow HTTP traffic" option under the "Firewall" section to allow incoming HTTP requests.
- Click on the "Create" button to create the virtual machine instance.
- Once the instance is created, click on the SSH button to open a terminal window for the virtual machine.
- In the terminal, run the following commands to install the necessary packages: sudo apt-get update sudo apt-get install apache2 sudo apt-get install mysql-server sudo apt-get install php libapache2-mod-php php-mysql
- After installing the packages, configure the MySQL database by running the following command: sudo mysql_secure_installation (follow the prompts to set a root password and secure your installation)
- Download the latest Joomla package from the official Joomla website.
- Move the downloaded package to the web server's document root: sudo mv ~/Downloads/Joomla_X.X.X-Stable-Full_Package.zip /var/www/html/
- Unzip the Joomla package: cd /var/www/html/ sudo unzip Joomla_X.X.X-Stable-Full_Package.zip
- Grant necessary permissions to the web server to access Joomla files: sudo chown -R www-data:www-data /var/www/html/ sudo chmod -R 755 /var/www/html/
- You can now access your Joomla website by entering the external IP address of your virtual machine instance in a web browser.
- Follow the on-screen instructions to complete the Joomla installation process.
That's it! You have successfully launched Joomla on Google Cloud. You can now customize and manage your Joomla website through the Joomla administrator interface.
How to sign up for a Google Cloud account?
To sign up for a Google Cloud account, follow these steps:
- Open your web browser and go to the Google Cloud Platform website: https://cloud.google.com
- Click on the "Get started for free" button or "Try it free" button. This will take you to the Google Cloud sign-up page.
- If you already have a Google account, sign in with your existing credentials. If you don't have a Google account, click on the "Create account" button to create a new Google account.
- Fill out the required information, including your name, email address, password, and phone number. Follow the on-screen instructions to complete the sign-up process. Make sure to select your country and agree to the terms and conditions.
- Provide your billing information. Google Cloud Platform offers a free trial with $300 credits that you can use within the initial period. You will need to provide your credit card or other billing information during this step. Note that you will not be charged unless you exceed the free trial limits or choose to upgrade to a paid account.
- Verify your account. Google may send you a verification code to the email or phone number you provided during the sign-up process. Enter the code to complete the verification.
- Once your account is verified, you will have access to your Google Cloud Platform console, where you can start using and managing various Google Cloud services.
Remember to review the pricing and services available to ensure that Google Cloud Platform suits your requirements.
How to create a new project in Google Cloud?
To create a new project in Google Cloud, follow these steps:
- Open the Google Cloud Console: https://console.cloud.google.com/.
- Sign in to your Google account, or create a new account if needed.
- Click on the project dropdown menu, usually located at the top of the page just below the Google Cloud logo. If you have no projects yet, you may see a "Select a project" prompt.
- Click on the "New Project" button or the "Select a project" prompt.
- In the pop-up window, enter a project name of your choice.
- (Optional) Modify the project ID if you wish, or use the generated one. The project ID is a unique identifier for your project, and it must be globally unique within Google Cloud. It will be used in various resource URLs.
- (Optional) You may choose to organize your projects into folders or under an organization. Select the desired folder or organization under the "Parent organization" dropdown.
- Click on the "Create" button to create the project.
- Wait a few moments while Google Cloud sets up the new project.
- Once the project is created, you will be redirected to the project's Overview page.
Congratulations! You have successfully created a new project in Google Cloud. From here, you can choose your desired products and services, enable APIs, manage permissions, and start building your applications and infrastructure.
What are the common errors faced during Joomla installation on Google Cloud?
There are several common errors that users may encounter during Joomla installation on Google Cloud:
- Database Connection Errors: This error occurs when Joomla is unable to establish a connection with the database. It can be due to incorrect database credentials, improper database configuration, or firewall issues.
- File and Folder Permissions: Joomla requires specific file and folder permissions to function properly. If these permissions are not set correctly, it can result in an installation error or issues with the website's functionality.
- PHP Version Compatibility: Joomla may not work properly with certain versions of PHP. Users may face errors if they are using an incompatible version of PHP for their Joomla installation.
- Missing PHP Extensions: Joomla relies on certain PHP extensions to work correctly. If these extensions are missing or incorrectly configured, it can cause installation errors or issues with the website's functionality.
- Incorrect Web Server Configuration: Joomla requires specific web server configurations, such as enabling certain modules or rewriting rules. If the web server is not configured correctly, it can lead to installation errors or issues with the website's functionality.
- Insufficient Resources: If the server resources, such as CPU, memory, or disk space, are insufficient for Joomla, it can result in installation errors or slow website performance.
- SSL Certificate Issues: If the website is using SSL (HTTPS) and there are issues with the SSL certificate, Joomla may not install or function properly.
It is important to carefully review the installation steps, ensure compatibility with the server environment, and troubleshoot any encountered errors using relevant Joomla and Google Cloud documentation.
