Best WordPress SEO Tools to Buy in February 2026
Professional WordPress Plugin Development, 2nd Edition


Building Web Apps with WordPress: WordPress as an Application Framework


WordPress Power Toolkit: Harness AI to build next-level websites


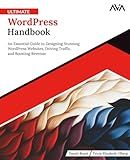
Ultimate WordPress Handbook: An Essential Guide to Designing Stunning WordPress Websites, Driving Traffic, and Boosting Revenue (English Edition)


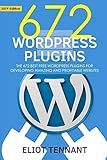
WordPress Plugins: The 672 Best Free WordPress Plugins for Developing Amazing and Profitable Websites


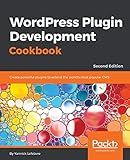
WordPress Plugin Development Cookbook: Create powerful plugins to extend the world's most popular CMS, 2nd Edition


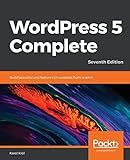
WordPress 5 Complete: Build beautiful and feature-rich websites from scratch, 7th Edition


Professional WordPress: Design and Development


101 WordPress Plugins… and Then Some : Build your dream website 2023


To set up a custom permalink structure in WordPress, you need to access the Permalinks settings in your WordPress admin area. Here's how:
- Log in to your WordPress admin area.
- Locate and click on "Settings" in the left-hand sidebar.
- A drop-down menu will appear. Click on "Permalinks."
- You will now see different options for the permalink structure. By default, WordPress uses the "Plain" option, which includes a post ID in the URL. However, you can create a custom structure by selecting one of the options below.
- If you want to create a custom structure, you can use tags to define how your URLs will look. For example, if you want your post URLs to include the post name, you can choose the "Post name" option.
- To further customize your structure, you can use specific tags. Here are a few commonly used tags: %postname%: The post slug or the post's URL-friendly version of the title. %post_id%: The unique numerical identifier of the post. %category%: The main category of the post. %year%: The year the post was published in. %monthnum%: The numerical representation of the month the post was published in.
- Once you have selected your desired permalink structure or created a custom one, scroll down and click on the "Save Changes" button to apply the changes.
- After saving the changes, your posts and pages will now have URLs based on your specified structure.
It's important to note that changing your permalink structure can affect the existing links on your website. If your site is already indexed by search engines or shared on other platforms, the old URLs may result in errors or broken links. To mitigate this, you can set up redirects from the old URLs to the new ones using plugins or manual configurations.
How to add custom variables to permalinks?
To add custom variables to permalinks in WordPress, you can follow these steps:
- Open your theme's functions.php file, which can be found in your WordPress theme's folder.
- Inside the functions.php file, add the following code snippet:
function custom_rewrite_tag() { add_rewrite_tag('%custom_variable%', '([^&]+)'); } add_action('init', 'custom_rewrite_tag', 10, 0);
Replace %custom_variable% with the name of the custom variable you want to add to the permalinks.
- Save the functions.php file.
- Next, you need to flush the rewrite rules. This can be done by simply visiting the "Settings" -> "Permalinks" page in your WordPress admin dashboard and clicking the "Save Changes" button.
- Now you can use the custom variable in your permalinks. For example, if your custom variable is "author_name", you can use it in a permalink structure like this: /%year%/%monthnum%/%postname%/%author_name%/.
Remember to update the permalink structure in the "Settings" -> "Permalinks" page to include your custom variable.
- Finally, you can access the value of the custom variable in your template files using the get_query_var() function. For example:
$custom_variable_value = get_query_var('custom_variable');
Replace 'custom_variable' with the name of your custom variable.
That's it! Your custom variable should now be included in the permalinks and accessible in your template files.
How to make permalinks more SEO-friendly?
There are several ways to make permalinks more SEO-friendly:
- Use descriptive keywords: Include relevant keywords in the permalink that accurately describe the content of the page. This helps search engines understand what the page is about.
- Keep it concise: Try to keep permalinks short and concise while still conveying the page's content. Long, complicated URLs can be difficult for users to read and might not be seen as favorable by search engines.
- Use hyphens as separators: Instead of using underscores or spaces, use hyphens to separate words in the permalink. Search engines generally prefer hyphens as word separators.
- Exclude unnecessary words: Remove unnecessary words like "and," "the," "a," or "of" from the permalink to keep it focused on the main keywords and make it more concise.
- Avoid using dates: If possible, avoid including dates in the permalink unless it's relevant to the content. Date-specific URLs may appear outdated and can discourage users from clicking on them.
- Don't change permalinks frequently: Avoid changing permalinks once they are published. Changing permalinks frequently can lead to broken links and negatively impact SEO.
- Utilize proper URL structure: Make sure your permalinks follow a logical hierarchy or structure that reflects the content's organization on your website. This can improve user experience and help search engines understand the site's architecture better.
- Implement canonical URLs: Use canonical tags to indicate the preferred version of a page when there are multiple URLs with similar content. This helps avoid duplicate content issues and ensures search engines understand which URL to index.
Remember, the primary goal is to create permalinks that are descriptive, easy to read, and relevant to the page's content, providing value to both users and search engines.
What is a slug in permalink structure?
In the context of permalink structure, a slug is a part of a URL that identifies a specific page or post on a website. It typically appears after the domain name and any parent directories.
A slug is a user-friendly, human-readable string of words or characters that helps describe the content of the page. It is usually derived from the title of the page or post, with certain modifications such as removing special characters, converting spaces to dashes, and making all letters lowercase.
For example, in the URL "https://www.example.com/blog/my-post-slug", "my-post-slug" is the slug that uniquely identifies the specific blog post on the website.
What is the recommended permalink structure for a news website?
The recommended permalink structure for a news website typically includes the following elements:
- Post type: The post type should be included in the permalink to differentiate between different categories of content. For a news website, it is usually "news" or "article".
- Date: Including the publication date in the permalink can help with organizing and categorizing news articles. It is often represented as year, month, and day.
- Title: The title of the news article should be a part of the permalink. This helps create a clear, readable URL that reflects the content.
An example of a recommended permalink structure for a news website could be: /%post_type%/%year%/%monthnum%/%day%/%postname%/
Here's what the structure would look like for an article published on March 15, 2022, titled "New Study Reveals Insights on Climate Change": /news/2022/03/15/new-study-reveals-insights-on-climate-change
How to change the permalink structure in WordPress?
To change the permalink structure in WordPress, follow these steps:
- Log in to your WordPress admin panel.
- Go to the "Settings" tab and click on "Permalinks."
- You will see various permalink structure options. Choose the one that suits your needs or select "Custom Structure" to define your own structure.
- If you selected "Custom Structure," you can enter your desired permalink structure using specific tags. These tags represent different elements of your URLs, such as post name, post ID, category, and more. Here are a few examples of tags you can use: %postname%: The post slug or URL-friendly version of the post title. %post_id%: The unique ID assigned to each post. %category%: The category the post belongs to.
- Once you have set your desired permalink structure or custom structure, click on the "Save Changes" button at the bottom of the page.
After saving the changes, your WordPress site will start using the new permalink structure for all future posts and pages. However, keep in mind that changing the permalink structure can affect the existing permalinks of your published content. If you have an established website with existing content, it's important to set up proper redirects to ensure that old URLs are redirected to their new counterparts, thereby avoiding any broken or inaccessible links.
