
Best Component Styling Tools in Svelte to Buy in June 2026

TsMADDTs Hair Styling Tool Set - 3 Pcs French Braid Tool, Rat Tail Comb, and Metal Braiding Pin in Pink
- EFFORTLESSLY ACHIEVE STYLISH HAIR IN SECONDS WITH OUR TOOL SET!
- DURABLE TOOLS PREVENT KNOTTING, MAKING STYLING HASSLE-FREE!
- UNIQUE PINK DESIGN ELEVATES YOUR MOOD WHILE CRAFTING PERFECT STYLES!


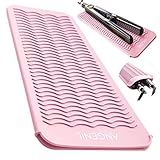
ANGENIL Heat Resistant Silicone Flat Iron Mat Pouch, For Travel Dual Voltage Curling Iron Wand, Hair Straightener, Automatic Wireless Curlers, Crimper Hair Iron, Styling Tools, Curling Brush For Women
- DUAL USE: FUNCTIONS AS A MAT AND POUCH FOR EASY STORAGE ON-THE-GO.
- EXTREME HEAT RESISTANCE: SAFELY PROTECTS SURFACES FROM UP TO 482°F.
- SKID-PROOF DESIGN: UNIQUE TEXTURE PREVENTS SLIPPING AND ENSURES STABILITY.
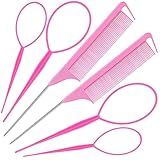
Topsy Pink Styling Tools Set - 6 Pcs Hair Loops, 2 Steel Pin Combs & 4 Pony Tail Tools for Women's Hairstyles, A Gift
-
EFFORTLESSLY ACHIEVE STYLISH HAIRSTYLES WITH OUR VERSATILE TOOL SET!
-
DURABLE, HEAT-RESISTANT TOOLS ENSURE SAFE AND EASY STYLING FOR ALL.
-
LIGHTWEIGHT AND PORTABLE, PERFECT FOR HOME, OFFICE, OR TRAVEL USE!
In Svelte, styling components involves using the <style> tag within the component file to apply CSS styles. You can write CSS directly within the <style> tag using standard CSS syntax. Svelte components also support scoped styles, which means that styles defined within a component are only applied to that specific component and do not affect other components. Additionally, you can use CSS preprocessors like SCSS or LESS by setting up the appropriate preprocessor configuration in your Svelte project. To apply global styles that affect all components, you can create a separate global stylesheet and import it into your main Svelte component file. Overall, styling components in Svelte is flexible and allows you to easily customize the appearance of your components.
What is the importance of using CSS resets in Svelte projects?
Using CSS resets in Svelte projects is important because it helps to standardize and normalize the default styles across different browsers. This prevents inconsistencies in how elements are displayed and ensures that the design looks consistent and the same across all browsers.
Without a CSS reset, browsers have their own default styles for elements which can cause discrepancies in how elements are rendered. By using a CSS reset, you can reset these default styles to a consistent baseline, allowing you to start styling from a clean slate.
Additionally, CSS resets can help to improve cross-browser compatibility and make it easier to create a consistent design across different devices and screen sizes. This can save time and effort in the long run by reducing the amount of browser-specific CSS code that needs to be written to account for differences in default styles.
How to center align text in Svelte?
In Svelte, you can center align text using CSS. You can either use a CSS class or inline styles to center align text.
Using a CSS class:
- Create a CSS class in your Svelte component's stylesheet or in a global stylesheet:
.center { text-align: center; }
- Apply the CSS class to the text element in your Svelte component:
Using inline styles:
- Use the style attribute in your Svelte component's template to apply inline styles:
Either method will center align the text in your Svelte component. Choose the one that best fits your preferences and coding style.
How to use CSS modules in Svelte?
To use CSS modules in Svelte, follow these steps:
- Install the required dependencies by running the following command in your project directory:
npm install svelte-preprocess postcss postcss-modules
- Create a postcss.config.js file in the root of your project with the following configuration:
module.exports = { plugins: { 'postcss-modules': {} } }
- Update your svelte.config.js file to include CSS modules preprocessing using the svelte-preprocess plugin:
const preprocess = require('svelte-preprocess');
module.exports = { preprocess: preprocess({ postcss: true }) };
- Create a CSS file with the .module.css extension in the same directory as your Svelte component. For example, if your component is named Button.svelte, create a file named Button.module.css.
- In the CSS file, define your styles as usual and export the classes using :export syntax. For example:
:export { redButton: red-button; } .red-button { background-color: red; color: white; }
- Import the CSS module in your Svelte component and apply the exported classes to your elements. For example:
Click me
With these steps, you should be able to use CSS modules in your Svelte project. Each CSS class in the module will be scoped locally to the component where it is imported, ensuring that styles do not clash with other components.
What is the role of vendor prefixes in styling Svelte components?
Vendor prefixes are still used in web development to ensure that CSS properties and values are properly interpreted across different browsers. In Svelte, vendor prefixes can be used in the styling of components to ensure consistent appearance and functionality across various browsers and platforms.
When styling Svelte components, developers may need to add vendor prefixes to certain CSS properties in order to ensure that the styles are interpreted correctly by different browsers. This is especially important for properties that are not yet supported across all browsers or are subject to different rendering behavior.
By adding vendor prefixes to CSS properties in Svelte components, developers can ensure that their styling choices are consistent and reliable across different browsers, helping to create a seamless experience for users.
How to apply hover effects in Svelte components?
In Svelte, you can apply hover effects to components by using the on:mouseover and on:mouseout event handlers.
Here's an example of how you can apply a hover effect to a component in Svelte:
In this example, we have a div element that will change its background color when it is hovered over. The handleMouseOver function sets the isHovered variable to true when the mouse is over the component, and the handleMouseOut function sets it back to false when the mouse leaves the component. We also use the isHovered variable to conditionally apply a class that changes the background color of the component when it is hovered over.
What is the impact of specificity in CSS on styling Svelte components?
Specificity in CSS plays a significant role in styling Svelte components. Since Svelte components are built using HTML, CSS, and JavaScript, specificity determines which styles will be applied to specific elements within the component.
When styling Svelte components, the specificity of CSS selectors will determine which styles take precedence over others. This can be especially important when working with multiple components on a page, as the styles applied to one component may inadvertently affect another component if the specificity is not properly managed.
Therefore, it is essential to understand and use specificity effectively when styling Svelte components to ensure that the desired styles are applied correctly and that there are no unintended side effects on other components. This can be achieved by using CSS selectors, classes, and IDs strategically to target specific elements and apply styles in a precise and controlled manner.