
Best Graphic Design Tools to Buy in June 2026
The History of Graphic Design. 45th Ed. (45th Edition) (Multilingual Edition)


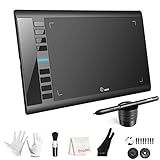
Graphics Drawing Tablet, UGEE M708 10 x 6 inch Large Drawing Tablet with 8 Hot Keys, Passive Stylus of 16384 Levels Pressure, UGEE M708 Graphics Tablet for Paint, Design, Art Creation Sketch
-
VAST 10X6 DRAWING SPACE: ENJOY A SMOOTH, LIMITLESS DIGITAL DRAWING EXPERIENCE.
-
16384 PRESSURE LEVELS: CREATE DYNAMIC LINES AND EFFECTS WITH PRECISE CONTROL.
-
BROAD OS COMPATIBILITY: EASY SETUP ACROSS WINDOWS, MAC, ANDROID, AND MORE.
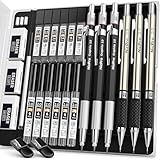
Nicpro 6PCS Art Mechanical Pencil Set, 3PCS Metal Drafting Pencil 0.5 mm & 0.7 mm & 0.9 mm & 3PCS 2mm Graphite Lead Holder (2B HB 2H) For Writing, Sketching Drawing With Lead Refills Case
-
COMPLETE SET: 6 PENCILS, 12 REFILLS, ERASERS, SHARPENERS & CASE!
-
VERSATILE LEAD: 4 SIZES & 3 HARDNESS LEVELS FOR ALL YOUR WRITING NEEDS.
-
COMFORT FIRST: ERGONOMIC DESIGN ENSURES FATIGUE-FREE WRITING & SKETCHING.
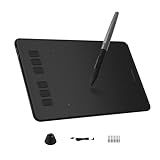
HUION Inspiroy H640P Drawing Tablet, 6x4 inch Digital Art with Battery-Free Stylus, 8192 Pen Pressure, 6 Hot Keys, Graphics Tablet for Drawing, Writing, Design, Teaching, Work with Mac, PC & Mobile
-
CUSTOMIZE WORKFLOW: 6 PROGRAMMABLE KEYS STREAMLINE YOUR CREATIVE PROCESS.
-
NATURAL PEN EXPERIENCE: BATTERY-FREE STYLUS OFFERS PRECISE, ACCURATE DRAWING.
-
COMPACT & PORTABLE: LIGHTWEIGHT DESIGN FOR CREATIVITY ON THE GO.
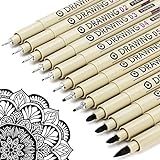
Muchcute Micro Fineliner Drawing Art Pens: 12 Black Fine Line Waterproof Ink Set Artist Supplies Archival Inking Markers Liner Sketch Outline Anime Gifts Manga Sketching Watercolor Zentangle Kit Stuff
- VERSATILE PEN TIPS FROM 0.2MM TO 3.0MM FOR ALL ARTISTIC NEEDS.
- WATERPROOF, NO BLEED, AND FADE-RESISTANT INK FOR LASTING QUALITY.
- PERFECT GIFT IDEA WITH STYLISH PACKAGING FOR ARTISTS AND ENTHUSIASTS.
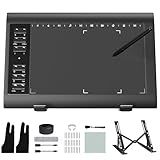
Graphic Drawing Tablet, Digital Sketch,Design for PC and Computer/Pad-12 Hot Keys, Compatible Windows/MAC/Android,The Adjustable Ergonomic Stand,16384 Upgrade Levels Battery-Free Pen,ienRon 10x6.25
- WIDE COMPATIBILITY: WORKS WITH MAJOR OS AND SOFTWARE FOR DIVERSE USE.
- CUSTOM SHORTCUTS: BOOST EFFICIENCY WITH 12 CUSTOMIZABLE KEYS.
- BATTERY-FREE PEN: ENJOY PRECISE CONTROL WITH NO CHARGING NEEDED.
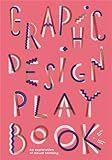
Graphic Design Play Book: An Exploration of Visual Thinking (Logo, Typography, Website, Poster, Web, and Creative Design)
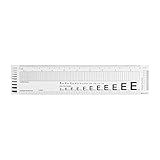
Westcott GA-96 Computer Point & Pica Ruler, Transparent Graphic Arts Ruler, 12 Inch
- VERSATILE RULER FOR PRECISE DRAFTING AND DESIGN NEEDS.
- DURABLE LAMINATED FINISH ENSURES LONG-LASTING USE.
- TRANSPARENT DESIGN ALLOWS FOR EASY PAGE VISIBILITY.

GAOMON PD1161 Drawing Tablet with Screen, Digital Art Tablet with Battery-Free Stylus, Tilt, 8 Shortcut Keys for Paint, Design, Illustration, Editing, 11.6-inch Graphics Tablet for Mac, Windows PC
-
DIRECT DRAWING ON FULL HD 11.6 SCREEN FOR REALISTIC FEEL.
-
BATTERY-FREE STYLUS WITH 8192 PRESSURE LEVELS FOR PRECISION.
-
COMPATIBLE WITH MAJOR SOFTWARE FOR ART, DESIGN, AND COLLABORATION.
Palette Perfect for Graphic Designers and Illustrators: Colour Combinations, Meanings and Cultural References
Updating an SVG path using d3.js is a common task when working with scalable vector graphics (SVG). Here is an overview of the steps involved:
- Select the SVG element: Use d3.js to select the SVG element that contains the path you want to update. This can be done using the d3.select() method, passing the appropriate selector.
- Bind data: Use the datum() or data() method to bind data to the SVG element. This data will determine the new path attributes.
- Update the path attributes: With the data bound, you can update the path attributes based on the new values. This can be done using the attr() method, specifying the attribute you want to update (such as "d" for the path's d attribute) and the new value. You can also use a function to dynamically calculate the new attribute value based on the bound data.
- Enter and exit selection: If the number of data points has changed, you may need to handle the enter and exit selections. The enter selection represents new elements to be added, while the exit selection represents elements to be removed. You can use the enter() and exit() methods to handle these scenarios, specifying how to add or remove elements accordingly.
- Apply transitions (optional): If you want to animate the update, you can use d3.js transitions. By calling the transition() method before updating the attributes, you can specify the duration and easing for the transition. This gives a smooth effect as the path updates.
- Finalize the update: Finally, you can call the merge() method to merge any remaining enter and update selections. This ensures that the updated path is rendered correctly in the SVG.
Overall, updating an SVG path with d3.js involves selecting the SVG element, binding data, updating the path attributes based on the new data, handling enter and exit selections, applying transitions if desired, and finalizing the update with a merge.
Keep in mind that this is just a basic overview, and d3.js offers various other methods and techniques for manipulating SVG elements.
How to animate an SVG path with d3.js?
To animate an SVG path with d3.js, you can follow these steps:
- Import the d3.js library into your HTML file:
- Create an SVG container:
- Create an SVG path inside the SVG container:
const svg = d3.select("#svg-container") .attr("width", 500) .attr("height", 500);
const path = svg.append("path") .attr("d", "M10 80 C 40 10, 65 10, 95 80 S 150 150, 180 80") .attr("stroke", "black") .attr("fill", "none");
Replace the "d" attribute value with your desired SVG path string.
- Define the initial and final path values for the animation:
const initialPath = path.attr("d"); const finalPath = "M10 10 L90 10 L90 90 L10 90 Z";
Replace the "finalPath" value with your desired final SVG path string.
- Animate the path:
path.transition() .duration(2000) .attrTween("d", function() { return d3.interpolatePath(initialPath, finalPath); });
The transition function creates a transition that will interpolate the "d" attribute between the initial and final path values.
The duration specifies the duration of the animation in milliseconds.
The attrTween function is used to interpolate the "d" attribute between the initial and final path values using d3's interpolatePath function.
That's it! Your SVG path will now be animated from the initial path to the final path over a duration of 2000 milliseconds (2 seconds).
What is the difference between "append" and "insert" in adding SVG path elements with d3.js?
In D3.js, both "append" and "insert" are methods used to add SVG path elements to the document. However, there is a difference in how they add the elements.
- Append: The "append" method is used to add new elements to the end of the selected element. When you use "append" to add an SVG path element, it will be appended as the last child of the selected element. For example:
// Select an SVG container var svg = d3.select("svg");
// Append a path element to the SVG container var path = svg.append("path");
This code will add a new SVG path element as the last child of the SVG container.
- Insert: The "insert" method, on the other hand, is used to add new elements at a specific position relative to the selected element. It allows you to choose where the new element should be inserted. You need to specify two parameters in the "insert" method: the element to be inserted, and a reference element before which the new element should be inserted. For example:
// Select an SVG container var svg = d3.select("svg");
// Insert a path element before an existing element var circle = svg.select("circle"); var path = svg.insert("path", circle);
This code will add a new SVG path element before the existing "circle" element in the SVG container.
So, in summary, "append" adds new elements at the end of the selected element, while "insert" allows you to specify a position for the new element to be inserted.
How to add a tooltip to an SVG path element in d3.js?
To add a tooltip to an SVG path element using d3.js, you can follow these steps:
-
Add a container element to hold the tooltip. This can be any HTML element like a
or a . For example:
- Create an event listener to show/hide the tooltip when hovering over the SVG path element. This can be done using the .on() method in d3.js. For example:
d3.select("svg path") .on("mouseover", function(event, d) { // mouseover event handler d3.select("#tooltip") .style("display", "block") .style("left", event.pageX + 10 + "px") // adjust the position of the tooltip .style("top", event.pageY + 10 + "px") // adjust the position of the tooltip .text("Tooltip text"); // set the tooltip text }) .on("mouseout", function() { // mouseout event handler d3.select("#tooltip") .style("display", "none"); });
- Style the tooltip element using CSS. For example:
#tooltip { position: absolute; background: #fff; padding: 5px; border: 1px solid #ccc; font-size: 12px; }
Note that in the above code, the mouseover event handler shows the tooltip by setting its display style to "block", and positions it using the pageX and pageY properties of the event object. The mouseout event handler hides the tooltip by setting its display style to "none". You can customize the tooltip's appearance and position by modifying the CSS and adjusting the position values in the code accordingly.
How to create a curved SVG path in d3.js?
To create a curved SVG path in d3.js, you can use the d3.line() function and specify a curve generator.
Here's an example of how to create a curved path using d3.js:
- First, select the svg element where you want to append the path:
var svg = d3.select("svg");
- Next, define your data as an array of points. Each point should have an x and y coordinate:
var data = [ {x: 10, y: 20}, {x: 50, y: 100}, // ... more points ... ];
- Create a curve generator using d3.line().curve() and pass the curve type you want to use (e.g., d3.curveBasis, d3.curveCardinal, d3.curveMonotoneX):
var curve = d3.line() .curve(d3.curveBasis); // Set the curve type to be used
- Append a element to the svg and set its "d" attribute to the path generated from the data array:
svg.append("path") .attr("class", "curve") .attr("d", curve(data));
By default, d3.line() generates a straight line path. However, when you pass a curve generator using the curve() method, it will generate a curved path based on the specified curve type.
Note: You may need to include the d3.js library in your HTML file by adding a script tag or using a module bundler like webpack.
What is the purpose of the "transition" function in animating SVG paths with d3.js?
The "transition" function in d3.js is used to create smooth animations when updating SVG elements. When applied to SVG paths, the "transition" function allows you to smoothly transition between different path shapes, positions, or styles over a specified duration. This can be useful when animating data visualizations, creating interactive effects, or improving user experience by providing visually appealing transitions between states.
What is the difference between "attr" and "style" in updating the stroke color of an SVG path with d3.js?
In d3.js, both "attr" and "style" are used to update the stroke color of an SVG path element, but they have slightly different behaviors and syntax.
- attr(): The "attr" method is used to set or update attributes of SVG elements, including stroke color. When using "attr" to update the stroke color, you need to specify the attribute name as "stroke" and provide the color value as a string. Here's an example: d3.select("path") .attr("stroke", "red"); This will set the stroke color of the selected path element to red.
- style(): The "style" method is used to set or update the CSS styles of SVG elements. When updating the stroke color using "style", you need to specify the CSS property name as "stroke" and provide the color value as a string. Here's an example: d3.select("path") .style("stroke", "blue"); This will set the stroke color of the selected path element to blue.
The key difference between "attr" and "style" lies in their impact on the SVG element's specificity and override rules. By using "attr", you directly modify the attribute value, which can have higher specificity and override other CSS rules applied to the element. On the other hand, using "style" modifies the inline styling of the element, which has a lower specificity and can be overridden by other CSS rules.
In summary, both methods can be used to update the stroke color of an SVG path element, but "attr" modifies the attribute value directly while "style" sets the inline CSS for the element, with potential differences in specificity and override rules.