
Best React Inline Style Guides to Buy in June 2026
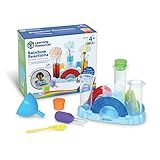
Learning Resources Rainbow Reactions - 14 Pieces, Ages 4+, Preschool Science Lab, Experiments for Kids, STEM Toys for Boys and Girls
- FUN 14-PIECE SCIENCE LAB FOR KIDS TO EXPLORE COLOR MIXING!
- STEM SKILLS DEVELOPMENT THROUGH 10 ENGAGING EXPERIMENTS!
- KID-SIZED TOOLS PERFECT FOR BUILDING FINE MOTOR SKILLS!


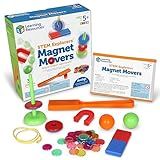
Learning Resources STEM Explorers Magnet Movers - Science For Kids Sensory Bin, Critical Thinking, Fine Motor Toys, Classroom Math Supplies, Homeschool Crafts, Educational Games, Birthday Gift
-
IGNITE CURIOSITY WITH HANDS-ON STEM LEARNING AND MAGNETIC EXPLORATION!
-
ENDLESS ENTERTAINMENT: CHILDREN LOVE EXPERIMENTING FOR HOURS ON END!
-
QUALITY MATERIALS ENSURE SAFE, DURABLE PLAYTIME FOR LITTLE EXPLORERS!
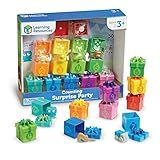
Learning Resources Counting Surprise Party - Toddler Montessori Toys, Stacking Preschool Activities, Matching Color Game, Homeschool, Fine Motor Skills, Gifts For Boys And Girls, Manipulatives
-
FUN LEARNING: TEACH COUNTING & COLORS THROUGH PLAYFUL BOX SURPRISES!
-
SKILL BUILDER: ENHANCE FINE MOTOR SKILLS WITH ENGAGING OPEN/CLOSE ACTIVITIES.
-
VERSATILE PLAY: ENJOY ENDLESS GAMES AND IMAGINATIVE PLAY WITH BOXES!

React Key Concepts: An in-depth guide to React's core features

Learning React: Modern Patterns for Developing React Apps
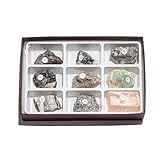
Scott Resources 2381 - Shortwave UV Fluorescent Minerals - 9 Specimens
-
UNLOCK GEOLOGY MAGIC WITH UV-REACTIVE MINERAL SPECIMENS!
-
ENGAGE STUDENTS WITH HANDS-ON STEM LEARNING ADVENTURES!
-
ILLUMINATE SCIENCE CURRICULUM WITH VIBRANT, REAL-LIFE SAMPLES!
In React, you can use inline styles by passing a JavaScript object with CSS properties instead of a traditional CSS class name. This allows you to style elements directly within your components without the need for external CSS files. Inline styles are typically defined as an object within the component's render method, using the style attribute on the element you want to style. The keys in the object represent the CSS properties (in camelCase), and the values represent the property values. This approach can be useful for adding dynamic styles based on props or state, as well as for styling individual components in isolation. However, using inline styles can make your components harder to maintain and debug, as styles are scattered throughout your code. It's generally recommended to use CSS classes for most styling needs in React, reserving inline styles for cases where dynamic or component-specific styles are required.
How can you add dynamic styles using inline styles in React?
In React, you can add dynamic styles using inline styles by first defining an object with the dynamic styles in your component's state or props. Then, you can reference these dynamic styles in the inline style attribute of the JSX element like so:
import React, { Component } from 'react';
class MyComponent extends Component { constructor(props) { super(props); this.state = { dynamicStyles: { color: 'blue', fontSize: '16px' } }; }
render() { return ( Hello, World! ); } }
export default MyComponent;
In this example, the dynamicStyles object in the component's state is used to define the dynamic styles for the div element. These styles are then referenced in the style attribute of the div element. This allows you to update the dynamic styles based on changes in state or props, providing a way to dynamically style elements in React.
How to animate elements using inline styles in React?
To animate elements using inline styles in React, you can use the CSS property transition to define the animation duration and timing function for the element.
Here’s an example of how you can animate an element in React using inline styles:
- Create a component with a state variable to toggle the animation:
import React, { useState } from 'react';
const AnimatedElement = () => { const [isAnimated, setIsAnimated] = useState(false);
const handleClick = () => { setIsAnimated(!isAnimated); };
return ( <div style={{ width: '100px', height: '100px', backgroundColor: 'blue', transition: 'width 1s, height 1s, background-color 1s', transform: isAnimated ? 'scale(1.5)' : 'scale(1)', }} onClick={handleClick} > Click me to animate! ); };
export default AnimatedElement;
-
In this example, we have a
element that changes its scale when clicked. The transition property is used to animate the changes in width, height, and background color over 1 second.
-
The transform property is used to scale the element when isAnimated is true.
-
By toggling the isAnimated state variable when the
is clicked, the element will animate based on the defined transition properties.
-
You can customize the animation duration, timing function, and properties to achieve the desired animation effect.
What is the syntax for applying inline styles in React components?
In React, you can apply inline styles to components using the style attribute. The syntax for applying inline styles in React components is as follows:
const MyComponent = () => { const myStyle = { color: 'red', fontSize: '20px', backgroundColor: 'blue' };
return ( Hello World ); }
In the above example, we have defined an object called myStyle with CSS properties as key-value pairs. We then apply this inline style to the <div> element using the style attribute.
What is the effect of using !important in inline styles in React?
When using !important in inline styles in React, it will give the specified style declaration the highest priority, overriding any other styles that may be applied to the same element. This means that the style with !important will take precedence over any other styles, even if they have a higher specificity or are applied later in the stylesheet. This can be useful in certain situations where you want to ensure that a particular style is always applied, regardless of other styles that may be present. However, it is generally recommended to use !important sparingly, as it can make CSS harder to maintain and debug.
How to customize the appearance of third-party components with inline styles in React?
In order to customize the appearance of third-party components with inline styles in React, you can follow these steps:
- Identify the component you want to customize and determine which styles you want to apply to it.
- Import the component into your React component file.
- Use the style prop to apply inline styles to the component. This prop accepts an object with key-value pairs representing the CSS properties and values you want to apply.
- Define the styles you want to apply as an object in the component's render method or as a separate variable.
- Pass the styles object to the style prop of the component you want to customize.
Here is an example of customizing the appearance of a third-party component with inline styles in React:
import React from 'react'; import ThirdPartyComponent from 'third-party-component';
const MyComponent = () => { // Define styles object const customStyles = { backgroundColor: 'lightblue', color: 'darkblue', fontSize: '16px', padding: '10px', borderRadius: '5px', };
return ( Customized Third-Party Component ); };
export default MyComponent;
In this example, we define a customStyles object with the CSS properties we want to apply to the ThirdPartyComponent. We then pass this object to the style prop of the ThirdPartyComponent to customize its appearance.