
Best Svelte and Routify Tools to Buy in June 2026

Full-Stack Web Development with TypeScript 5: Craft modern full-stack projects with Bun, PostgreSQL, Svelte, TypeScript, and OpenAI


Hands-On JavaScript High Performance: Build faster web apps using Node.js, Svelte.js, and WebAssembly

CRKT Minimalist Bowie Neck : Compact Fixed Blade Knife, Folts Utility with Bead Blast Blade, Resin Infused Fiber Handle, and Sheath 2387
- RAZOR-SHARP HIGH CARBON BLADE FOR EFFORTLESS SHARPENING.
- BEAD BLAST FINISH MINIMIZES GLARE FOR STEALTHY USE.
- STYLISH, STRONG HANDLE WITH VERSATILE MOUNTING OPTIONS.
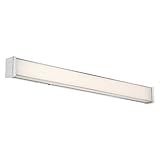
WAC Lighting dweLED, Svelte 34in LED Bathroom Vanity or Wall Light 2700K in Chrome
- SLEEK 5MM MITERED GLASS DESIGN FOR MODERN ELEGANCE.
- VERSATILE MOUNTING OPTIONS FOR ANY SPACE, INCLUDING 277V.
- LONG-LASTING 80,000-HOUR LED WITH SMOOTH DIMMING.

JavaScript Frameworks for Modern Web Development: The Essential Frameworks, Libraries, and Tools to Learn Right Now

Perfecasa Svelte Solid Wood Floating Mini Floating Closet, Coat Rack, Space Saving Wall Mounted, Creative Corner, Entryway, Foyer Hallway, Easy KD parts(Classic Cherry)
- SAVE SPACE EFFORTLESSLY IN ANY ROOM WITH OUR VERSATILE DESIGN!
- HANG CLOTHES AND STORE ITEMS ALL IN ONE STYLISH COAT RACK!
- QUICK SETUP WITH NO MEASURING-DRILLING TEMPLATE INCLUDED!

PRESTIGE Paints Exterior Paint and Primer In One, 1-Gallon, Semi-Gloss, Comparable Match of Sherwin Williams* Svelte Sage*
- SUPERIOR COVERAGE: HIGH HIDING FORMULA FOR SMOOTH APPLICATION.
- LONG-LASTING DURABILITY: WEATHER, FADE, AND STAIN RESISTANT FEATURES.
- ECO-FRIENDLY CHOICE: LOW VOC FOR HEALTHIER INDOOR AIR QUALITY.

WAC Lighting dweLED, Svelte 22in LED Bathroom Vanity or Wall Light 3000K in Brushed Nickel
- SLEEK 3 DESIGN WITH DURABLE MITERED GLASS FOR A MODERN LOOK.
- VERSATILE MOUNTING OPTIONS WITH EASY INSTALLATION FOR ANY SPACE.
- LONG-LASTING LED MODULE WITH SMOOTH DIMMING AND HIGH CRI.
Sure! Svelte is a JavaScript framework that allows you to build user interfaces. Routify is another tool that helps in creating routes for your application. When using Svelte with Routify, you can effectively handle routing within your Svelte application.
To begin using Svelte with Routify, you need to follow a few steps:
- Install Routify: Start by installing Routify globally or within your project using npm or yarn.
- Set up a Routify project: Initiate a Routify project by running the appropriate commands in your terminal. This will create the basic template for your application.
- Define routes: Routify uses a file-based routing system. Create a folder structure to represent your routes and add corresponding Svelte component files within each folder. Each component file will represent a specific route of your application.
- Create a layout: A layout file defines the overall structure of your application, including the header, footer, and other common components. Create a layout component and include your routes within it. This layout will be shared across all routes and provides a consistent user interface.
- Set up navigation: Routify provides a component that you can use to navigate between routes in your application. Use this component to create navigation links within your layout or other components.
- Use dynamic routes: Routify allows you to define dynamic routes with placeholders. For example, if you have a route to display a user profile, you can define it as /user/:id, where :id represents the dynamic part of the URL. You can then access the dynamic value as a prop within the corresponding Svelte component.
- Handle nested routes: Routify supports nested routes, allowing you to create complex routing structures. You can create subfolders within your route folders to represent child routes. These child routes will be rendered within their parent component.
- Add route guards: Routify also provides route guards, which allow you to control access to certain routes based on certain conditions. You can define guards to handle authentication, authorization, or any other custom requirements.
By following these steps, you can effectively use Svelte with Routify to handle routing within your Svelte application. It helps in creating a structured and organized routing system, making your application more maintainable and user-friendly.
How to load data asynchronously for a specific route with Svelte and Routify?
To load data asynchronously for a specific route using Svelte and Routify, you can follow these steps:
- Install the required packages: Svelte, Routify, and any other necessary packages for making HTTP requests like axios or fetch.
- Define your routes in the src/routes/_routes.js file.
import { lazy } from 'routify';
const routes = [ { name: 'home', path: '/', lazyComponent: import('./pages/Home.svelte'), // Define the async load function for this route async load() { const response = await fetch('https://api.example.com/data'); const data = await response.json();
  return {
    data: data
  };
}
}, // Add other routes as needed ];
// Lazy load the components for (const route of routes) { route.lazyComponent = lazy(route.lazyComponent); }
export { routes };
- In your Svelte component for the route (src/pages/Home.svelte in this example), use the $error and $isLoading stores provided by Routify to handle the loading and error states.
{#if $isLoading}
With this setup, the data for the specific route will be loaded asynchronously when the component is mounted. The data prop is passed to the component, which could either be preloaded server-side or loaded asynchronously when the component mounts. The route's load function defined in _routes.js will be used to fetch the data and return it as props to the component.
How to redirect to a different route using Routify in Svelte?
To redirect to a different route using Routify in Svelte, you can use the goto function provided by Routify.
Here are the steps to redirect to a different route:
- Import the goto function from Routify in your Svelte component: import { goto } from '@roxi/routify';
- Use the goto function to redirect to a different route on an event or condition. For example, in a click event handler or after a successful AJAX request: goto('/new-route'); You can also include parameters in the route by passing an object as the second argument to the goto function: goto('/user/:id', { id: '123' }); In this case, ':id' is the parameter name specified in the route, and '123' is the value for the parameter.
That's it! Calling the goto function will navigate to the specified route, causing the browser's URL to change accordingly.
How to handle form submissions and data validations in Svelte with Routify?
To handle form submissions and data validations in Svelte with Routify, you can follow these steps:
- Create a form component: Create a Svelte component that includes your form HTML elements and form submission logic. For example, let's say you have a LoginForm.svelte component:
Password:
Submit
- Add data validations: Add appropriate validation logic to your form component. For example, you can use conditional statements or regular expressions to validate email and password inputs.
- Import and use the form component: Import the form component into your page component (e.g., Login.svelte) and use it within the template.
These steps allow you to handle form submissions and data validations in Svelte with Routify. You can customize the form validation logic and add error messages as per your requirements.