Best TensorFlow Resource Devices to Buy in February 2026

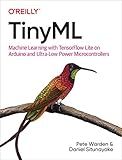
TinyML: Machine Learning with TensorFlow Lite on Arduino and Ultra-Low-Power Microcontrollers


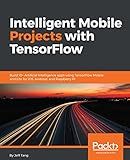
Intelligent Mobile Projects with TensorFlow: Build 10+ Artificial Intelligence apps using TensorFlow Mobile and Lite for iOS, Android, and Raspberry Pi


Learning TensorFlow.js: Powerful Machine Learning in JavaScript


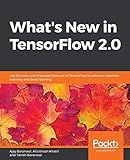
What's New in TensorFlow 2.0: Use the new and improved features of TensorFlow to enhance machine learning and deep learning


Hands-On Machine Learning with TensorFlow.js: A guide to building ML applications integrated with web technology using the TensorFlow.js library


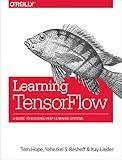
Learning TensorFlow: A Guide to Building Deep Learning Systems


In TensorFlow, a device refers to a specific hardware resource, such as a CPU or GPU, where computations can be executed. It represents a physical or virtual device on which tensors (multi-dimensional arrays) can be processed.
Devices in TensorFlow play a crucial role in distributing computations across multiple resources to improve performance and efficiency. TensorFlow allows you to explicitly specify the devices on which you want to run operations, or it can automatically assign them based on the available devices.
Devices are identified using a string-based name, typically in the format '/device:<device_type>:<device_id>'. The device type can be 'CPU', 'GPU', or 'TPU' (Tensor Processing Unit), and the device ID usually specifies the index or identifier of the specific device of that type.
When defining a TensorFlow graph, you can assign operations to specific devices by using the tf.device() context manager or the tf.device() function. This helps control the placement of computations, allowing you to utilize multiple devices effectively or concentrate computations on a specific device.
For example, you can allocate a specific operation to a GPU device using the following code:
with tf.device('/device:GPU:0'): # Define operations to be executed on the GPU ...
In addition to explicit device allocation, TensorFlow provides various high-level APIs and strategies like distribution strategies and MirroredStrategy that automatically handle device placement and scaling across multiple devices or distributed systems.
Overall, devices in TensorFlow allow you to take advantage of different hardware resources to accelerate computation and enhance performance and scalability of machine learning models.
What exactly is a device in TensorFlow?
In TensorFlow, a device refers to a physical or virtual component where computational operations can be executed. It can be a CPU, a GPU, or even special-purpose hardware like tensor processing units (TPUs). TensorFlow allows you to specify the devices on which tensors and operations should run, distributing the workload across multiple devices and accelerating the computation for complex models. By leveraging devices effectively, TensorFlow can parallelize computation and improve training and inference performance.
How to create a TensorFlow tensor?
To create a TensorFlow tensor, you can use the following steps in Python:
Step 1: Import the TensorFlow library.
import tensorflow as tf
Step 2: Create a constant tensor using the tf.constant() function.
tensor = tf.constant(value, dtype=None, shape=None, name='TensorName')
parameters:
- value: The value(s) you want to assign to the tensor.
- dtype: The data type of the tensor (e.g., tf.float32, tf.int32).
- shape: The shape of the tensor (e.g., (3, 3) for a 3x3 tensor).
- name: The optional name for the tensor.
Example:
tensor = tf.constant(5, dtype=tf.float32, shape=(2, 3), name='MyTensor')
You can also create tensors using other TensorFlow functions like tf.Variable(), tf.zeros(), tf.ones(), tf.random_normal(), etc.
How to install TensorFlow on Mac?
To install TensorFlow on your Mac, you can follow the steps below:
- Update pip: Open Terminal and enter the following command: pip3 install --upgrade pip
- Install TensorFlow: Run the following command in Terminal: pip3 install --upgrade tensorflow If you have a compatible GPU and want GPU support, install TensorFlow with GPU support using the following command instead: pip3 install --upgrade tensorflow-gpu
- Validate the installation: You can validate the installation by opening a Python interactive shell in Terminal with the python3 command, and then import tensorflow: $ python3 >>> import tensorflow as tf >>> print(tf.__version__) This should print the version of TensorFlow installed on your system.
Note: In case you encounter any issues during installation, consider checking the TensorFlow documentation for Mac-specific installation instructions and troubleshooting guidance.
