
Best Tools to Monitor Online Users to Buy in June 2026
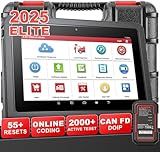
LAUNCH X431 PRO3 V+ 5.0, 2025 Upgrade Bluetooth Bi-Directional Scan Tool, OEM Topology Mapping, HD Trucks Diagnosis, Online Coding, 55+ Services, CAN FD AutoAuth FCA SGW, 2-Year Free Update
-
COMPREHENSIVE VEHICLE COVERAGE: DIAGNOSE 200+ BRANDS WITH EASE!
-
STREAMLINED DIAGNOSTICS: QUICKLY PINPOINT FAULTS WITH TOPOLOGY MAPPING.
-
POWERFUL ECU CODING: CUSTOMIZE VEHICLE SETTINGS FOR ENHANCED PERFORMANCE.


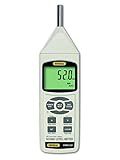
General Tools DSM403SD Sound Level Meter with Data Logging SD Card, Class 1 Sound
-
ACCURATE NOISE MEASUREMENT: 30-130 DB, A/C WEIGHTING OPTIONS.
-
EFFORTLESS DATA STORAGE: EXPORT TO EXCEL VIA REMOVABLE SD CARDS.
-
VERSATILE APPLICATIONS: IDEAL FOR OSHA COMPLIANCE AND ACOUSTICS DESIGN.
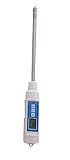
General Tools DSMM500 Precision Digital Soil Moisture Meter with Probe
- ACCURATE SOIL MOISTURE READINGS: 0-50% WITH 0.1% RESOLUTION.
- HEAVY-DUTY 8-INCH PROBE FOR TOUGH PROFESSIONAL USE.
- FAST 0.8S SAMPLING TIME; IP65 WATER RESISTANT FOR DURABILITY.
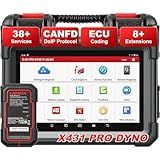
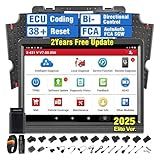
LAUNCH X431 PRO Dyno Bidirectional Scan Tool, ECU Coding Online Offline, 38 HOT Services, CANFD DoIP, FCA SGW, 8 Expansion Modules
- BI-DIRECTIONAL TESTS FOR SWIFT TROUBLESHOOTING IN JUST 30 SECONDS!
- MASTER ECU CODING WITH EASE-NO SKILLS NEEDED FOR COMPLEX TASKS!
- 38+ ESSENTIAL SERVICES UPGRADE REGULARLY FOR COMPLETE COVERAGE!
2025 LAUNCH X431 V PRO 4.0 Elite Bidirectional Scan Tool (Same As X431 PRO3S+),Online Coding &38+ Reset,Full System,VAG Guide,2 Yrs FREE Update
- COMPREHENSIVE COVERAGE: 200,000+ VEHICLES & 25 LANGUAGES SUPPORTED.
- ADVANCED FUNCTIONALITY: OE-LEVEL DIAGNOSTICS & BI-DIRECTIONAL CONTROL.
- EXCEPTIONAL WARRANTY: 5 YEARS WARRANTY & 2 YEARS OF FREE UPDATES.
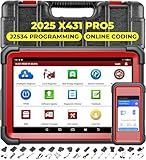
LAUNCH X431 PRO 5 Scan Tool: 2025 J2534 Reprogramming Tool, ECU Online Coding, Topology Mapping, Upgraded of X431 V+, Bi-Directional Diagnostic Scanner, with SmartLink C CANFD & DOIP, 2 Years Update
-
UNLOCK 50+ SERVICES FOR 150 BRANDS-EFFICIENCY AT YOUR FINGERTIPS!
-
ADVANCED TOPOLOGY MAPPING: DIAGNOSE WITH 90% MORE EFFICIENCY!
-
QUICK J2534 PROGRAMMING & BI-DIRECTIONAL CONTROL: FIX IT FASTER!
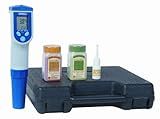
General Tools DPH7011 Digital PH Meter with RS-232 Output
- ACCURATE READINGS WITH DIGITAL DISPLAY AND AUTO TEMP COMPENSATION.
- WATERPROOF DESIGN: IP-57 RATED AND FLOATS FOR EASY USE.
- COMPACT POCKET SIZE WITH PH RANGE FROM 2 TO 16 FOR VERSATILITY.
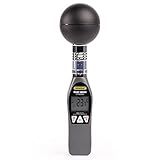
General Tools Deluxe Heat Index Monitor #WBGT8778 With 75 x 75 mm Brass Black Ball, 32° to 122° F, 0 to 100% RH
- TRACK HEAT CONDITIONS ACCURATELY WITH MULTI-TEMPERATURE METRICS.
- IDEAL FOR HVAC/R PROS AND OUTDOOR SPORTS INJURY PREVENTION.
- COMPACT DESIGN INCLUDES BATTERIES AND USER MANUAL FOR CONVENIENCE.
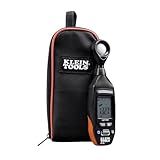
Klein Tools ET130 Digital Light Meter
-
USER-FRIENDLY DESIGN FOR EFFORTLESS LIGHT LEVEL MONITORING.
-
ACCURATE DUAL MEASUREMENT IN FOOT CANDLES AND LUX.
-
PORTABLE WITH CONVENIENT FEATURES FOR ON-THE-GO ANALYSIS.
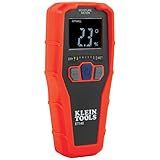
Klein Tools ET140 Pinless Moisture Meter for Non-Destructive Moisture Detection in Drywall, Wood, and Masonry; Detects up to 3/4-Inch Below Surface
- DETECT LEAKS QUICKLY WITH PINLESS, NON-DESTRUCTIVE MOISTURE SENSING.
- EASY-TO-READ REVERSE-CONTRAST DISPLAY SHOWS MOISTURE LEVELS CLEARLY.
- DURABLE KIT WITH DROP PROTECTION ENSURES RELIABILITY FOR ANY PROJECT.
To get a list of online users in Yii 2, you can follow these steps:
- First, you need to configure the session component in the application configuration file (config/web.php). Make sure the session component is enabled and set the user component as its session attribute:
return [ // ... 'components' => [ // ... 'session' => [ // ... 'class' => 'yii\web\Session', 'name' => 'your_session_name', ], 'user' => [ 'class' => 'yii\web\User', 'identityClass' => 'app\models\User', // Your User model class 'enableAutoLogin' => true, 'identityCookie' => ['name' => '_identity', 'httpOnly' => true], 'loginUrl' => ['site/login'], ], // ... ], //... ];
- In your User model, implement the yii\web\IdentityInterface. This interface requires you to implement the findIdentity and getId methods.
use yii\db\ActiveRecord; use yii\web\IdentityInterface;
class User extends ActiveRecord implements IdentityInterface { // ...
public static function findIdentity($id)
{
    return static::findOne($id);
}

public function getId()
{
    return $this->id;
}

// ...
}
- Once you have set up the configuration and implemented the IdentityInterface, you can get a list of online users by querying the session component. You can create a function in your User model, or wherever appropriate, to retrieve the online user list:
use yii\web\Session;
class User extends ActiveRecord implements IdentityInterface { // ...
public static function getOnlineUsers()
{
    $session = Yii::$app->session;
    $session->open();

    $userIds = $session->get('online\_users', \[\]);

    // Retrieve the User model instances corresponding to the online user IDs
    $onlineUsers = User::find()->where(\['id' => $userIds\])->all();

    return $onlineUsers;
}

// ...
}
- To update the online user list, you need to handle the user login and logout events. One approach is to use Yii's event system. In your User model, you can define an afterLogin method to add the logged-in user's ID to the online user list, and an beforeLogout method to remove the logged-out user's ID:
use yii\base\Event;
class User extends ActiveRecord implements IdentityInterface { // ...
public function afterLogin()
{
    $session = Yii::$app->session;
    $session->open();

    $userIds = $session->get('online\_users', \[\]);
    $userIds\[\] = $this->getId();
    $session->set('online\_users', $userIds);
}

public function beforeLogout()
{
    $session = Yii::$app->session;
    $session->open();

    $userIds = $session->get('online\_users', \[\]);
    $userIds = array\_diff($userIds, \[$this->getId()\]);
    $session->set('online\_users', $userIds);
}

// ...
}
Now, when you call the getOnlineUsers method on the User model, it should return a list of the online users based on the session data.
How to implement authentication in Yii 2?
To implement authentication in Yii 2, you can follow these steps:
Step 1: Configure the User Component
- Open the config/web.php file and configure the 'user' component with the identityClass property specifying the user model class. For example:
'components' => [ 'user' => [ 'identityClass' => 'app\models\User', 'enableAutoLogin' => true, ], // ... ],
Step 2: Create the User Model
- Create a new model class in the models directory, for example, User.php.
- Implement the IdentityInterface in the User model by adding the required methods: findIdentity(), findIdentityByAccessToken(), getId(), getAuthKey(), and validateAuthKey(). For example: